


Using the desktop in our multimedia classrooms:
The first thing to do in all our classrooms is to make sure that the computer is turned on. It can be located near the top of the front desk rack. If you notice that no lights are flashing on the computer, you will need to press the power button.
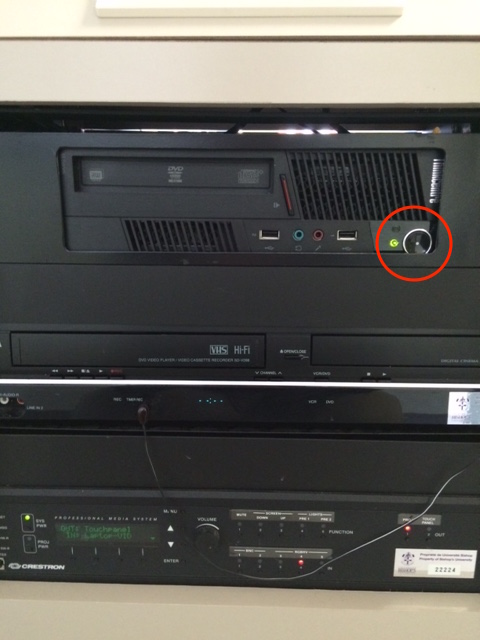
There is a monitor located on the desk that will need to be powered on by the button located on the front. You will at all times be able to see whats on your desktop, even while displaying another input on the projector.
Note: There are 8 classrooms on campus that do not have a desktop installed. These are primarily used by Champlain.
Displaying the desktop on the projector:
There are a few different kinds of user interface deployed throughout campus, however they are similar to one another.
General classroom with newer touch panel model:
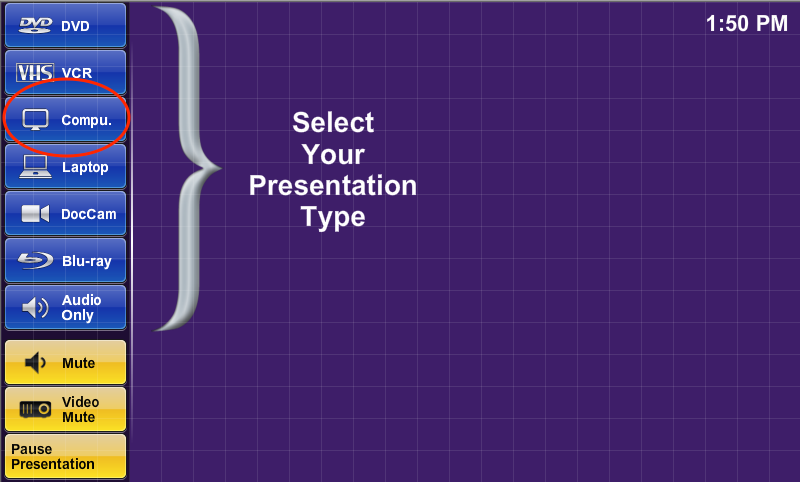
To project the desktop, you must tap on the touch panel screen where is says “Touch to begin”, then select the computer option located on the left hand side of the screen.
Once the system has warmed up, you will be able to see your desktop on the projector screen.
To turn off this system once you are done, please make sure to tap the off button located on the top right of the touch panel. You will then be asked if you are sure you want to turn off the system. Please remember to tap “Yes” to complete the shutdown.
General classroom with older touch panel model:
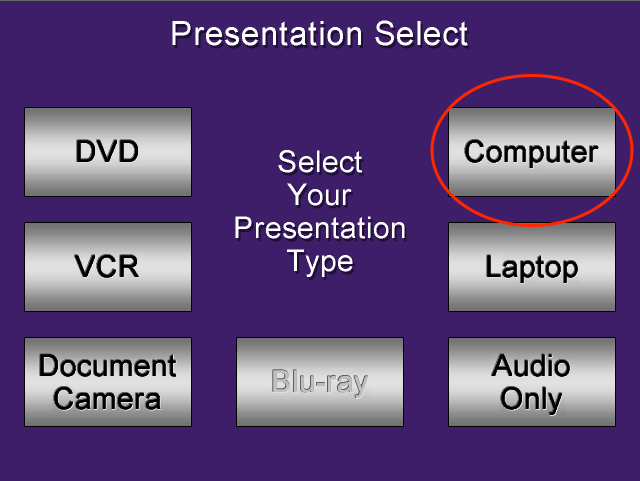
To project the desktop, you must tap on the touch panel screen where is says “Touch to begin”. Then you will need to select the computer option as circled in the image below.
Once the system has warmed up, you will be able to see your desktop on the projector screen.
To turn off the system once you are done, please make sure to press the button located on the bottom right of the touch panel (not the screen). You will then be asked if you are sure you wan to turn off the system. Again, please remember to tap on “Yes”.
BWH:
To project the desktop, you must tap on the touch panel screen where it says “Touch to begin”. With this touch panel, you will notice that the screen is mirrored to represent the two systems in that room. You can have both systems displaying the desktop, or just one, or have the desktop displayed on one and something else showing on the other. The choice is yours! You will then have to tap on the corresponding computer button for the system or systems you would like to display the desktop on. The desktop buttons can be seen in the image below circled in red.

Once the system has warmed up, you will be able to see your desktop on the projector screen(s).
To turn off the system once you are done, please make sure to tap the off button on the top right of the touch panel. You will then be asked if you are sure you want to turn off the system. This will appear over both system A and B. Please ensure that you select “Yes” on both of the systems.
Bandeen:
Bandeen has two touch panels, one on the stage and one in the booth. Both work exactly the same way and can control the system simultaneously, therefore it might be best to use just one or the other. To project the desktop, you must tap on the touch panel screen where is says “Touch to begin”. Then you will need to select the desktop option located in the list on the left of the screen. The page is setup the same way as the newer touch panel screen located higher up on this page. Once the system has warmed up, you will be able to see your desktop on the projector screen.
To turn off this system once you are done, please make sure to tap the off button on the top right corner of either of the touch panels. You will then be asked if you are sure you want to turn off the system and, as before, please tap on “Yes”.
N312:
N312 is a special classroom that can connect with the system in N313. Therefore you will need to be careful when turning on the system. Once you have tapped “Touch to begin” you will see a clear option for “Connect to N313”. If you have no need for this, please do not tap on the option since this would disrupt any potential classes running next door in N313, and will require a complete restart of your system for them to be able to use their own system once more.
To project the desktop, you must tap on the touch panel screen where is says “Touch to begin”. Then you will need to select the desktop option located in the list on the left of the screen. The page is set up the same way as the newer touch panel screen located higher up on this page. Once the system has warmed up, you will be able to see your desktop on the projector screen.
To Turn off this system once you are done, you will need to tap on the presentation select button on the screen. You will then be able to tap on “system off” and “Yes” when asked if you are sure.
Please make sure you log off the computer and turn off the Crestron system before leaving.