We replaced our photocopiers (Xerox WorkCenter 7835/7845) campus-wide in August 2023 with the Xerox AltaLink C8145 model. Since then, ITS has been notified of many issues printing purples specifically – especially our Bishop’s purple and similar/close shades/hues.
The official purple used at Bishop’s is based on the Pantone color system and is detailed in the Bishop’s University Brand Book published and maintained by the Communications department. The Pantone color is 268C with Red/Green/Blue values of 88/44/131 respectively or HTML code #582C83 (or 92/87/0/0 in Cyan/Magenta/Yellow/Black). This specific color that appears very purple on computer monitors comes out a deep blue on the Xerox copiers.
We are working with Xerox to find a permanent solution to this issue. In the meantime, we have found settings help produce more accurate purples depending on whether the purple you are getting is too blue or too red. Unfortunately the two problems are opposite – some purples come out too blue and others too red. Therefore, we cannot apply settings that will address both situations so they need to be set depending on which situation you have.
For starters, the best thing to do is make sure you are using the exact official Bishop’s purple in your documents when that is the color that is desired (as opposed to just picking something that looks “close” on the screen to your eyes). This may not be possible if you are printing something static like a web page or something created by another person or department.
We have listed the steps to set the printer settings for some of the more popular software titles below. We cannot provide steps for every software title that exists but you can refer to these as examples to get to the printer settings dialog if your software title is not listed.
Google Chrome, Microsoft Edge or Mozilla Firefox web browsers
Step 1:
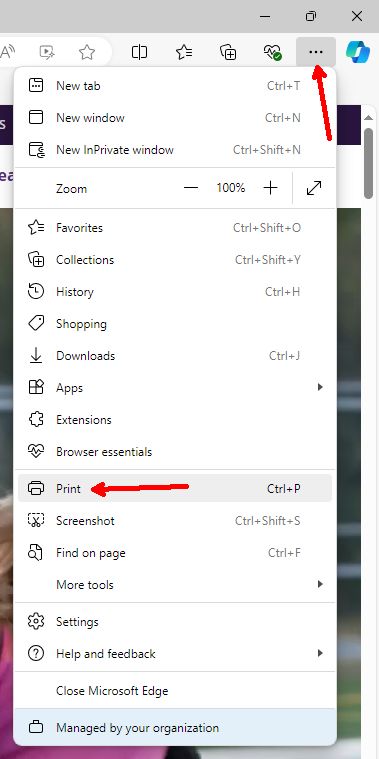
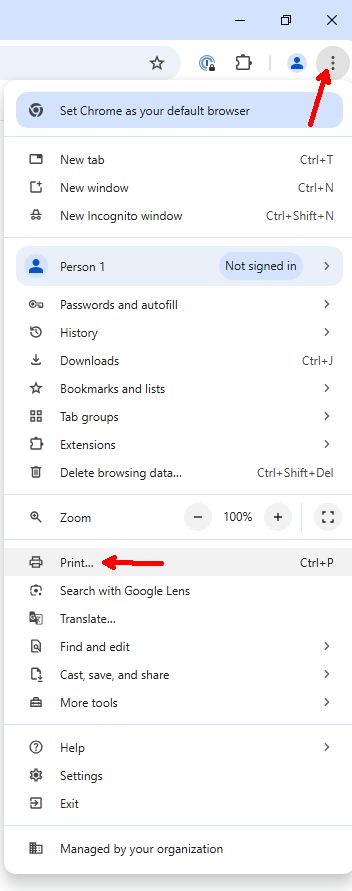
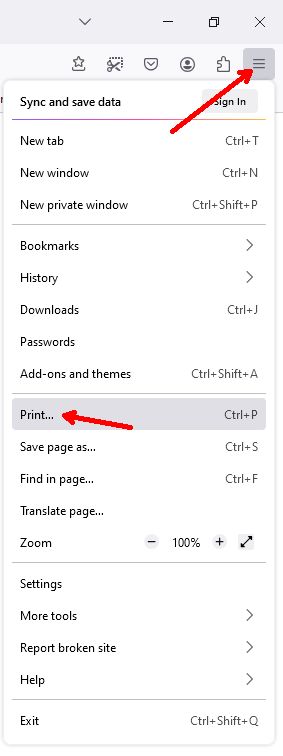
Use the Print option in the web application or open the Print option from the Google Chrome, Microsoft Edge or Mozilla Firefox menu:
Edge:
Chrome:
Firefox:
Step 2:
For Edge, this step is not necessary.
In Chrome, select the “Follow Me Printing Color” printer and then click “More settings”.
In Firefox, select the “Follow Me Printing Color” printer and then scroll down to the bottom.
Chrome:
Firefox:
Step 3:
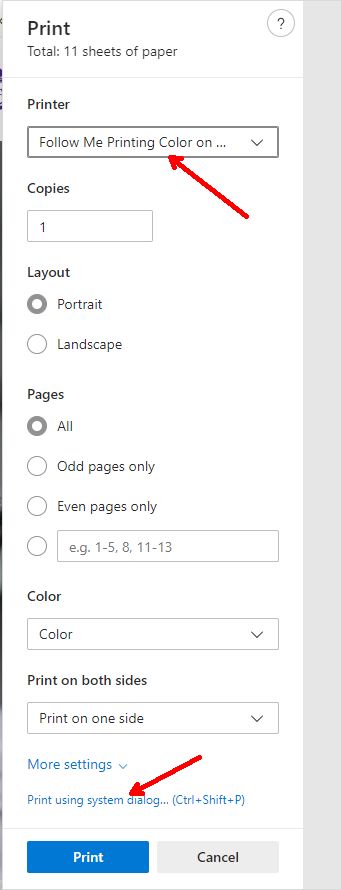
In Edge, the Print options will appear on the left side (shown on the left here). Select the “Follow Me Printing Color” printer then click “Print using system dialog” at the bottom.
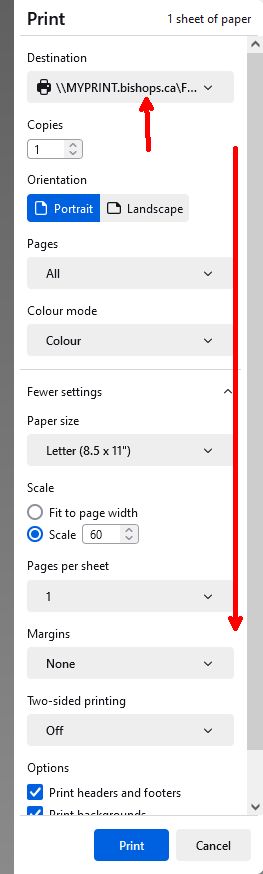
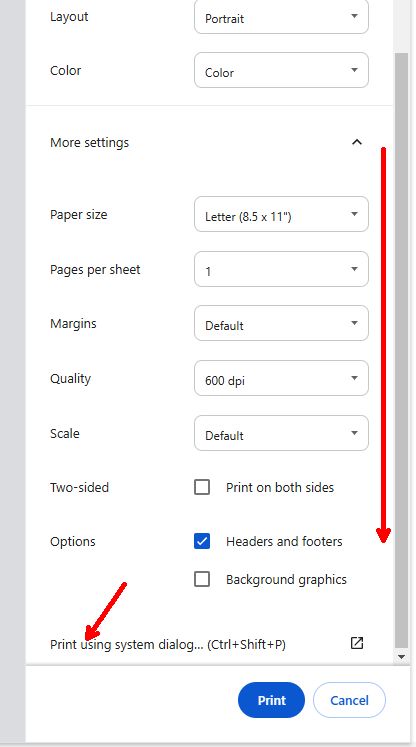
In Chrome, the Print options will appear on the right side (shown in the center here). Scroll all the way down to the bottom if necessary then click on “Print using system dialog.
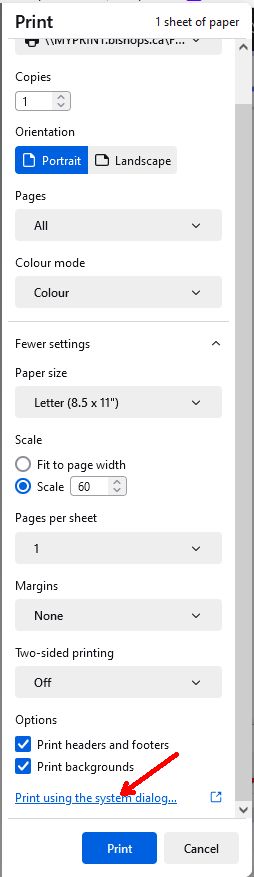
In Firefox, the Print options will appear on the right side (shown on the right). Scroll all the way down to the bottom if necessary then click on “Print using system dialog.
Edge:
Chrome:
Firefox:
Step 4:
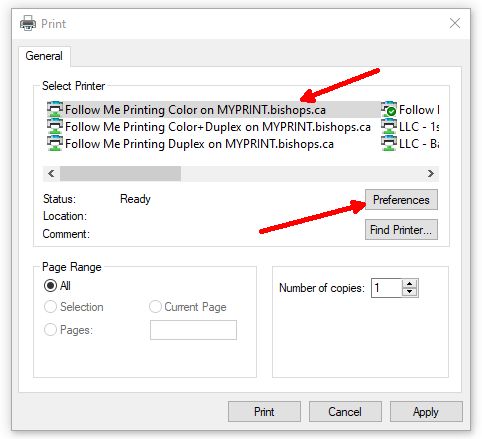
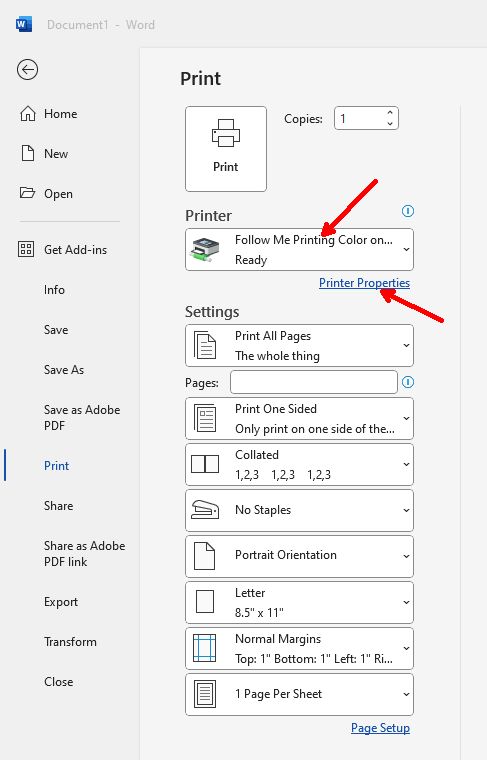
Once the Windows print dialog opens, select the “Follow Me Printing Color” printer then click the “Preferences” button.
Step 5:
Continue with the Xerox Print Settings dialog steps below. Once you are done with the Xerox printer settings, you will return to this dialog. Don’t forget to set the number of copies desired before finally clicking “Print”.
Adobe Acrobat Reader / Pro
Step 1:
Use the Print button or Print option from the Menu.
Step 2:
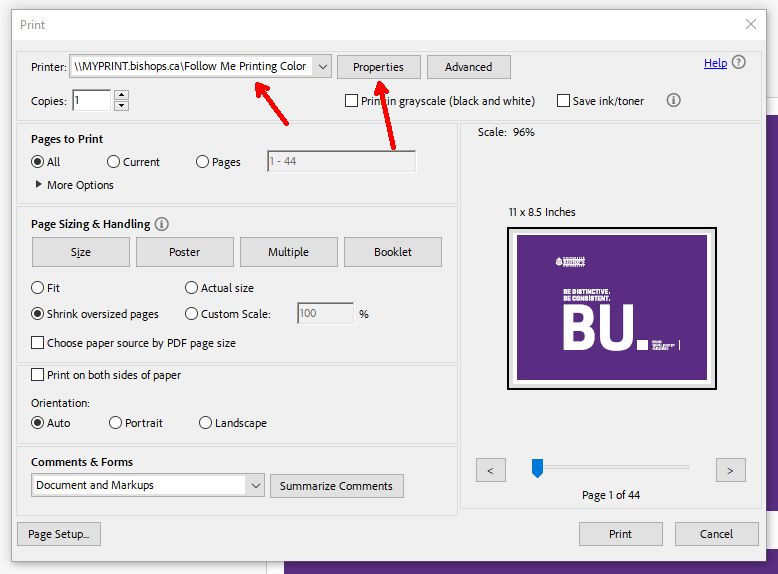
Select the “Follow Me Printing Color” printer then click the Properties button.
Once you return to this print dialog, double-check the settings, set the number of copies you want and any specific pages if desired then proceed to click “Print”.
Microsoft Outlook desktop application
Step 1:
Access the Print options screen as you normally would.
Select the “FollowMe Printing Color” printer then click the “Print Options” button.
Step 2:
Click the “Properties” button in the Print dialog.
Once you return to this print dialog, double-check the settings, set the number of copies you want and any specific pages if desired, etc then proceed to click “Print”.
Other Windows software titles
Step 1:
Get to the program’s print dialog as you normally would. Many programs open the built-in Windows dialog seen here.
From there, you can select the “Follow Me Printing Color” printer then click the “Prefrences” button.
Once you return to this print dialog, double-check the number of copies you want and any specific pages if desired then proceed to click “Print”.
Xerox Print Settings dialog
Step 1:
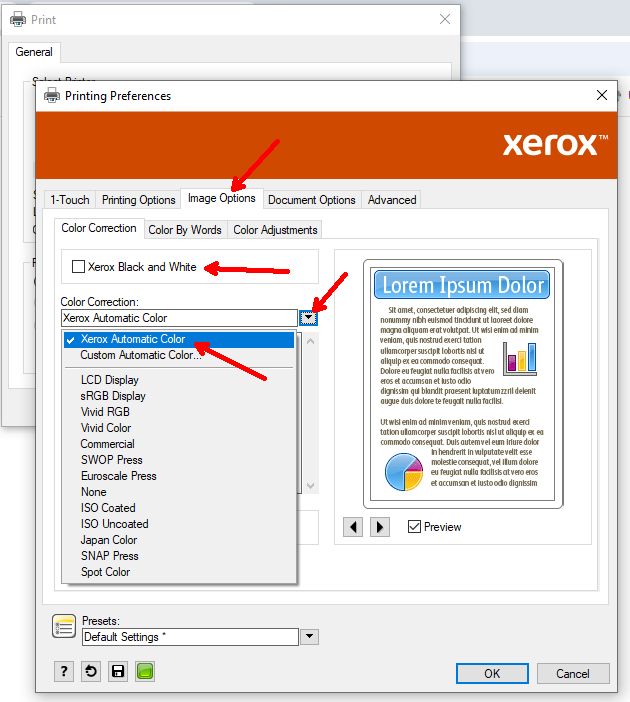
In the printer settings dialog, click on the “Image Options” tab and make sure that the “Xerox Black and White” checkbox is NOT checked and make sure that the “Xerox Automatic Color” color correction is selected.
Step 2:
If the purple printed is too RED, do not do this step.
If the purple printed is too BLUE (common with the Bishop’s purple or close hues):
In the “Image Options” tab, click the “Color Adjustments” tab then slide the “Lightness” slider to 40. All of the other sliders should be set to 0.
Step 3:
If the purple printed is too BLUE (and you did the step above), do not do this step.
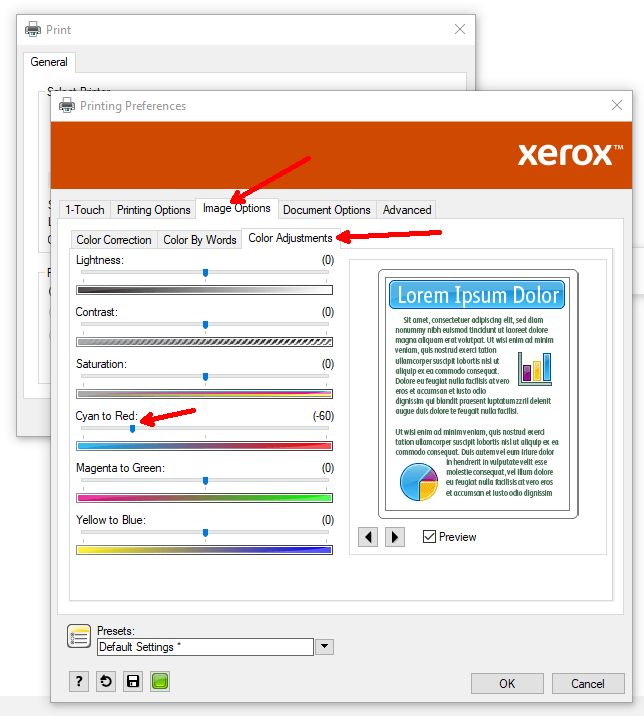
If the purple printed is too RED:
In the “Image Options” tab, click the “Color Adjustments” tab then slide the “Cyan to Red” slider to -60. Make sure the “Lightness” slider and all of the other sliders are set to 0.
Step 4:
If you need to set any additional settings (duplex, paper size/source, stapling, multiple pages, etc), make sure they are set correctly in the “Printing Options” tab and in the “Document Options” tab.
Step 5:
Click OK in the Xerox Print Settings dialog then you will return to the print dialog of whatever program you are using. From there, make sure any additional options you want are set before finally clicking “Print”. This may include specific pages or a number of copies, etc.
Depending on the program’s dialog, you may be able to set more advanced settings. The settings in the program will reflect what you set in the Xerox settings and vice-versa.
Printing on MacOS
Step 1:
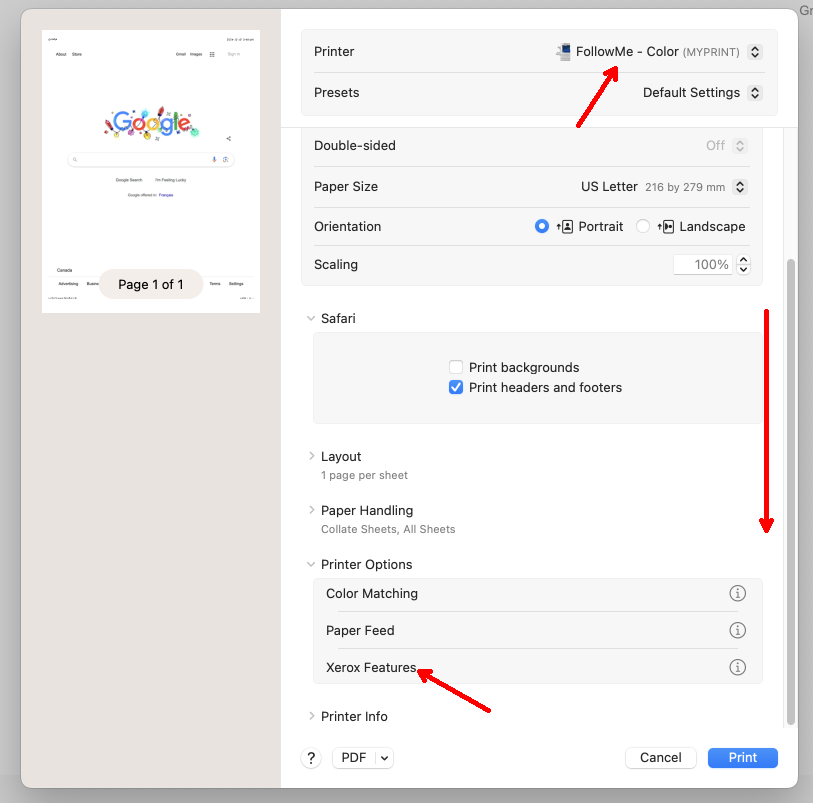
Open the print dialog for the program you are using from the usual print option.
Make sure the “FollowMe – Color” printer is selected then scroll down in the window to the bottom, expand the “Printer Options” drop-down and click on “Xerox Features” (if you do not have this option, there may be an issue with the printer configuration on your Mac – please contact us if it is missing).
Step 2:
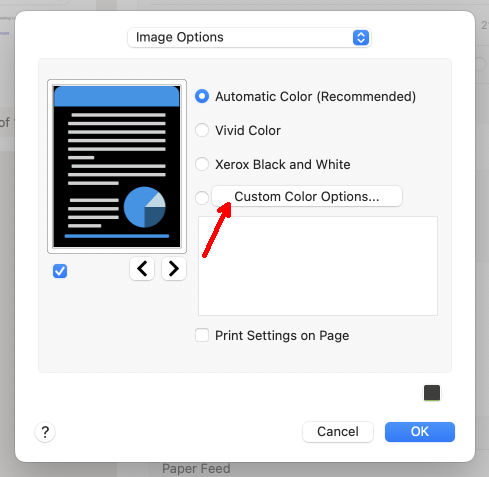
In the Xerox features dialog, pick “Image Options” from the top menu
Step 3:
In the next dialog, click on the “Custom Color Options…” button
Step 4:
Click on the “Color Adjustments” tab at the top
Step 5:
If the purple printed is too RED, do not do this step.
If the purple printed is too BLUE (common with the Bishop’s purple or close hues):
Slide the “Lightness” slider to 40 (or type in the value). All of the other sliders should be set to 0 and click OK
Step 6:
If the purple printed is too BLUE (and you did the step above), do not do this step.
If the purple printed is too RED:
Slide the “Cyan to Red” slider to -60 (or type in the value). Make sure the “Lightness” slider and all of the other sliders are set to 0 and click OK
Step 7:
Return to “Paper/Output” in the top menu and continue setting your desired settings then click OK
Step 8:
You will return to the program’s print dialog where you can double-check your settings and finally click Print. Don’t forget to set the number of copies you want and if you only want specific pages.