The fax feature is only available on certain departmental photocopiers. This feature will not be found on any of our public photocopiers available to students.
Step 1:
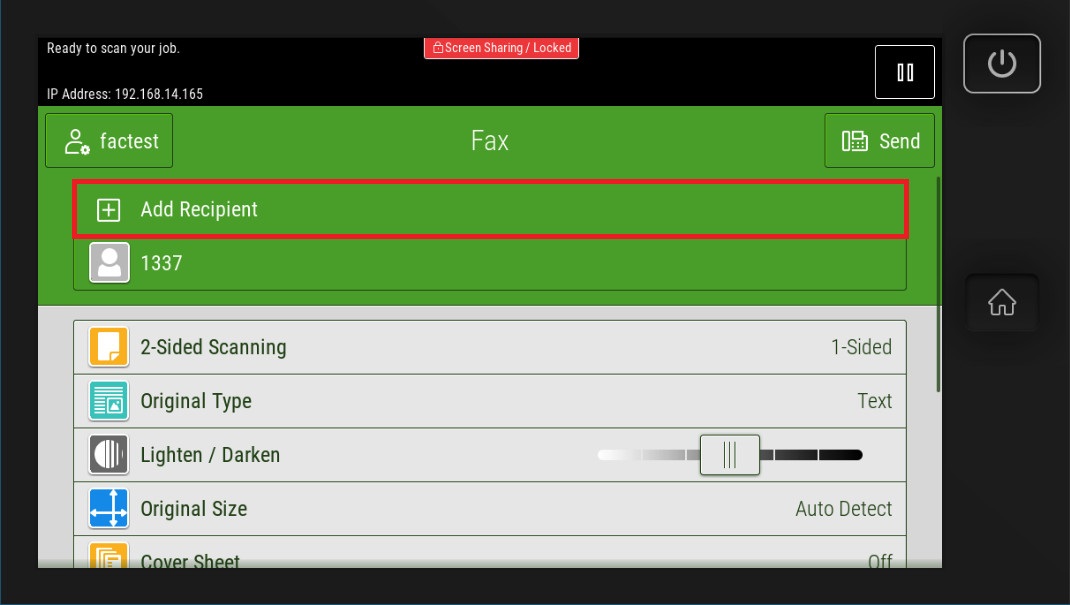
To begin, select “Fax” from the Service Home menu. This will take you to the “Fax” options screen.
From the “Fax” customization options screen, select “Add Recipient”.
Step 2:
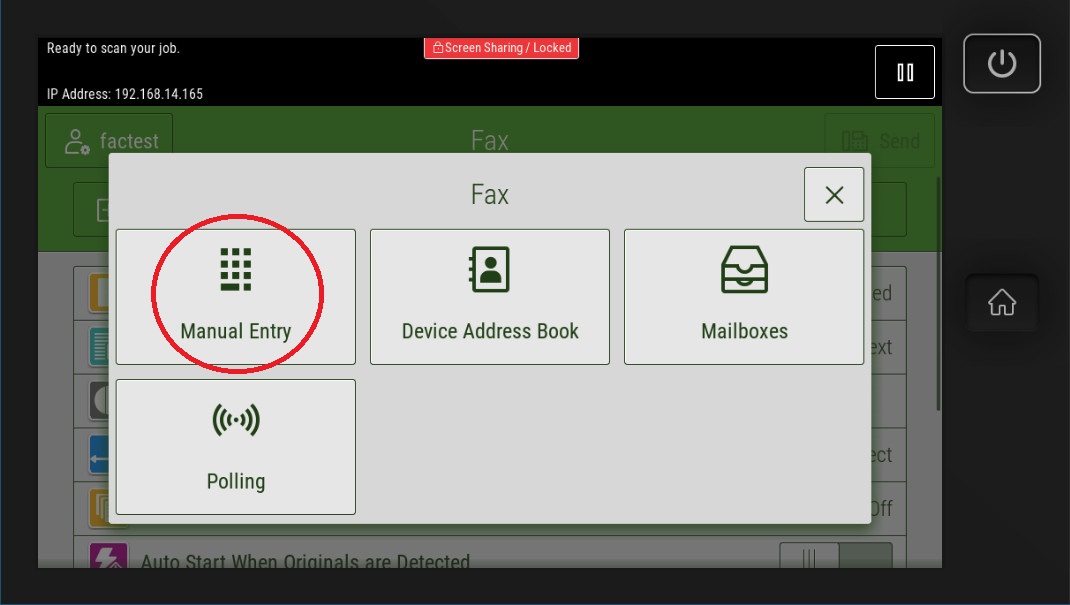
Selecting “Add Recipient” will open a window where you have several options for where you can find your recipient. If your recipient must be manually added, select “Manual Entry”.
Step 3:
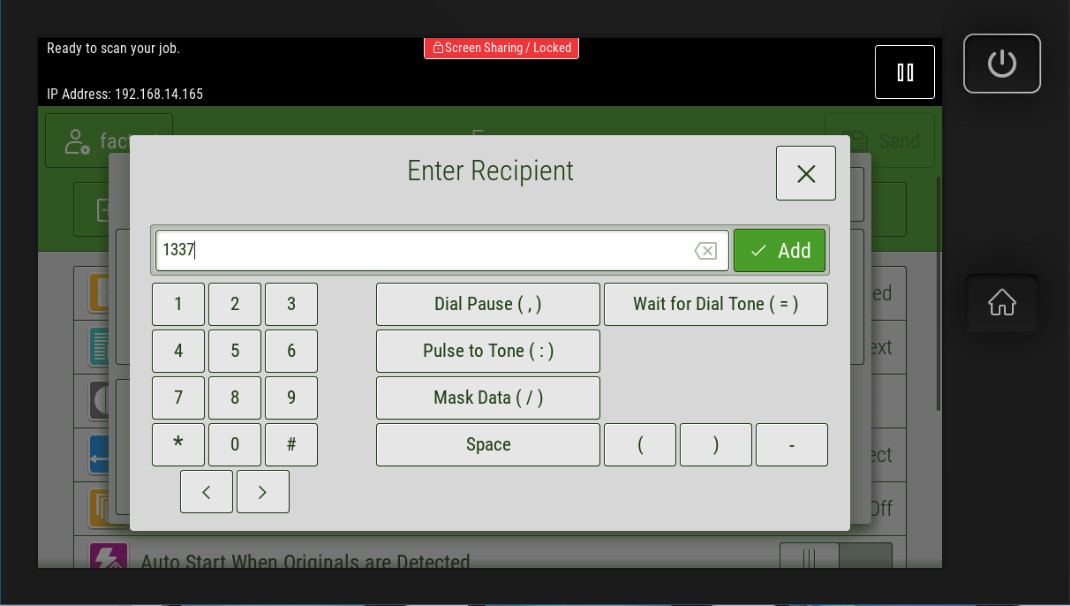
Selecting “Manual Entry” will open another window where you can put the fax number of the recipient in the space provided.
Make sure to put “9” in front of the number in order to dial outside of the Bishop’s network. Finally select “Add” to add the recipient to the outgoing list.
Once you are done, press “Add”.
Step 4:
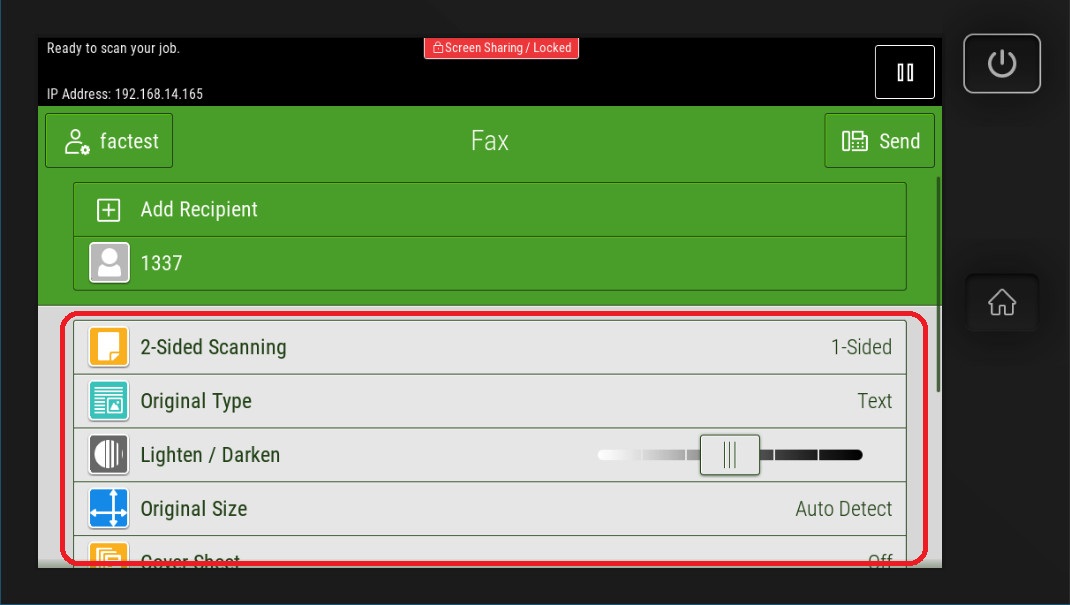
After successfully adding a recipient, close the “Enter Recipient” window and then close the “Fax” window with the options of where you can find your recipient. You will be back at the initial “Fax” customization options screen. From here, you can customize your fax job.