Follow these steps in order to add a printer to your Bishop’s-issued laptop or office desktop computer. If you encounter any difficulty along the way, feel free to call the ITS Helpdesk at ext. 2273, open a support ticket through Octopus, or come by the Helpdesk, located to the left of the Circulation desk in the Library Learning Commons.
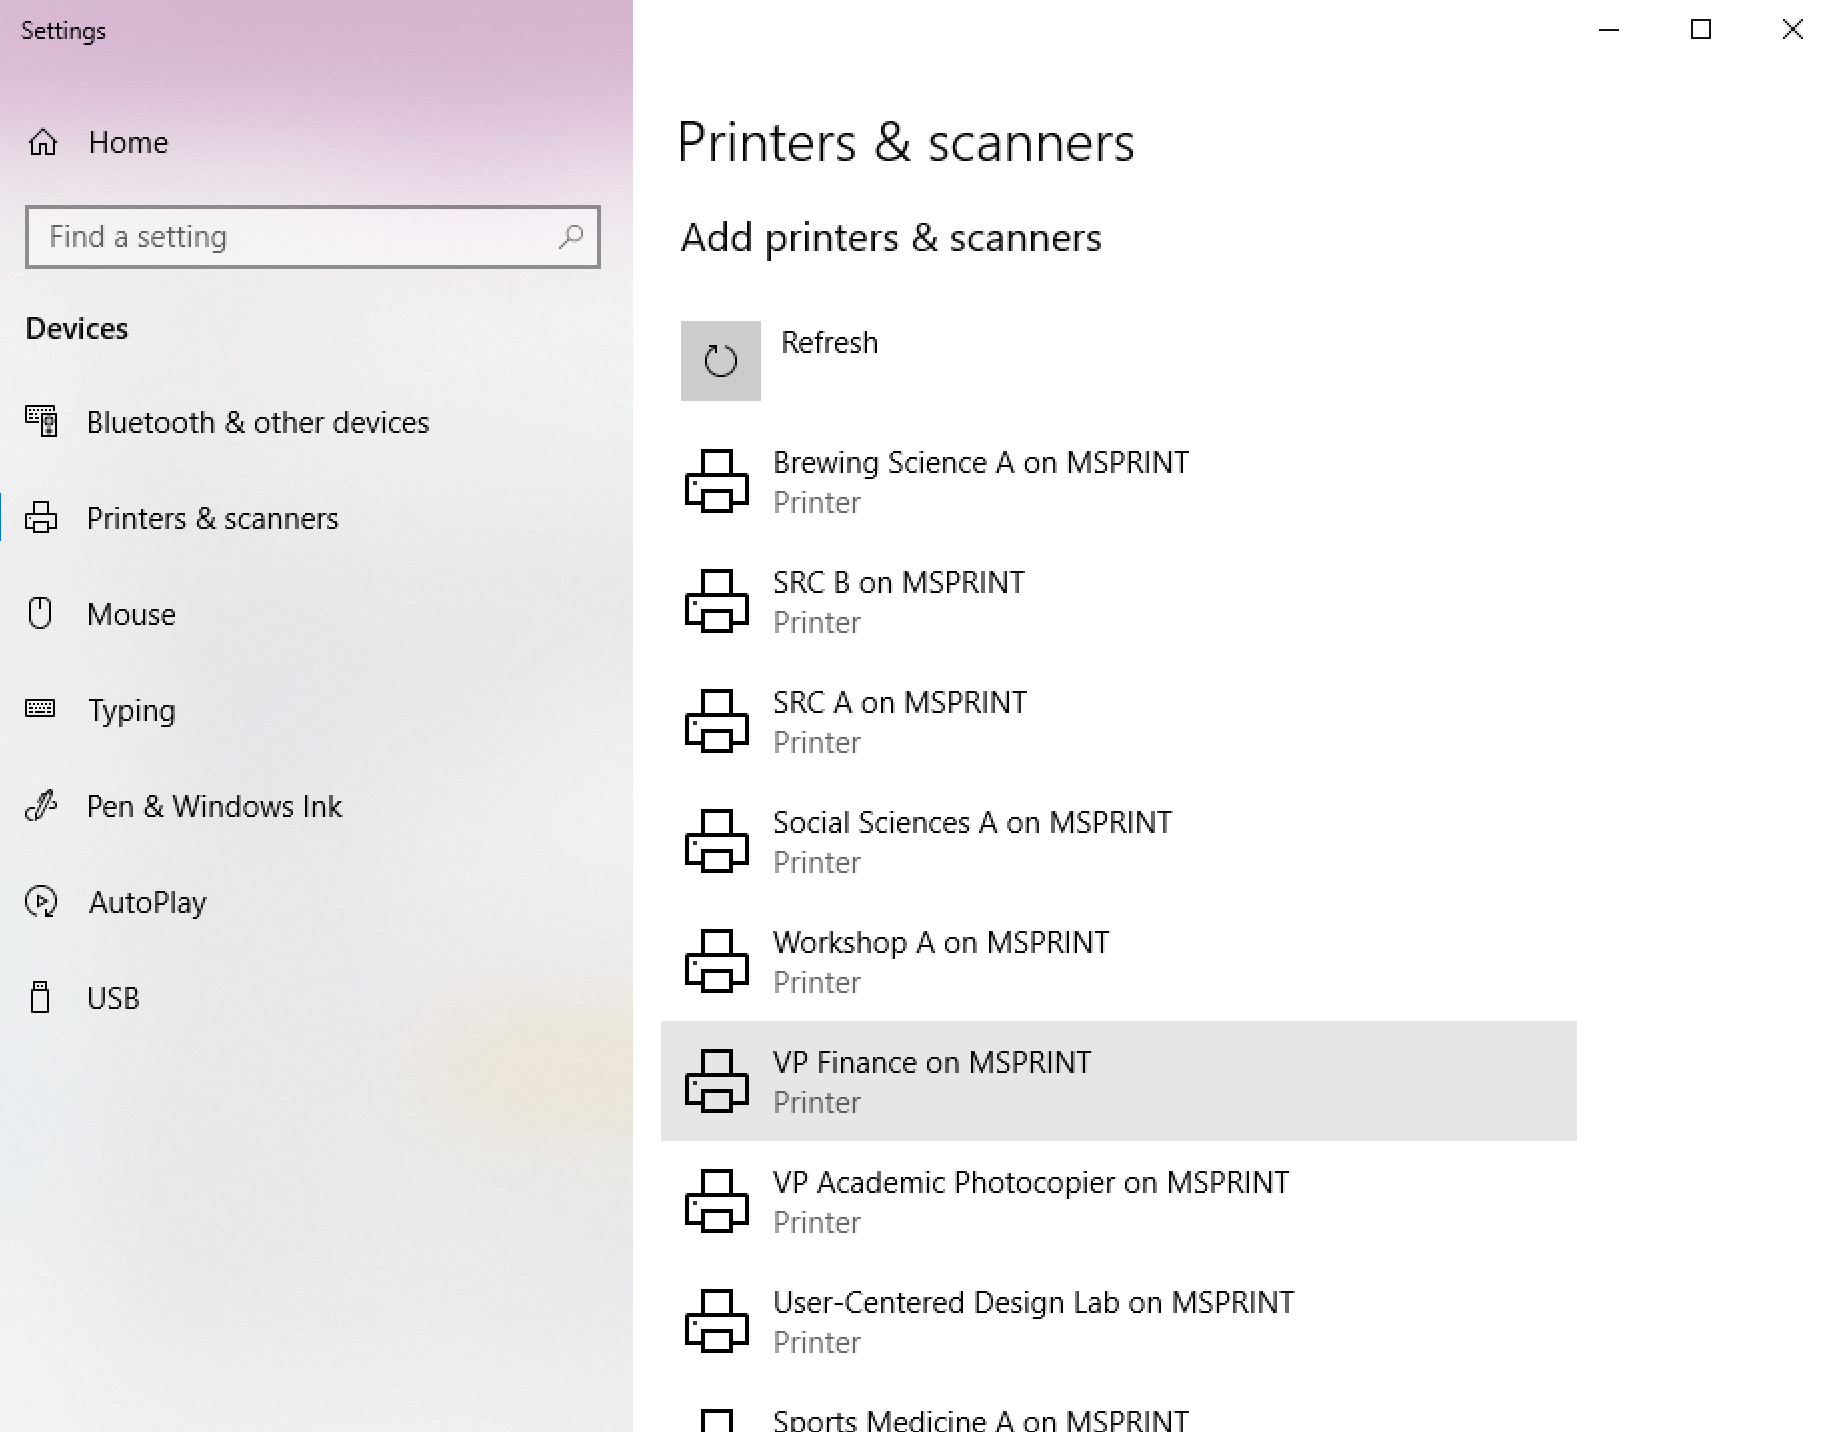
Step 1:
Click the Windows icon on the bottom left of the screen. Start to type “Printers” and you will see “Printers & Scanners” show up in the results. Click on it.
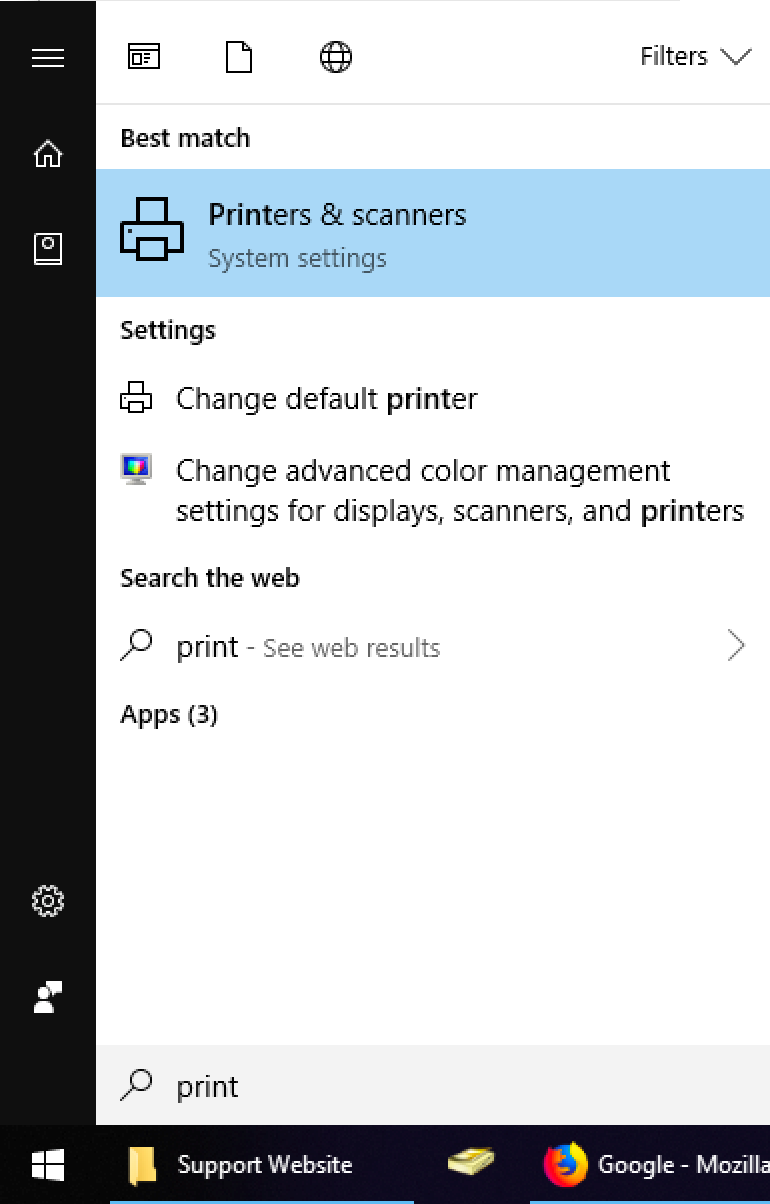
Step 2:
You will see a screen that looks somewhat like this. Scroll down till you see a link labelled “The printer I want isn’t listed”. Click this link.
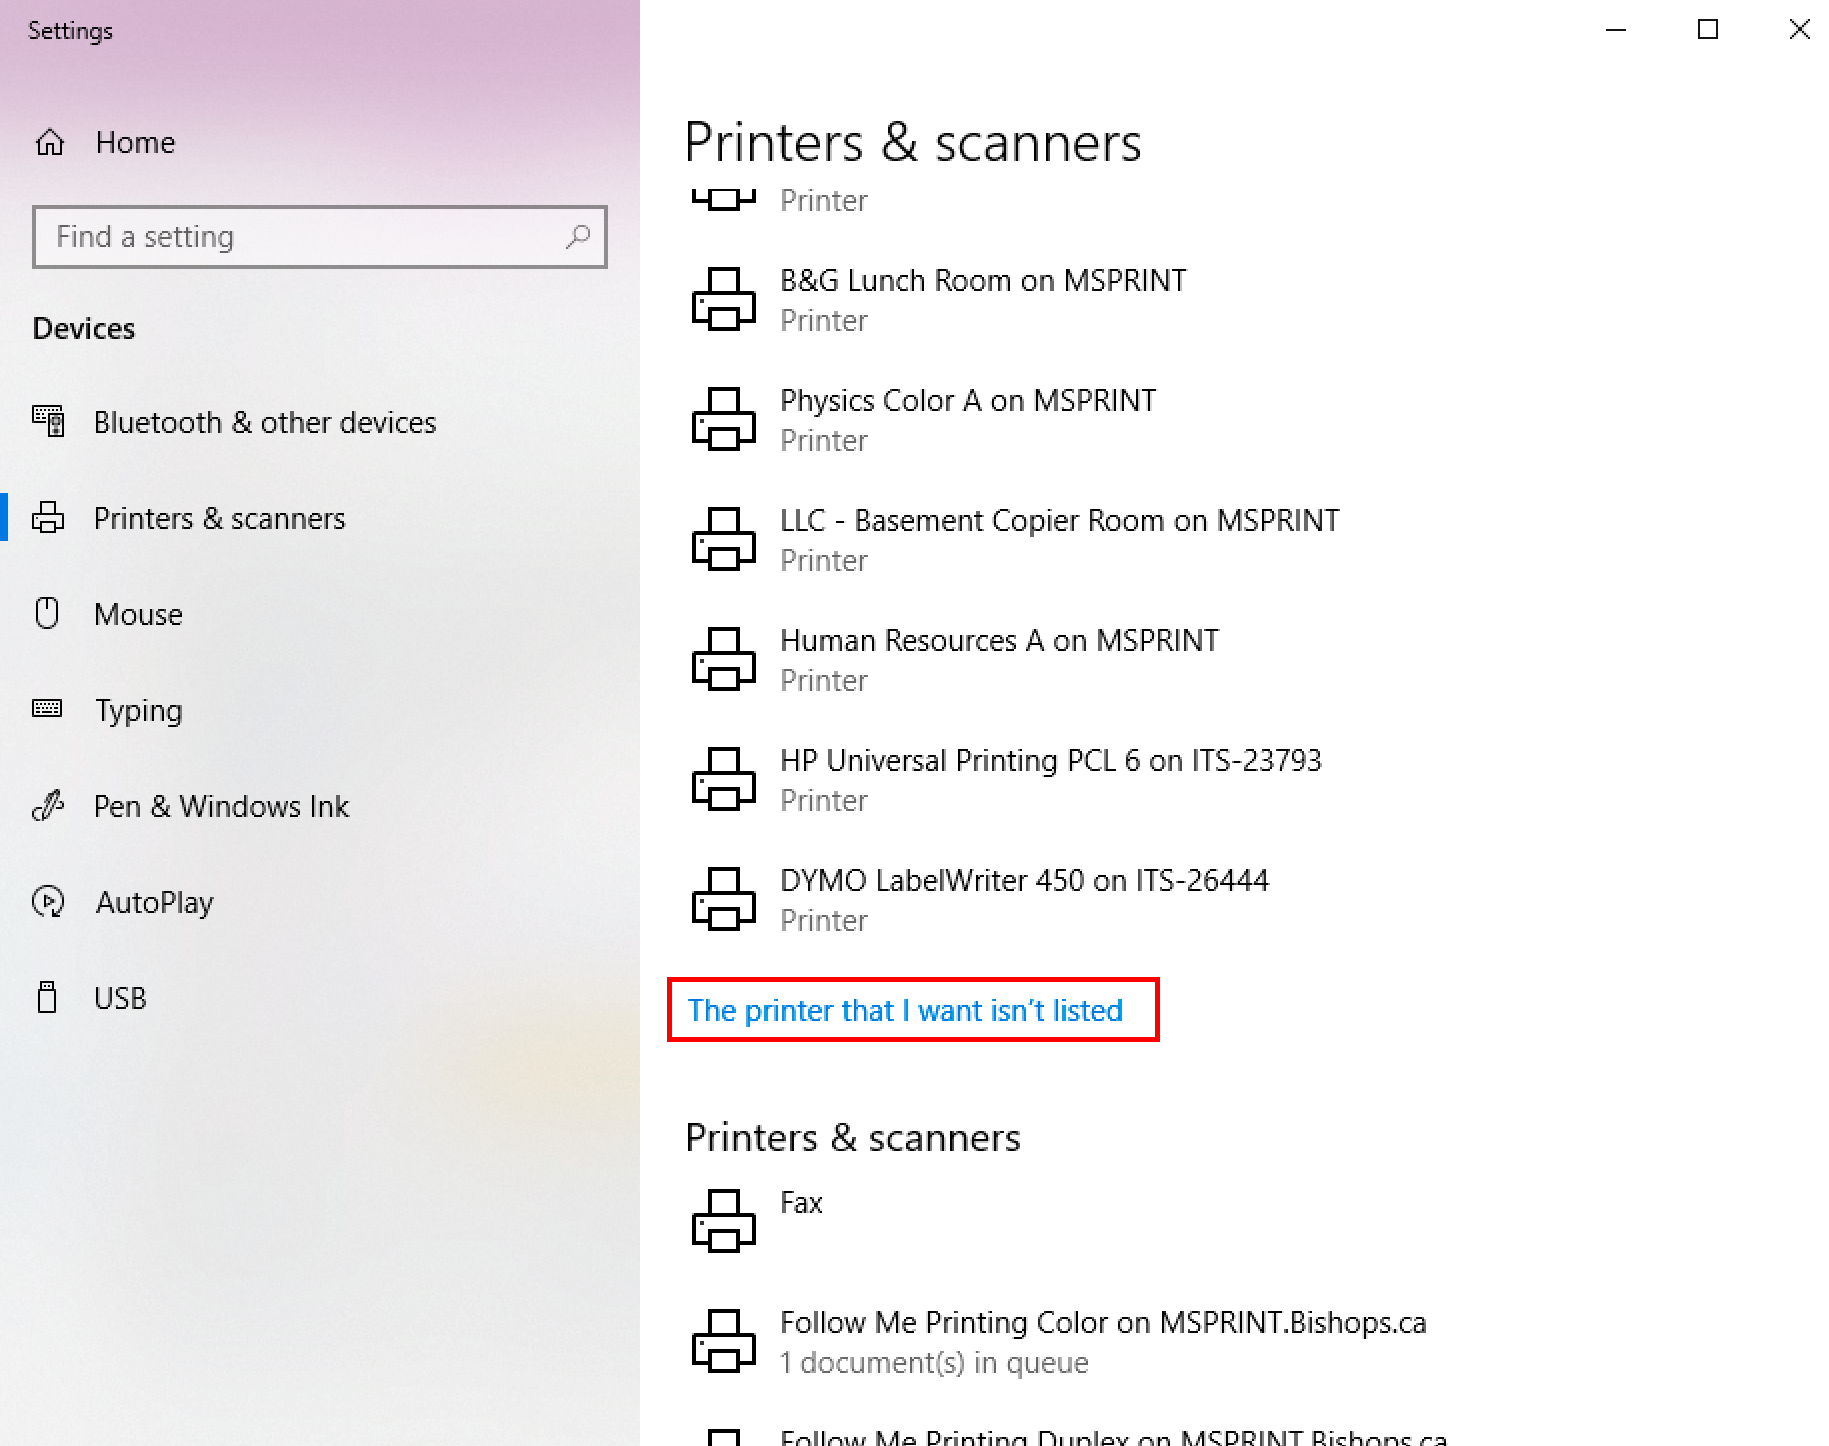
Step 3:
Select “Find a printer in the directory, based on location or feature”. Click next.
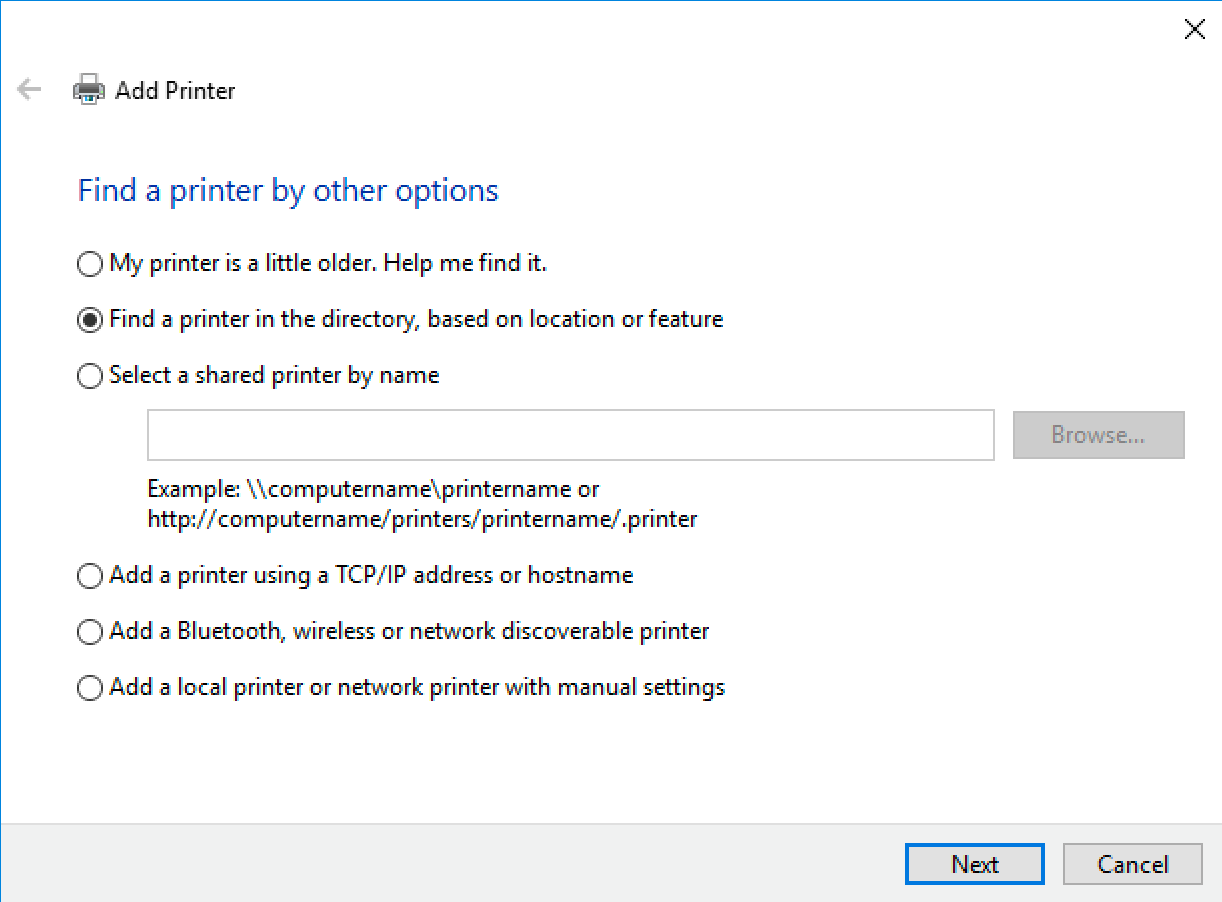
Step 4:
Search for the printer you want to add. You can search by room or printer name. When you have found your desired printer, double click on it to add it’s drivers to your computer.
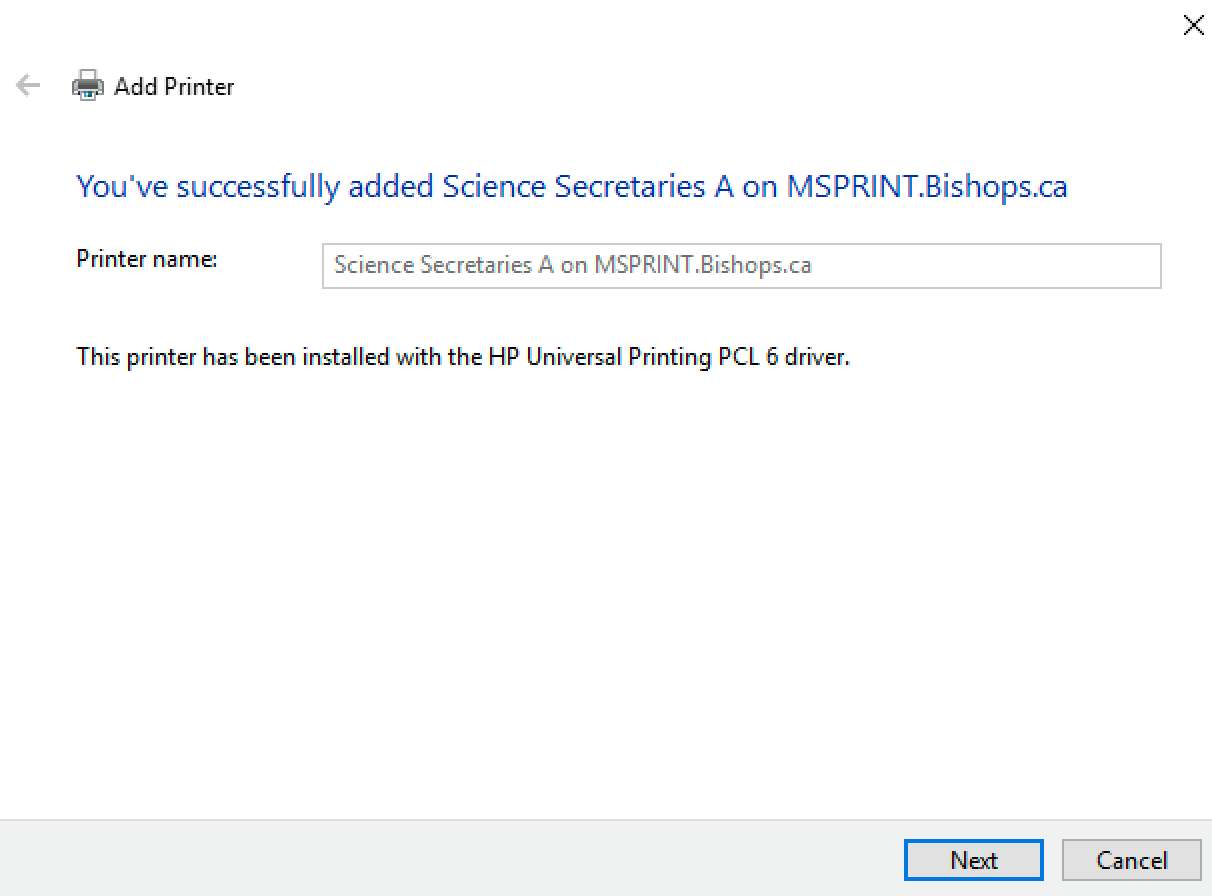
Step 5:
When it is completed, you will be presented with the following screen to confirm it has been added. Click next.
Step 6:
Finally, you can choose to set this printer as your default printer, or print a test page. When you are done you can click “Finish” and you will have successfully added a printer to your computer.