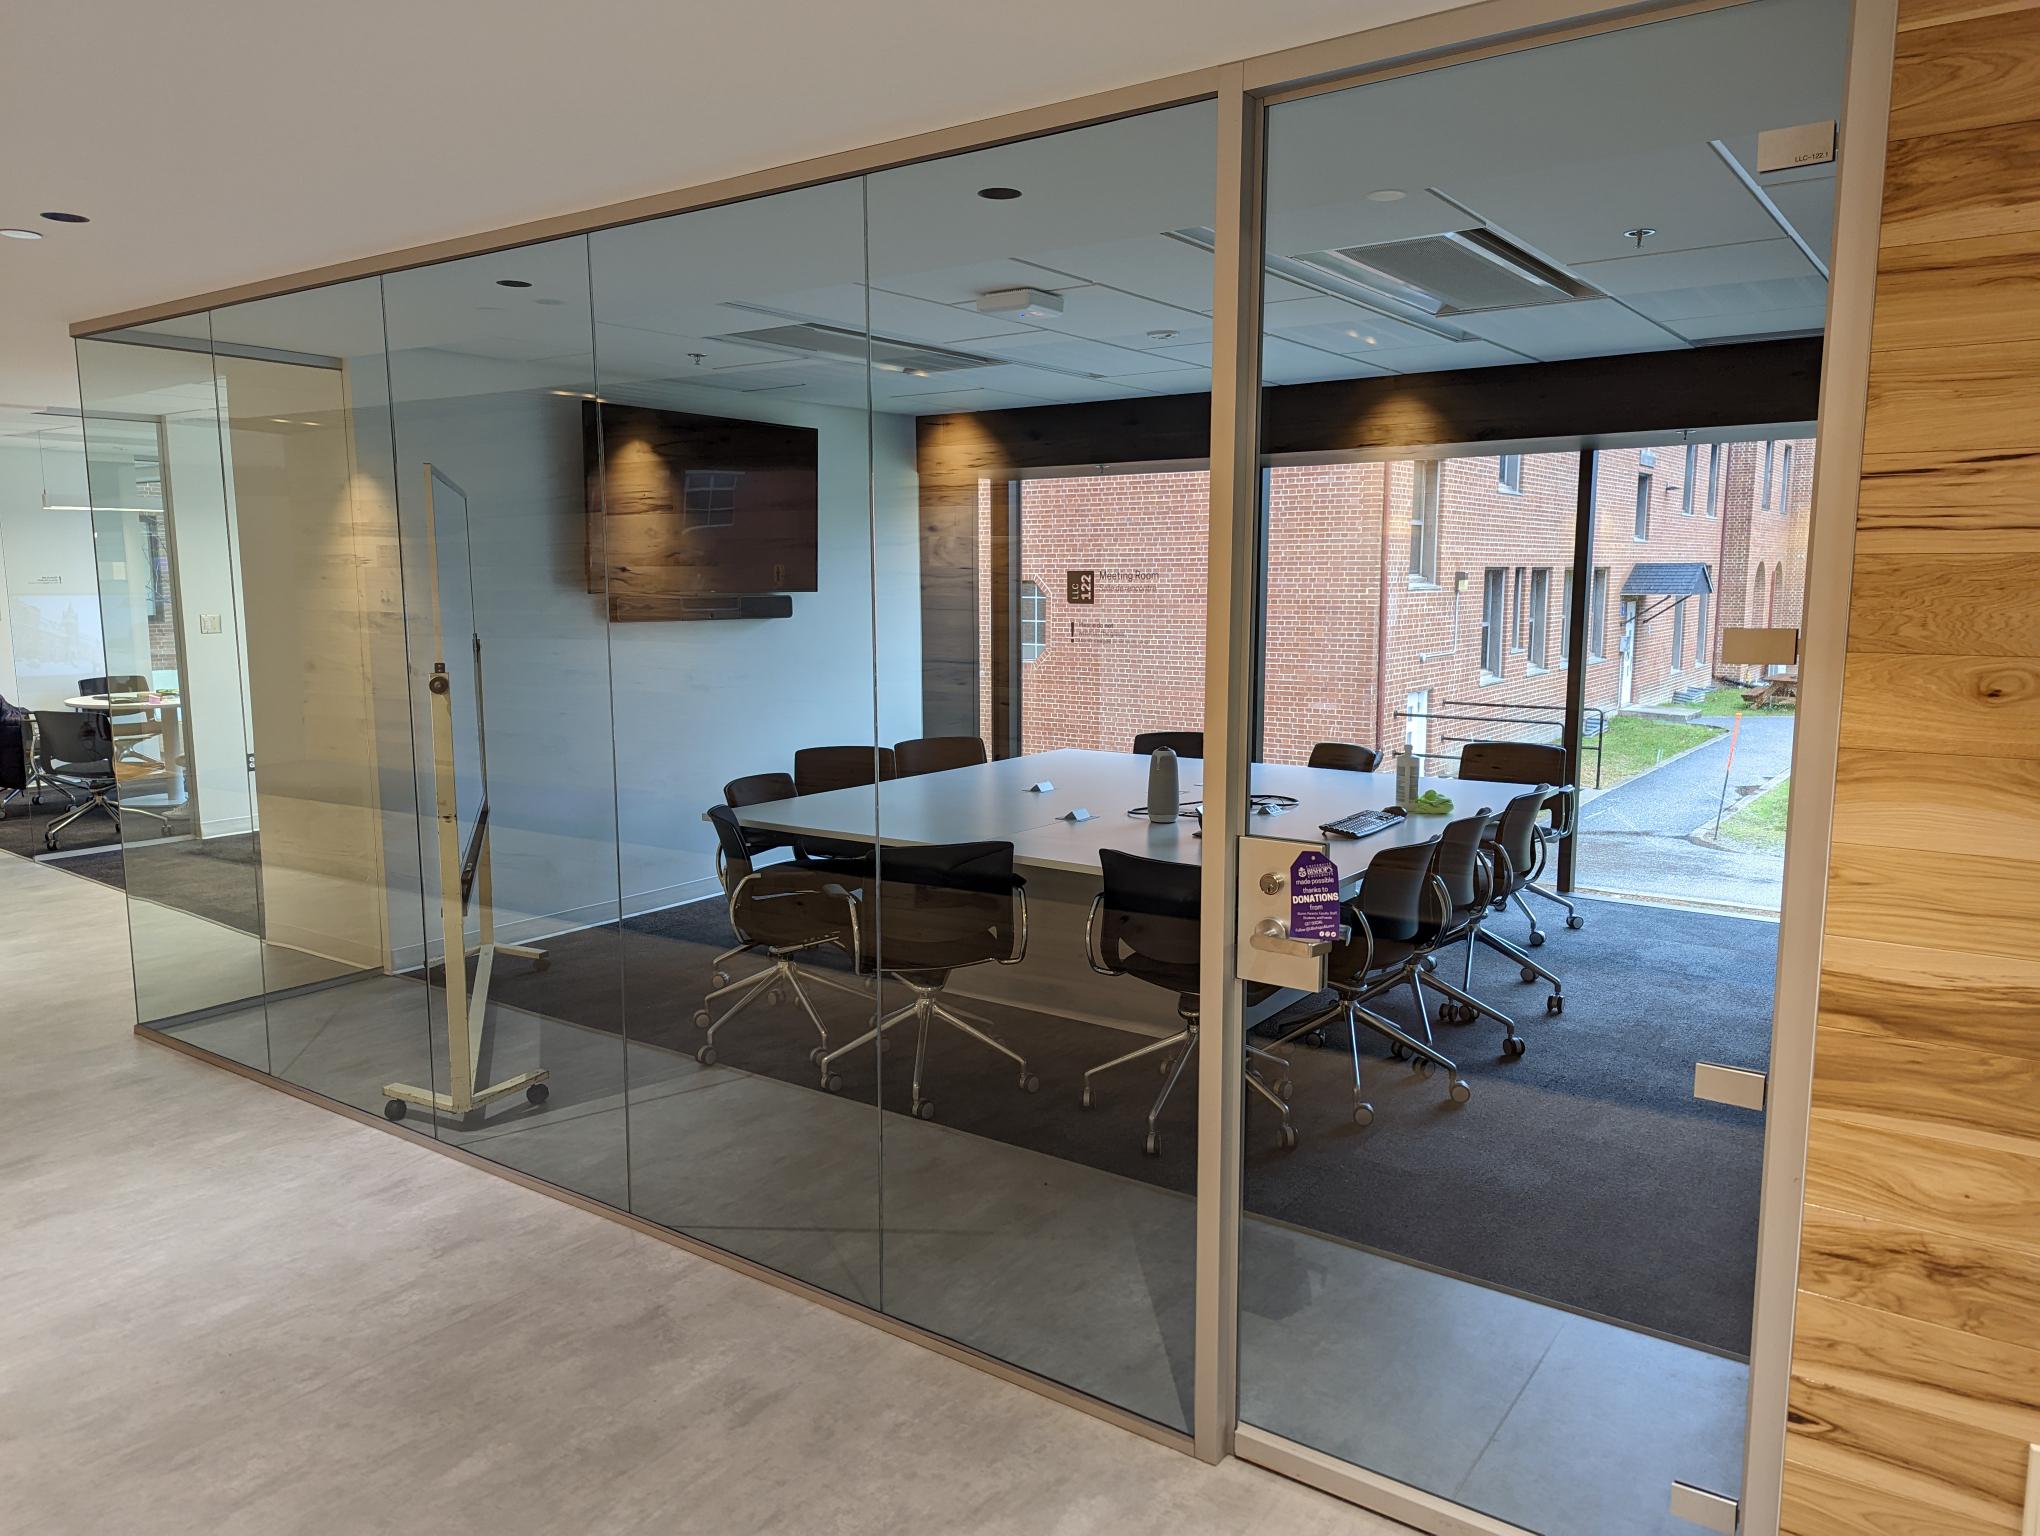
A meeting room that fits up to 12 persons is located on the main floor of the Library Learning Commons in room LLC 122. Users are required to book the room in advance and pick up the key from the Circulation Desk to access the meeting room.
The meeting room LLC 122 is equipped with a computer that displays on two opposing 65” screens, offering maximum visibility to all its users. The multimedia equipment in this room is operated from a Crestron touch panel similar to the ones found in the classrooms. The room is also equipped with a webcam/microphone allowing its users to connect with participants off campus through Teams.
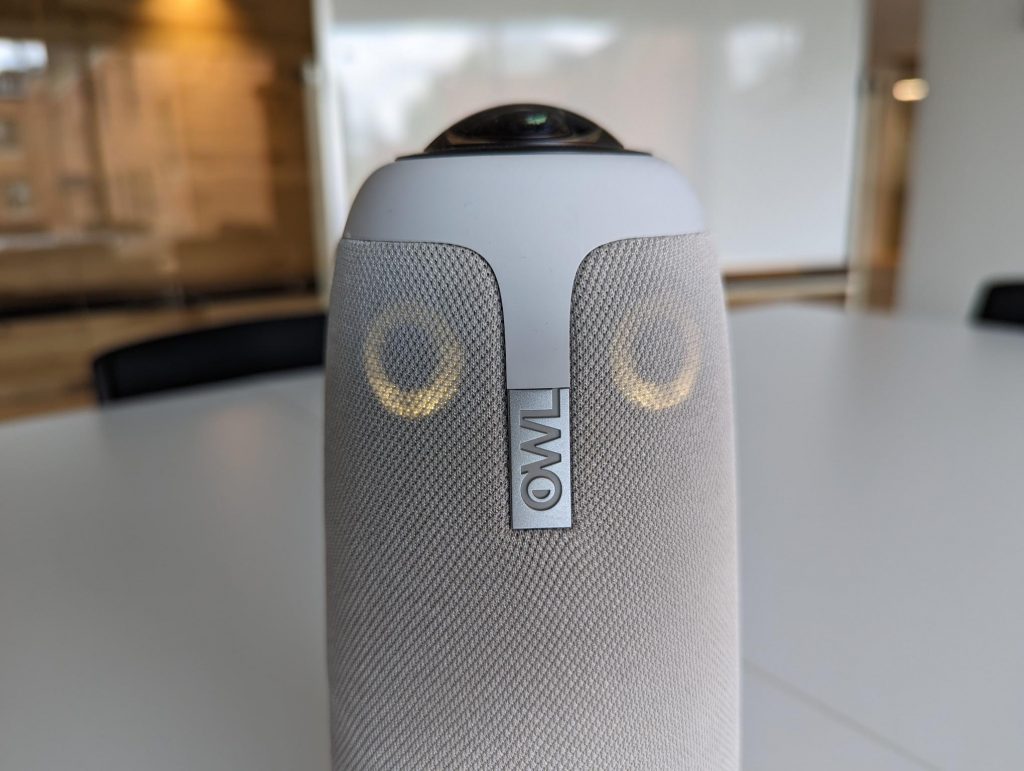
The room is equipped with a special videoconferencing microphone and webcam which allows all people sitting around the table to be included at the same time. The camera uses facial recognition to automatically detect where you are sitting, and combines multiple angles together into one webcam output for your meetings.
This room is best used for big group meetings requiring visual presentations or mobile conference call capability.
Best used for:
Video conference calls
In-person meetings
Trainings
Presentations
Computer
Included
Webcam
System Only
Microphone
System Only
Speakers
Included
VGA
Included
HDMI
Included
Reserve the room:
IMPORTANT: ITS will not set up any equipment in this room.
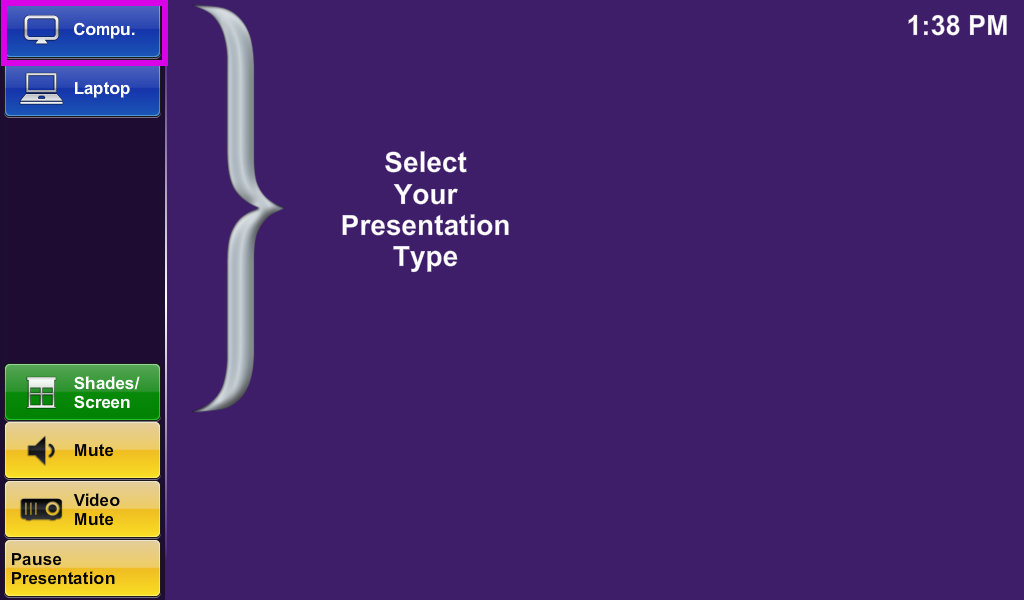
Press the “Computer” button in the top left corner.
1.3
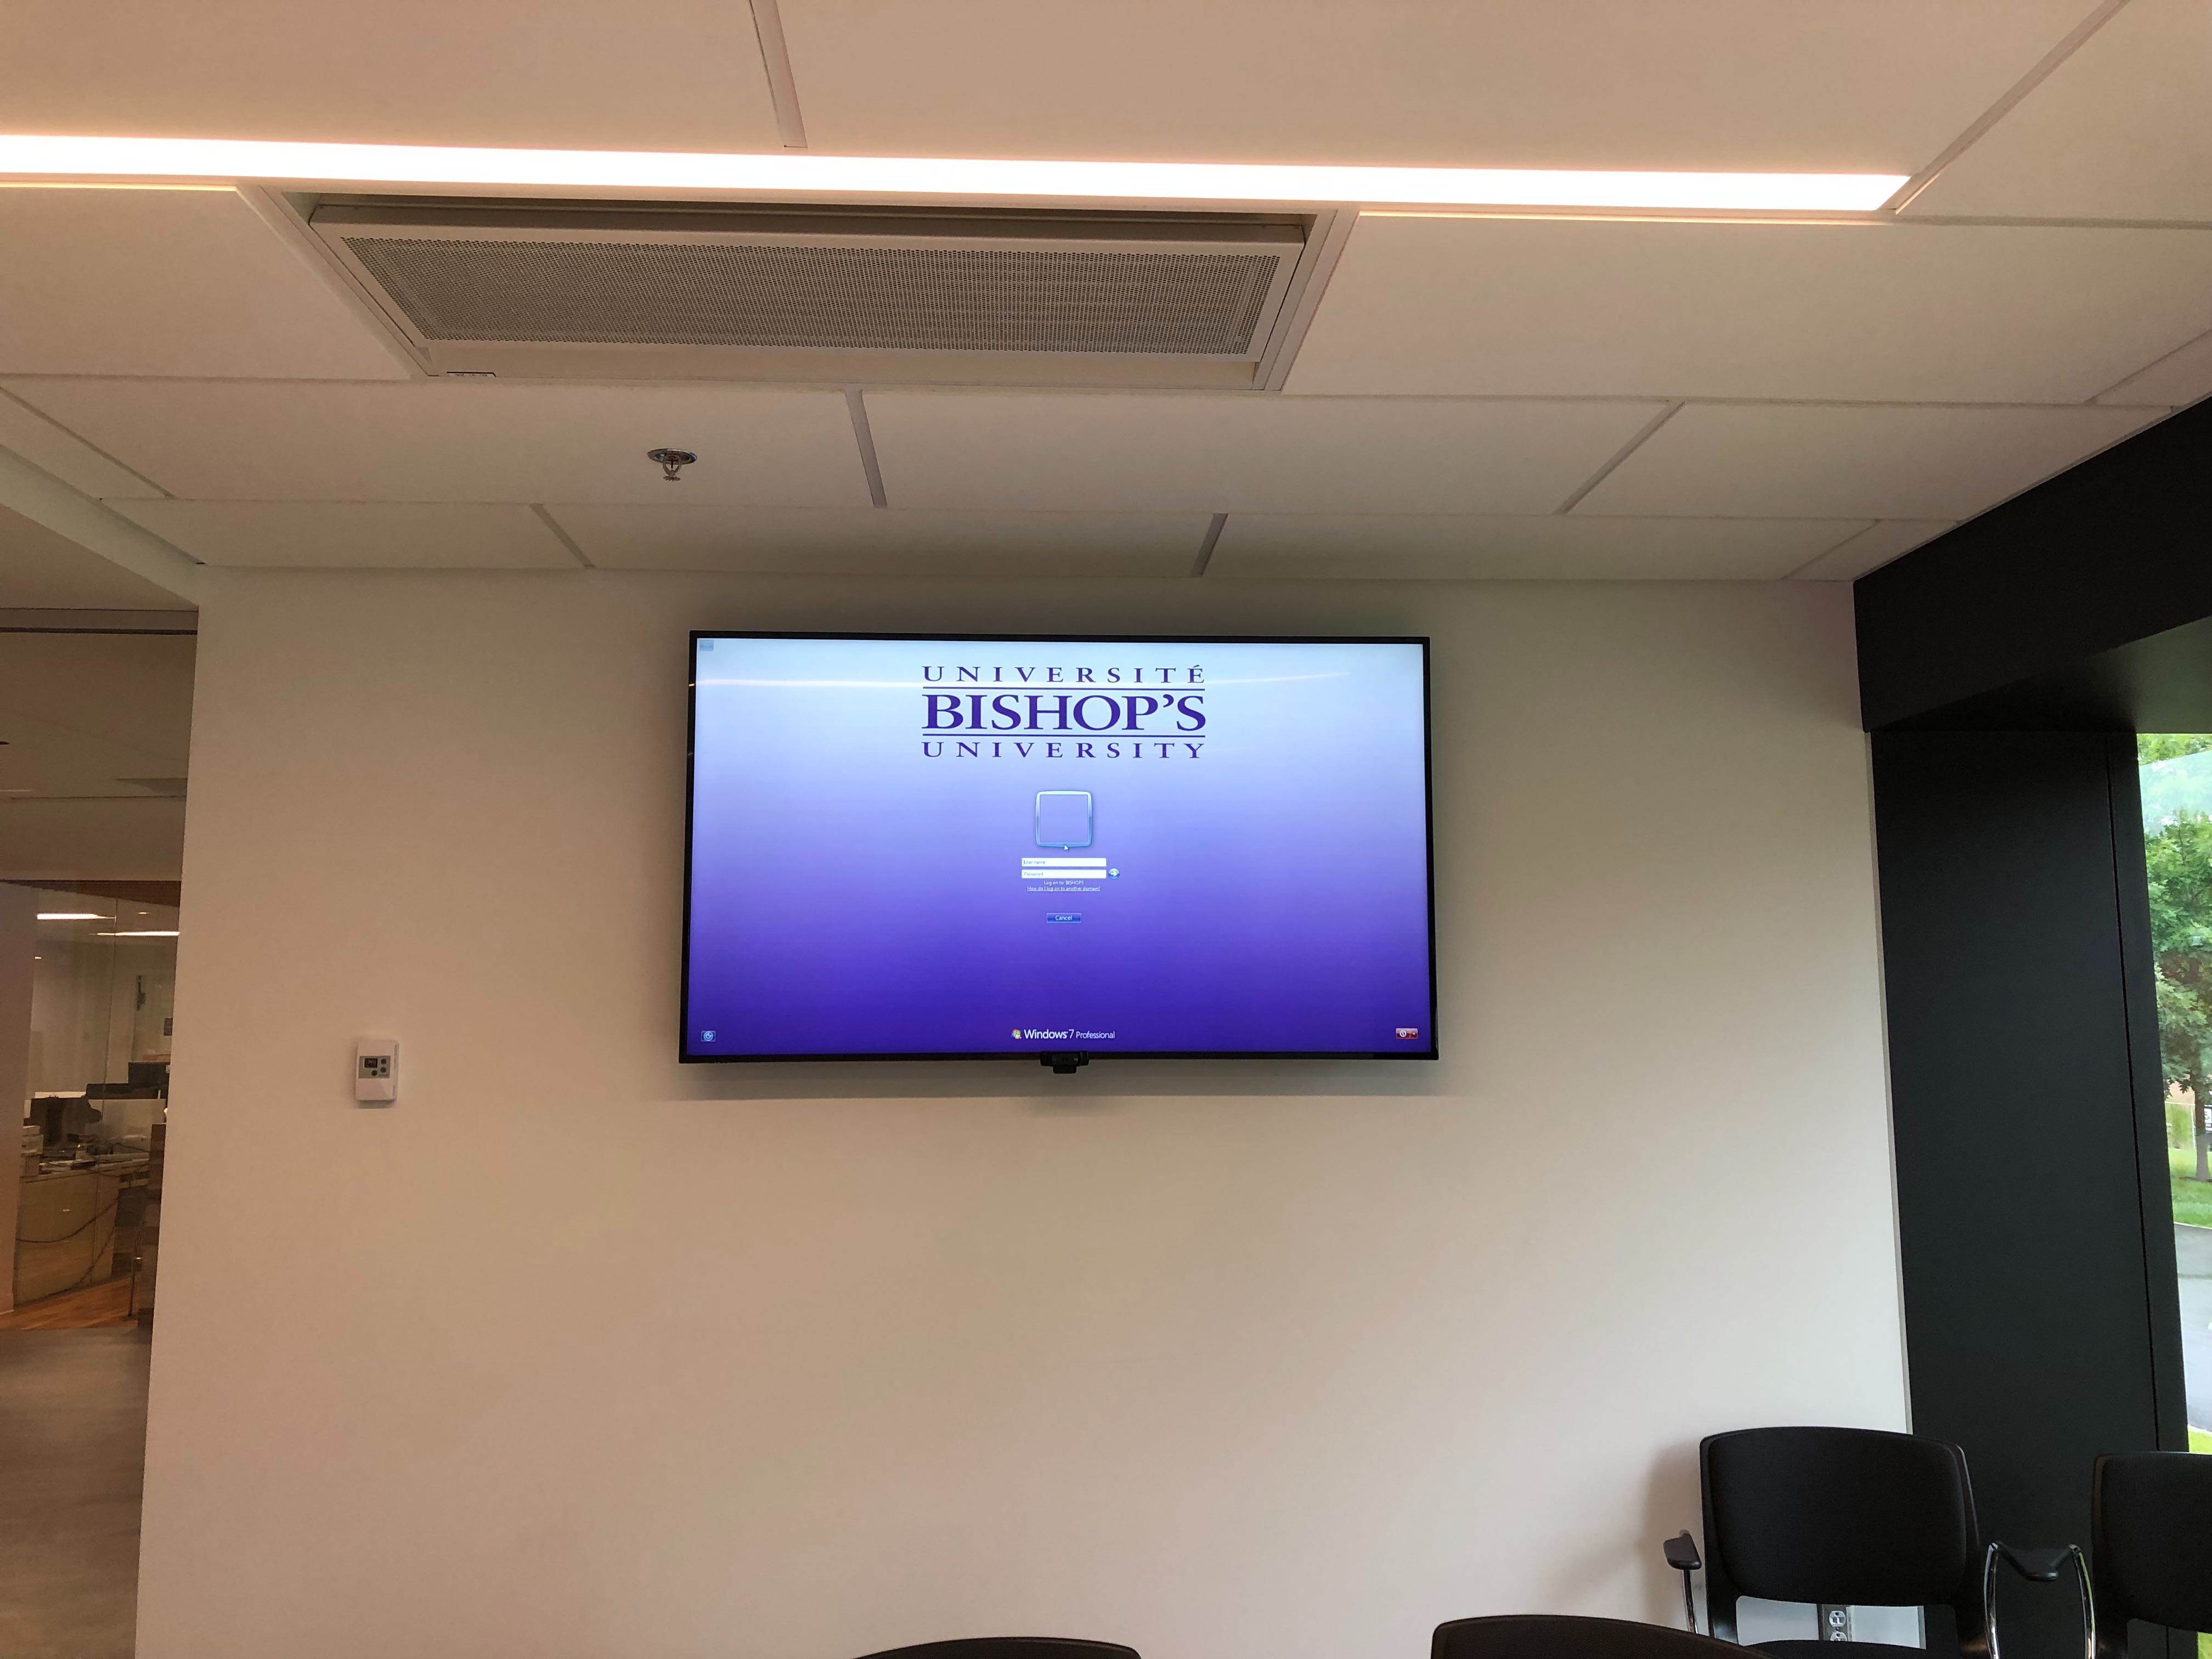
If nothing shows up on the TV screen, check to see if the computer is turned on. The computer is located behind the TV that is closest to the crestron station.
1.4
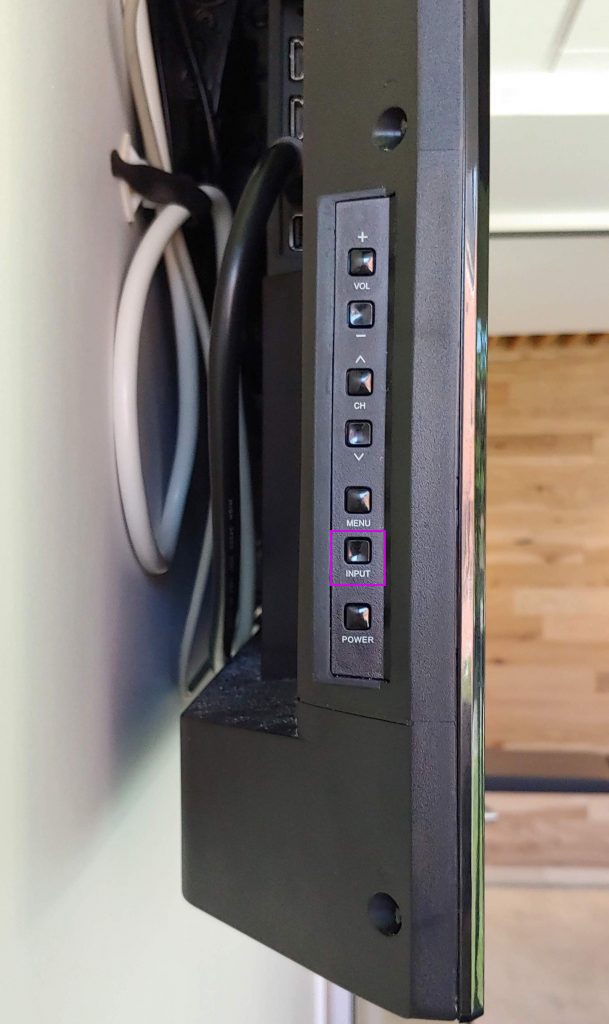
If there’s still no picture, make sure the display is set to “HDMI” by cycling through the input modes using the highlighted button.
1.5
Log into the computer and enjoy!
2. Setting up your laptop
2.1
Press to begin on the Crestron tablet.
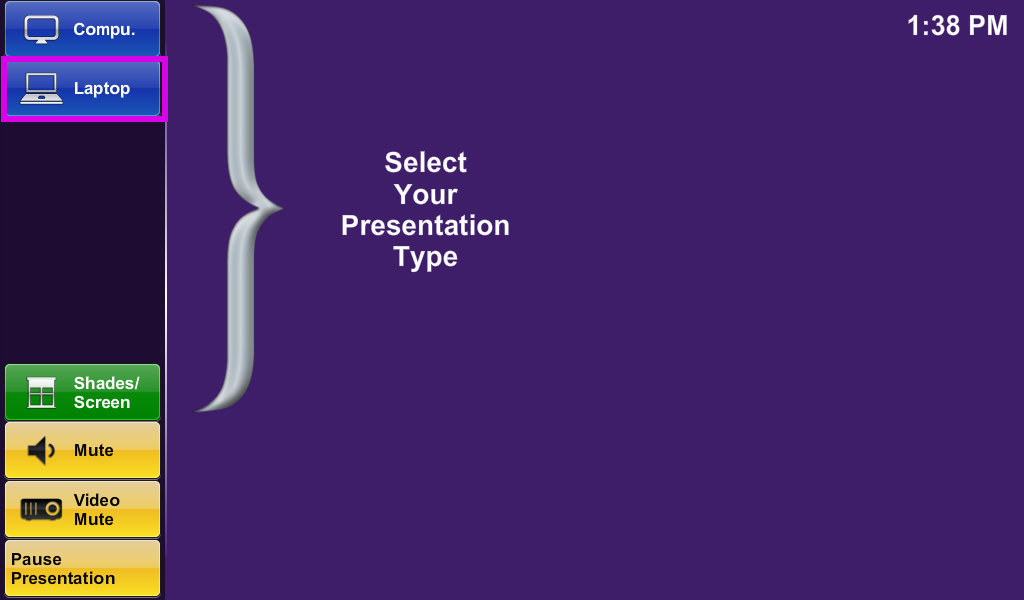
2.2
Press the “Laptop” button in the top left corner.
2.3
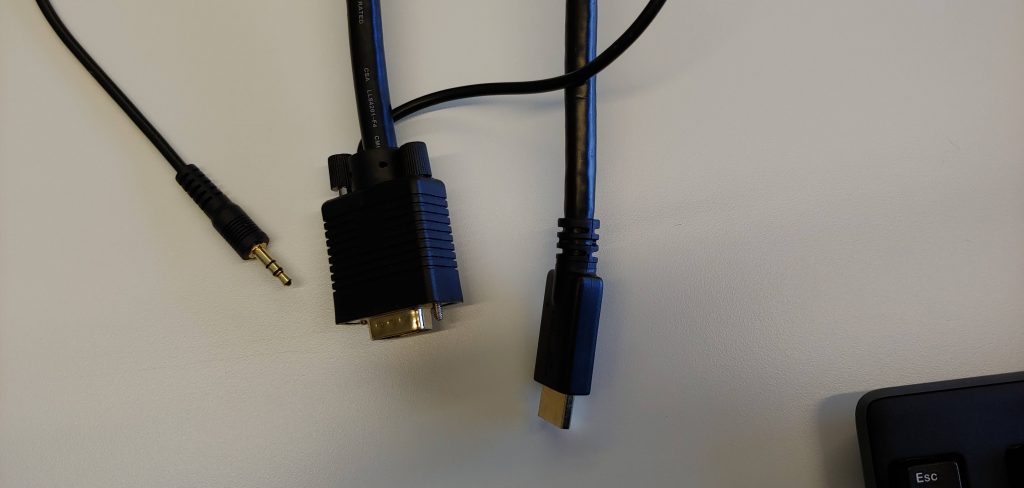
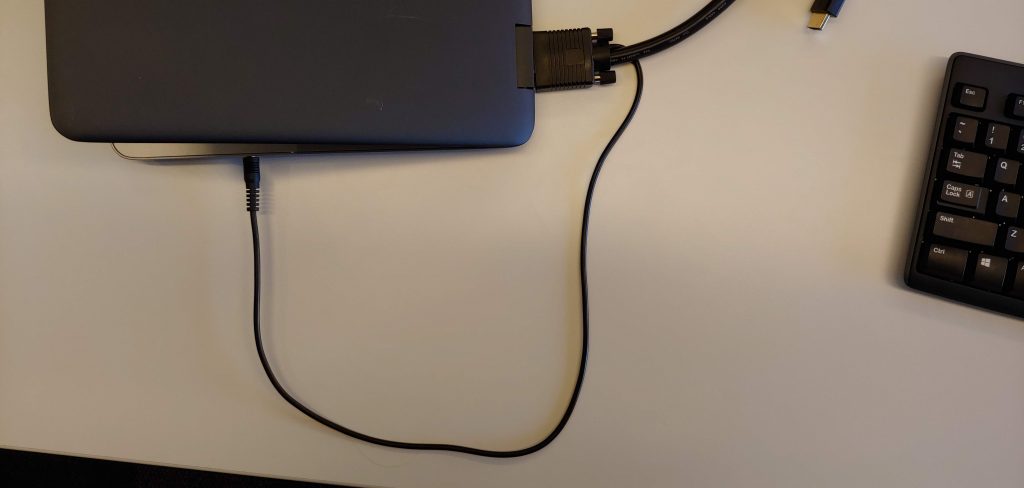
Connect your laptop to either the VGA or the HDMI cords on the table.
Please Note: If you use the VGA port, you need to plug the audio jack into your computer’s headphone output.
2.4
If there’s still no picture, make sure the display is set to “HDMI 1”.
2.5
Log into your device and enjoy!
3. Using the Owl camera
NOTE: The owl camera will only work while using the room PC (refer to section 1.Setting up the Computer to setup the PC and use this webcam.
Since the Owl webcam cannot be used through the laptop option, we recommend only using your laptop for in-person meetings and using the room’s PC for any video conference calls/hybrid meetings.
3.1
Log into the meeting room computer as in section 1.
3.2
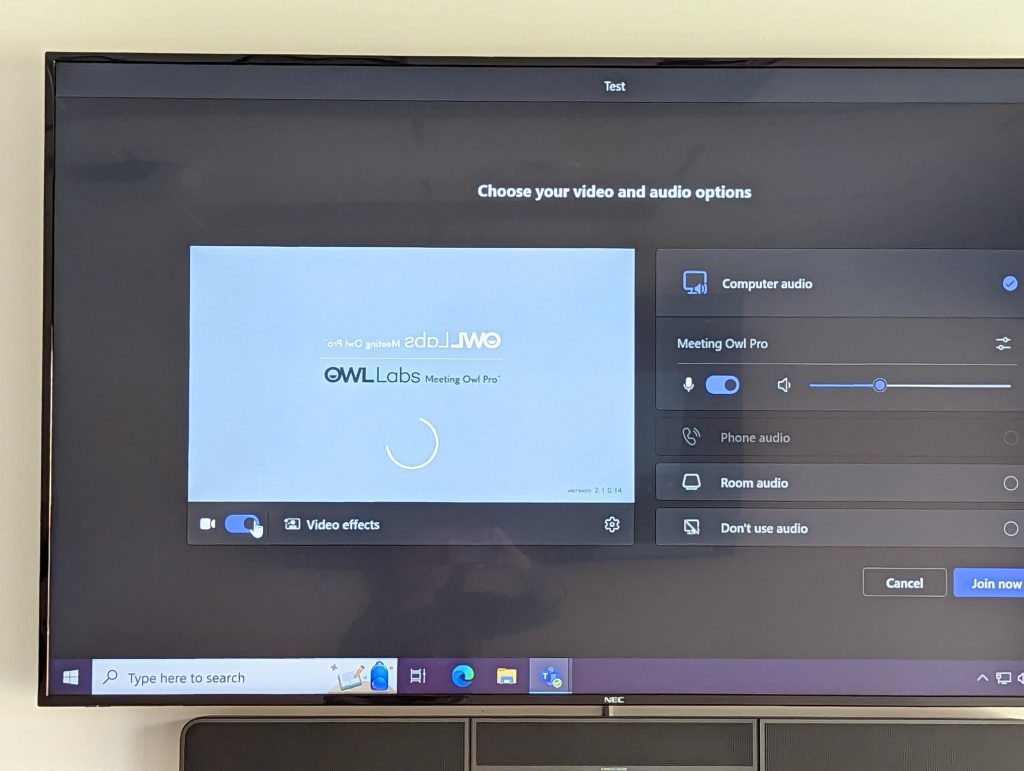
Open your meeting application of choice (Teams is recommended) and enable the camera. If the OWLLabs splash screen or the camera view does not show up in the preview, make sure that “Owl Meeting Cam” is the selected camera in the settings.
3.3
You can also verify that the camera is working by checking that its “eyes” have lit up.
3.4
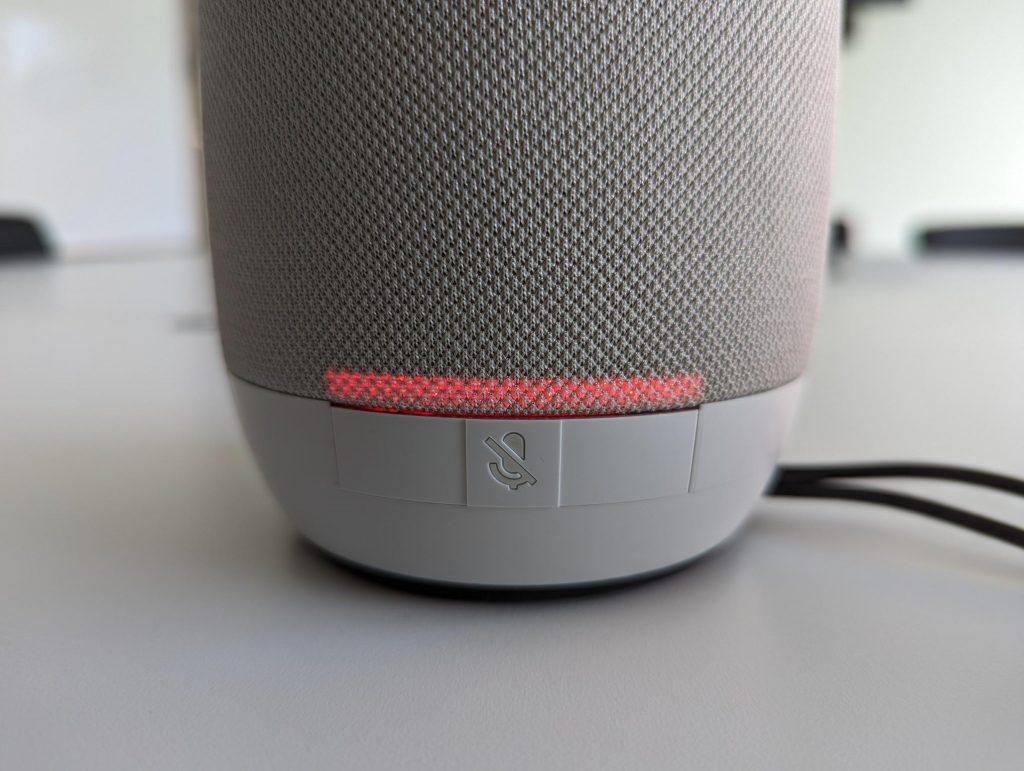
If the camera is not detected by Teams, perform a powercycle by unplugging the device and plugging it back in at the port on the bottom of the base.3
3.5
The camera’s built in microphone can be muted using the large rectangular mute buttons present on either side of the base.