


This tutorial is to guide those who are looking to use the Doc Cam in their multimedia classroom. Doc cams are very useful if you want to show a physical paper or picture that is not on your desktop or laptop. There are two kinds of Doc cams you can find here on campus. Most multimedia classrooms have the older version of a doc cam while others have the new doc cam.
<! Step 1 starts here: copy and paste this code below for each step of the tutorial>
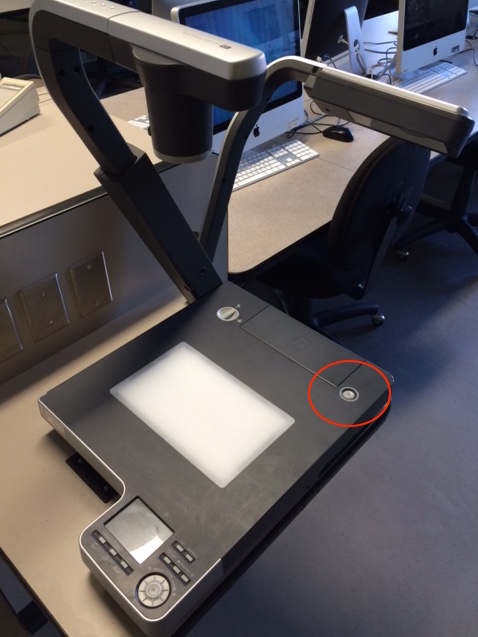
For those classrooms that have the older Doc cam (as shown) you may continue to scroll down through the following steps.
These are most commonly found in majority of the classrooms but they are especially found in classrooms that have just one screen to displays their presentation.

<! End of Step>
<! Step 1 starts here: copy and paste this code below for each step of the tutorial>
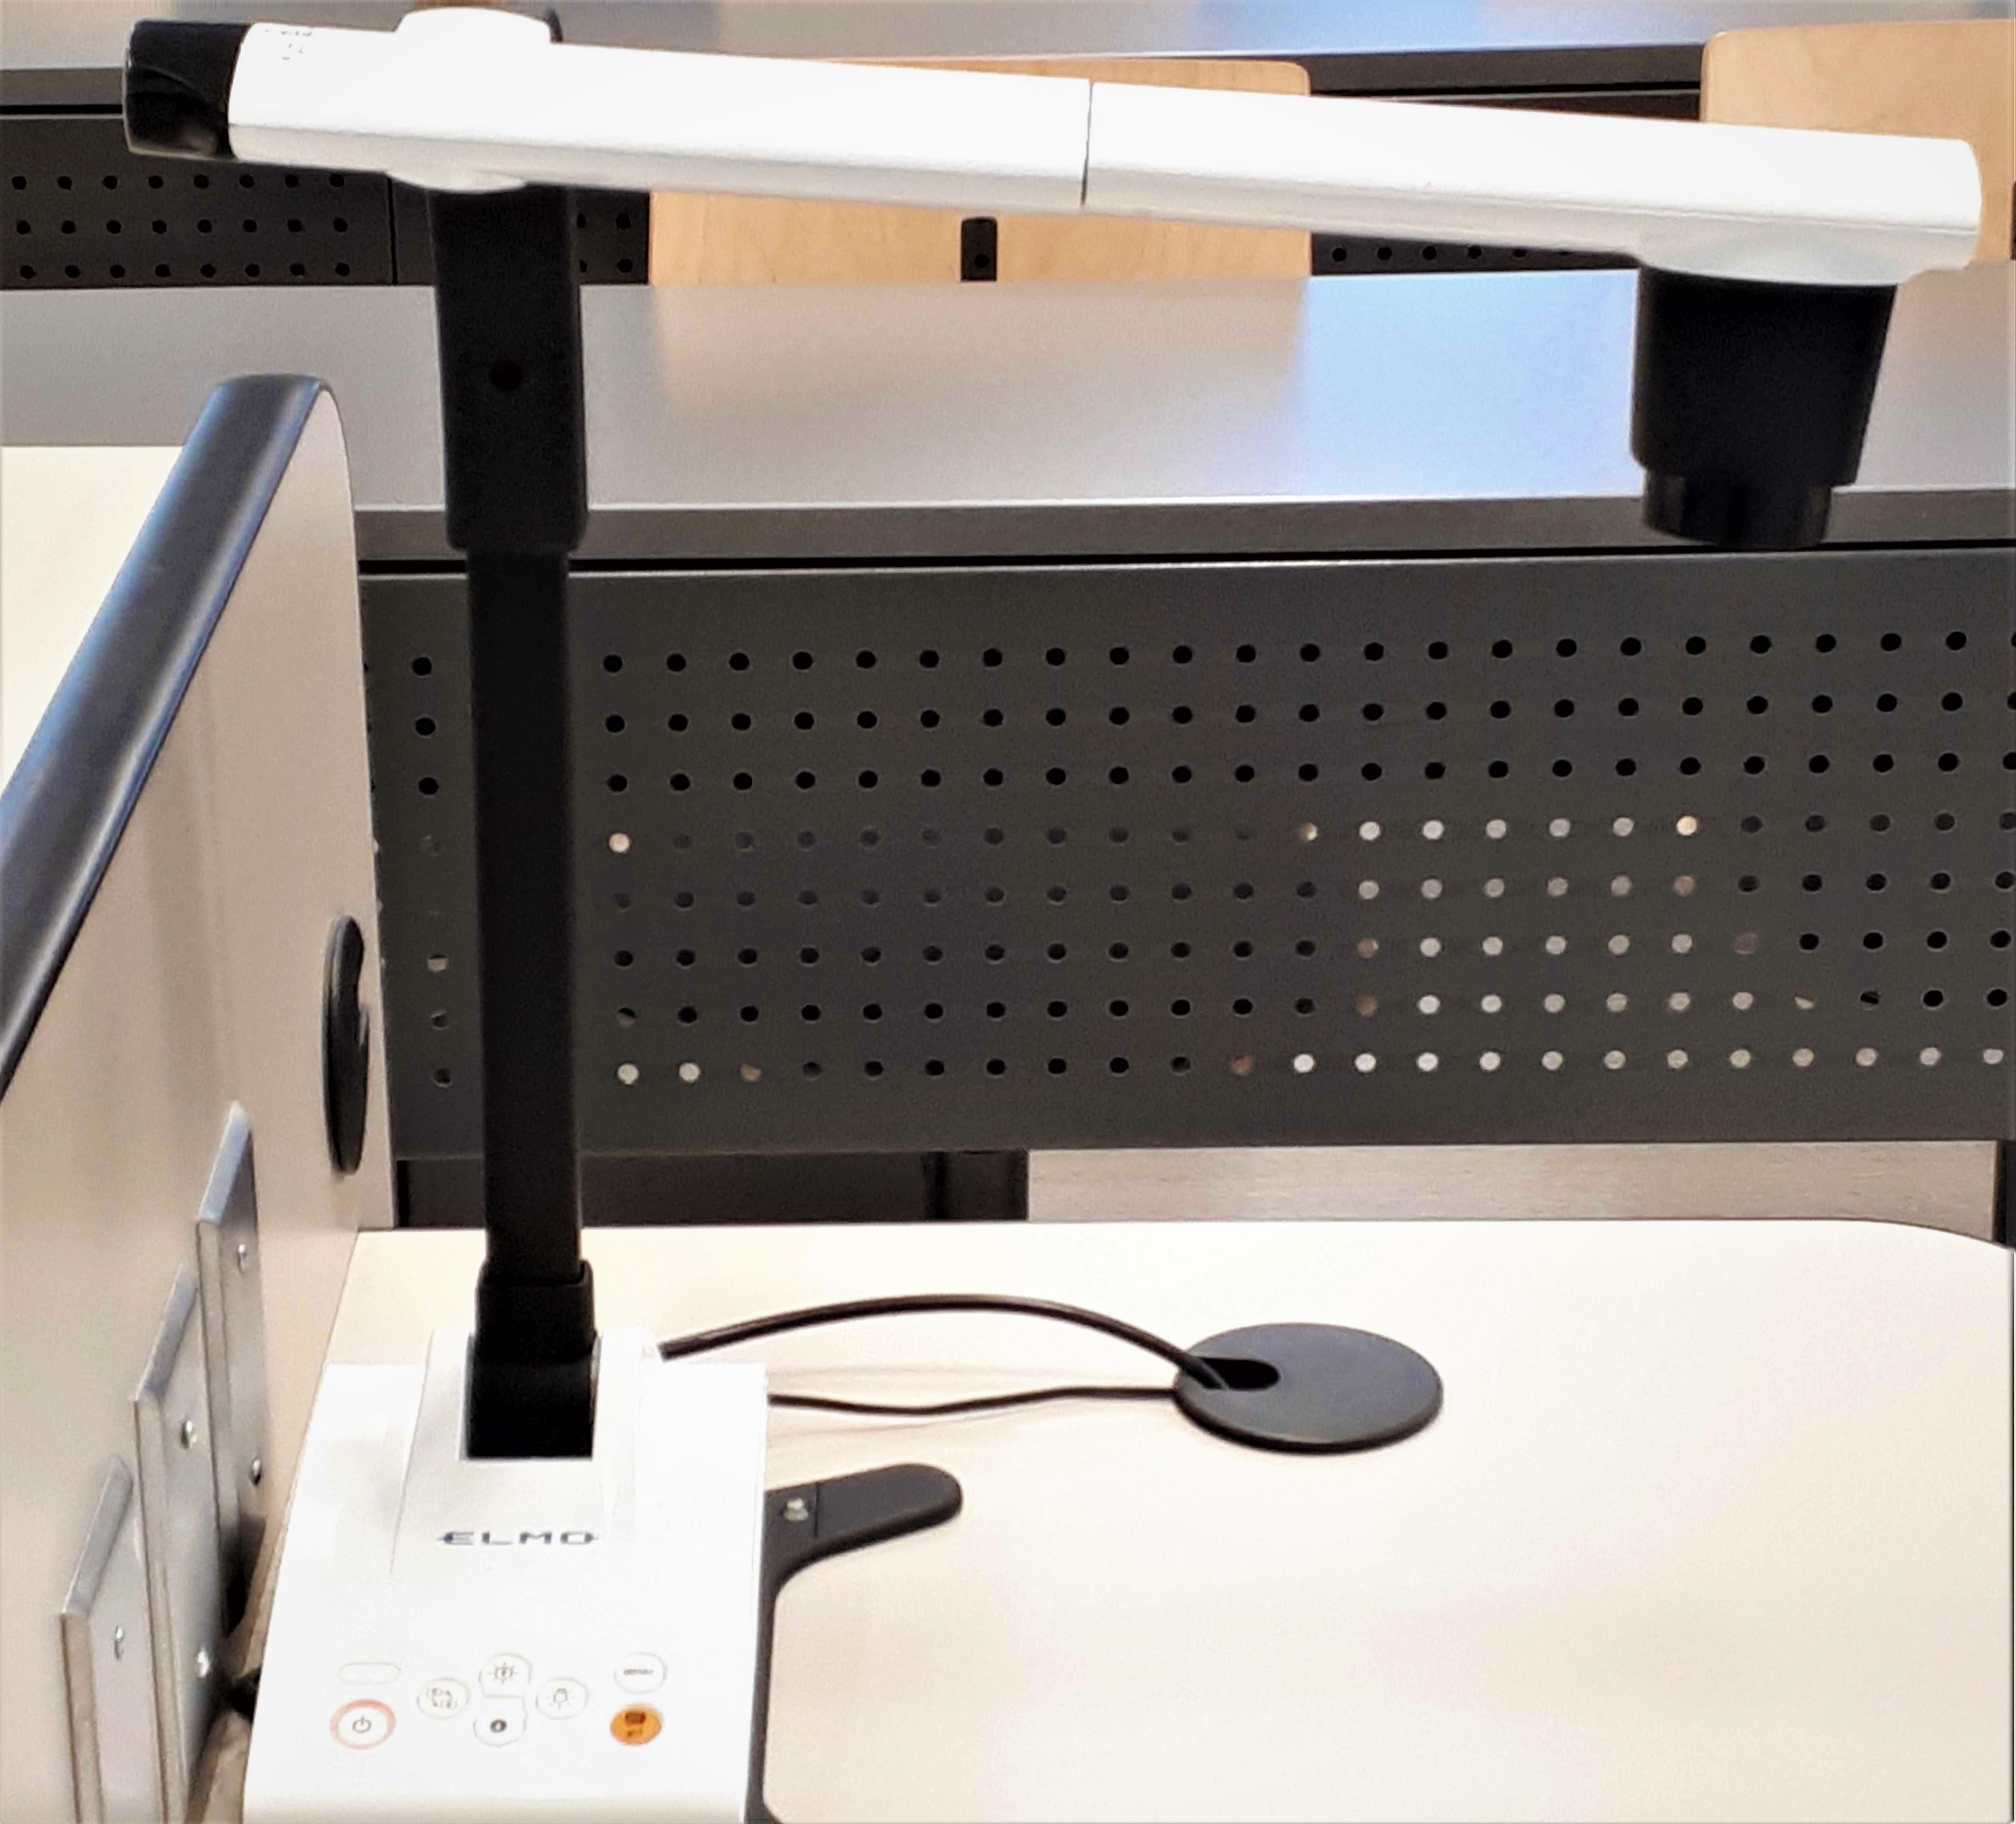
For those classrooms that have new Doc cams (as shown) you may click here to jump to the appropriate instructions.
These are most commonly found in newer classrooms, such as the rooms in the Library Learning Commons or large rooms that have more than one screen. *Except for older classrooms, such as those in Nicolls*
<! End of Step>
<! Step 1 starts here: copy and paste this code below for each step of the tutorial>
Step 1:
Turn on the Crestron system.
If the Crestron system is not turned on yet, you may do so in order to connect the Crestron to the Doc cam.
<! End of Step>
<! Step 1 starts here: copy and paste this code below for each step of the tutorial>
If you are already in the middle of a presentation...
If you are in the middle of a presentation and the system is connected to your laptop/desktop, you won't need to restart anything. Simply press "Doc Cam". If you want to go back to your laptop/desktop/movie, simply press on the input you desire.

<! End of Step>
<! Step 1 starts here: copy and paste this code below for each step of the tutorial>
Step 2:
Once you chose the Doc Cam input, be sure to turn on the Doc cam by pressing the power button.
These are the instructions on how to complete this step.
<! End of Step>
<! Step 1 starts here: copy and paste this code below for each step of the tutorial>
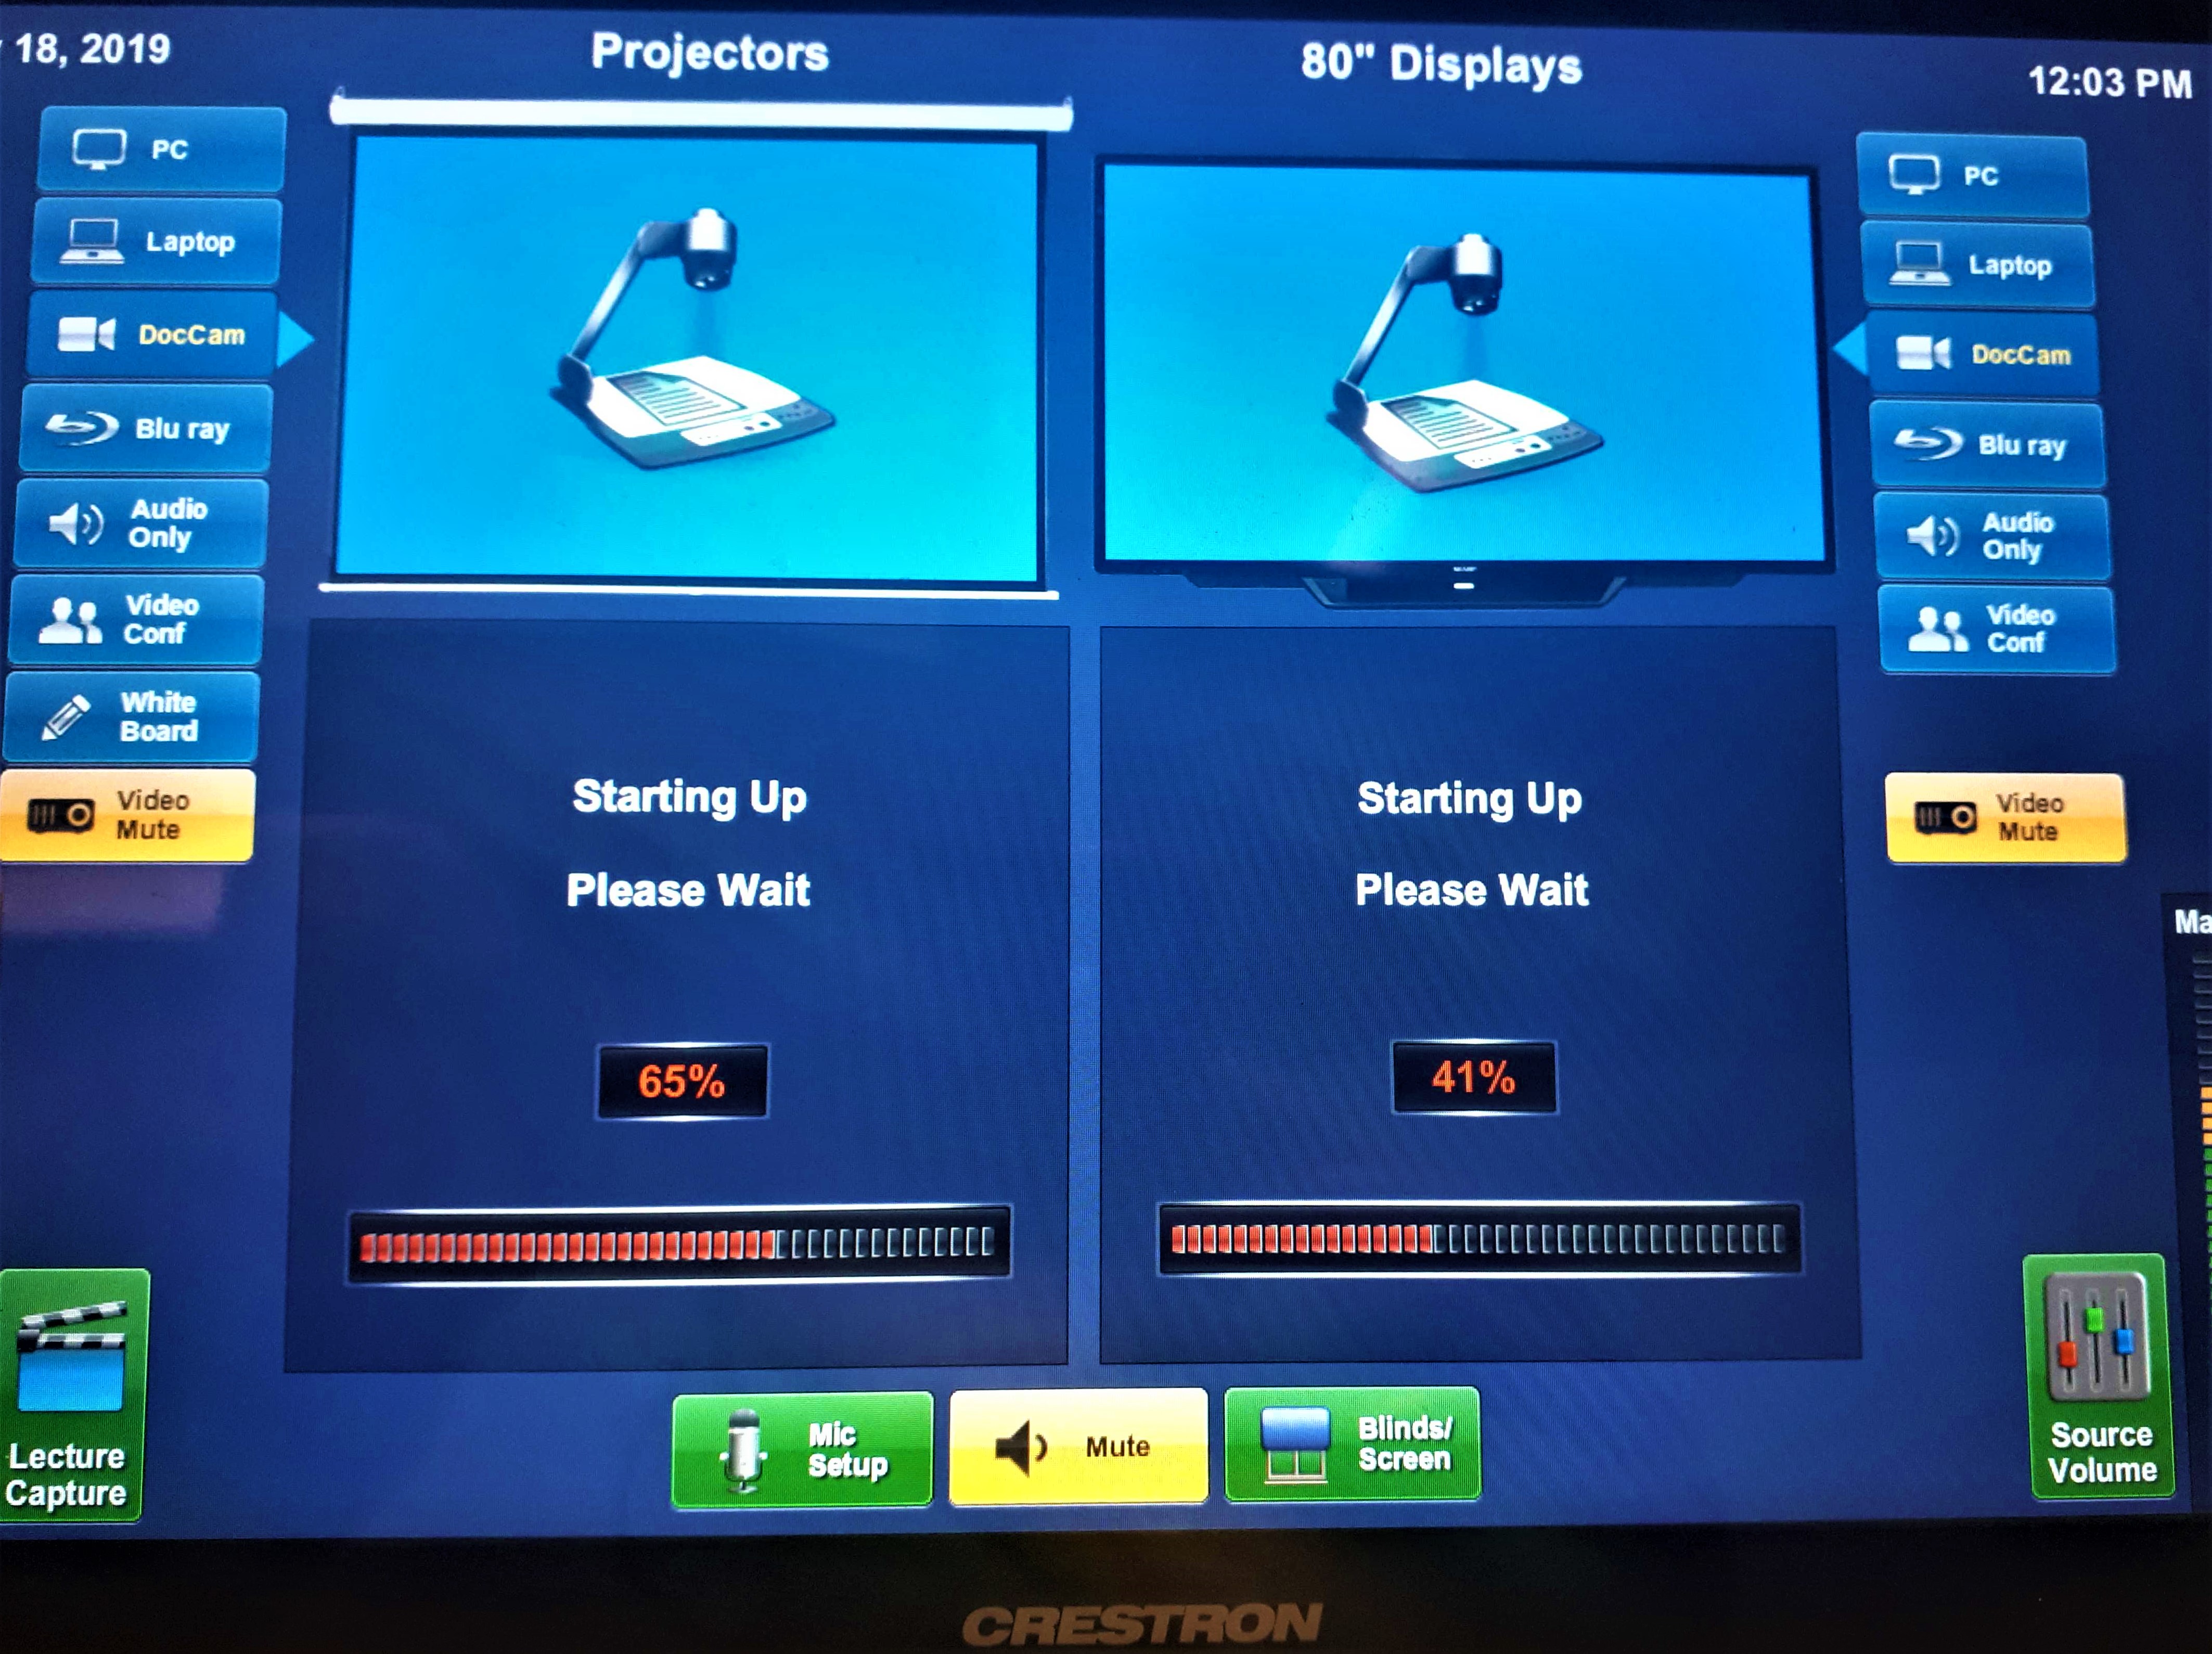
Step 3:
Place the document you want to show.
Once the Doc Cam input on the Crestron system is done "starting up" the projector will have the Doc Cam displayed on screen.

<! End of Step>
<! Step 1 starts here: copy and paste this code below for each step of the tutorial>
Step 3a:
For any adjustments...
If you are looking to zoom in or change the brightness, simply refer to the bottom right of the Doc Cam..

<! End of Step>
<! Step 1 starts here: copy and paste this code below for each step of the tutorial>
If your paper is double sided...
As shown in the picture above, the picture on the other side comes through. Sometimes we want to show a document that has writing/pictures on both sides and because of the lighting we can see what is displayed on the reverse side of the paper. No worries! On the Crestron system there is a button called "transparency" that you can click and you will see that the Doc Cam is going to focus on the side that is facing the camera.
<! End of Step>
<! Step 1 starts here: copy and paste this code below for each step of the tutorial>
Step 4:
Your class is ready to view your document!
Once you have made the adjustments you wanted to make, your class will be able to see it all on the screen.
<! End of Step>
<! Step 1 starts here: copy and paste this code below for each step of the tutorial>
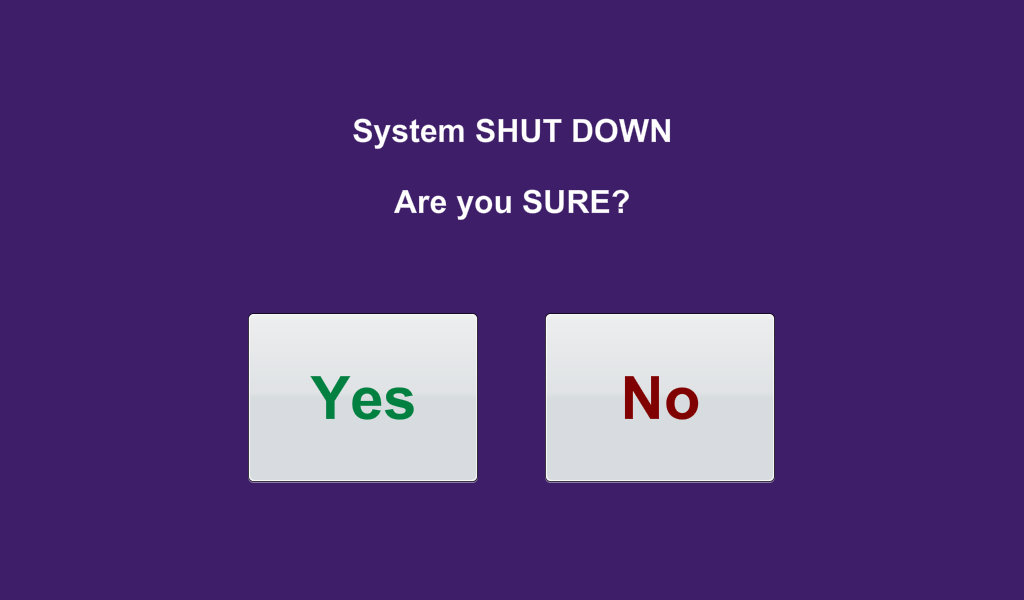
Step 5:
Once you have finished...
Simply click on which input you want to return/go to or, press the power button on the Crestron system as well as the Doc Cam in order to shut everything down. remember that you will need to confirm that you want to shut the Crestron system down by pressing on "Yes".
<! End of Step>
<! Step 1 starts here: copy and paste this code below for each step of the tutorial>
So you have the new Doc cam...
These instructions are every similar to those of the old doc cam however, some classes have more than one screen. This gives the presenter the opportunity to show two inputs at once, or have what is displayed on the Doc Cam on both screens simply by having to choose an input for each screen.
<! End of Step>
<! Step 1 starts here: copy and paste this code below for each step of the tutorial>
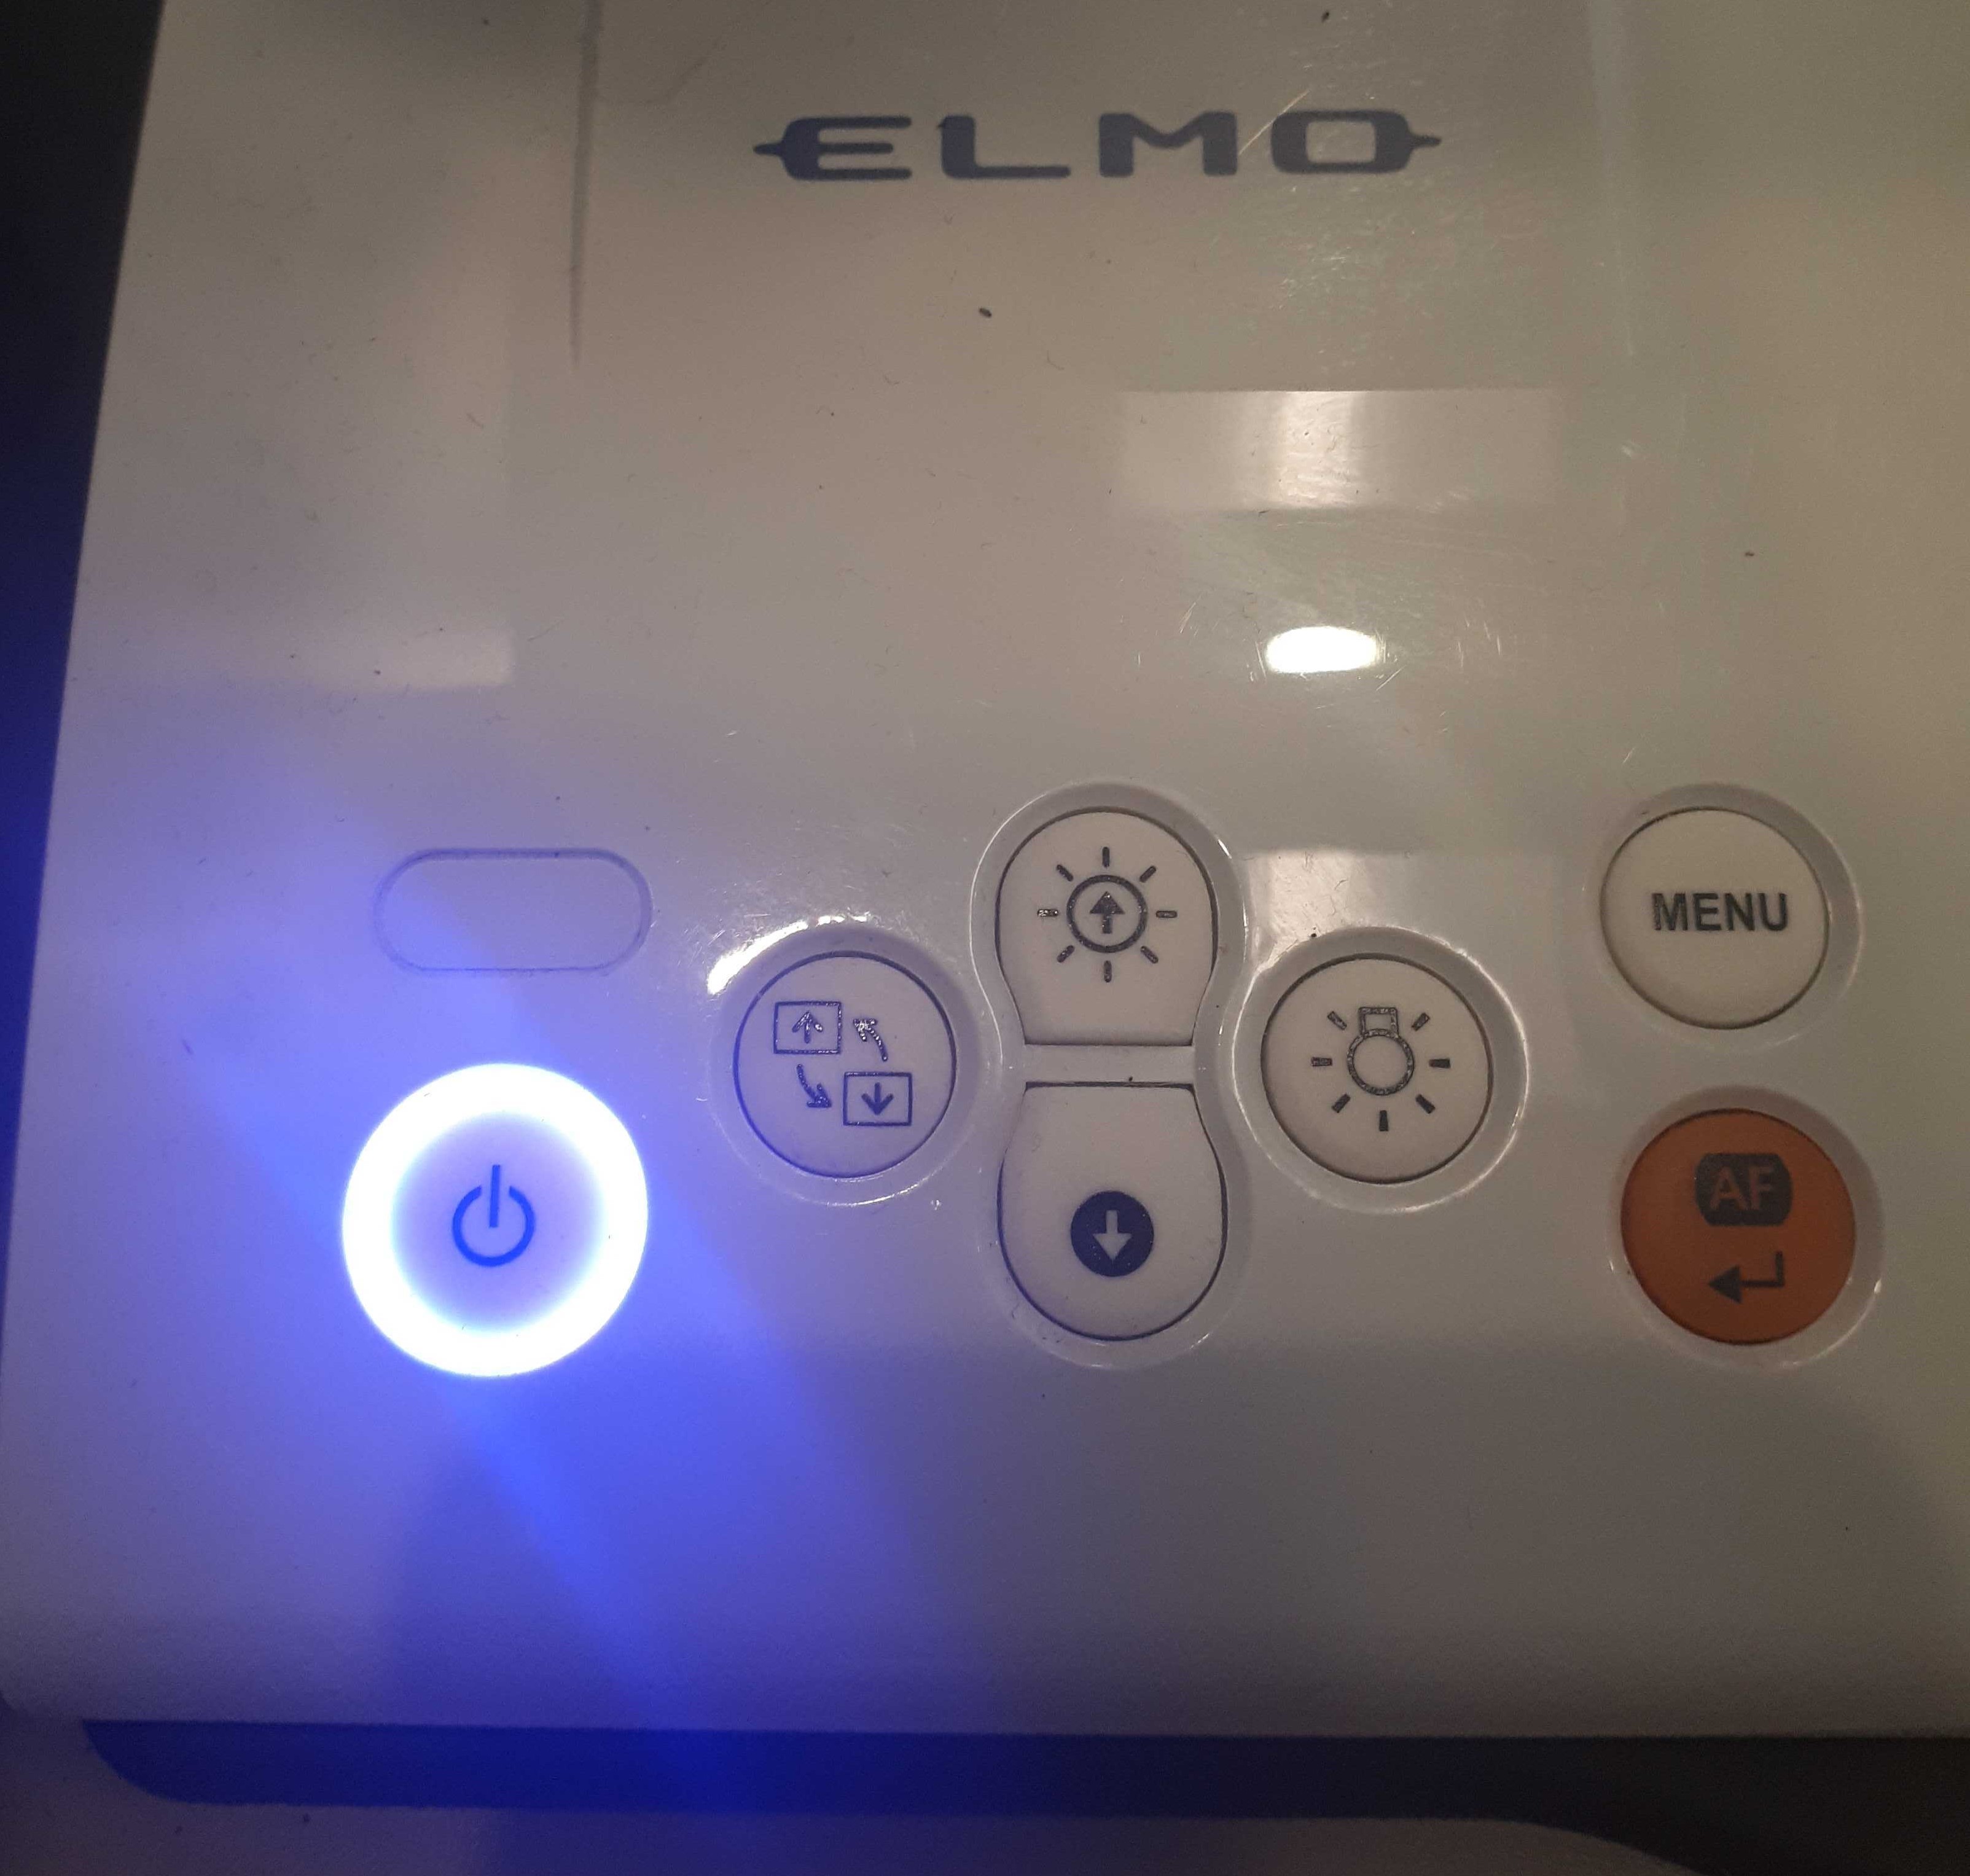
Step 1:
Turn the Doc Cam on
You will need to turn the Doc Cam on by pressing the power button on the Doc Cam as well as selecting the "Doc Cam" input on the Crestron system. You may do so before or after you have placed the desired document underneath the camera.
<! End of Step>
<! Step 1 starts here: copy and paste this code below for each step of the tutorial>
Is it not bright enough? Is it too bright?
Any adjustments to the brightness will be found on the Doc Cam. You may press the top button to make it brighter and the bottom button to make it darker.
<! End of Step>
<! Step 1 starts here: copy and paste this code below for each step of the tutorial>
Looking to zoom in or out?
The zoom option will be found on top of the camera itself. You may turn the black knob towards you in order to zoom in and away from you in order to zoom out.

<! End of Step>
<! Step 1 starts here: copy and paste this code below for each step of the tutorial>
You may start/continue with your presentation!
Once the adjustments were changed to your liking you may begin showcasing the document.
<! End of Step>
<! Step 1 starts here: copy and paste this code below for each step of the tutorial>
Step 2:
Remember to shut down both screens once you are finished with your presentation
Or, press on any other input if you no longer want to use the Doc cam.

<! End of Step>
<! Step 1 starts here: copy and paste this code below for each step of the tutorial>
Step 3:
Shut down the Doc Cam as well

<! End of Step>