


The Library Learning Commons at Bishop’s University is designed to explore the rich intersections between learning, space, and technology. Originally built in 1959 to house the University’s library and archives collection and extensively renovated in 2017/2018, the new Library Learning Commons is at the centre of campus life at Bishop’s. Situated on the west side of the University’s famous “Quad”, the building is a hive of activity throughout the academic year as students, faculty, staff and the community take advantage of all the services on offer. We warmly invite you to explore the newly renovated space.
We offer a myriad of IT services and technologies within the Library Learning Commons and strongly encourage anyone visiting the newly renovated building to browse through the list of multimedia services and rooms to learn more about using the available technology.
Best use for...
Looking for the best room to suits a specific purpose? Select one of these options:
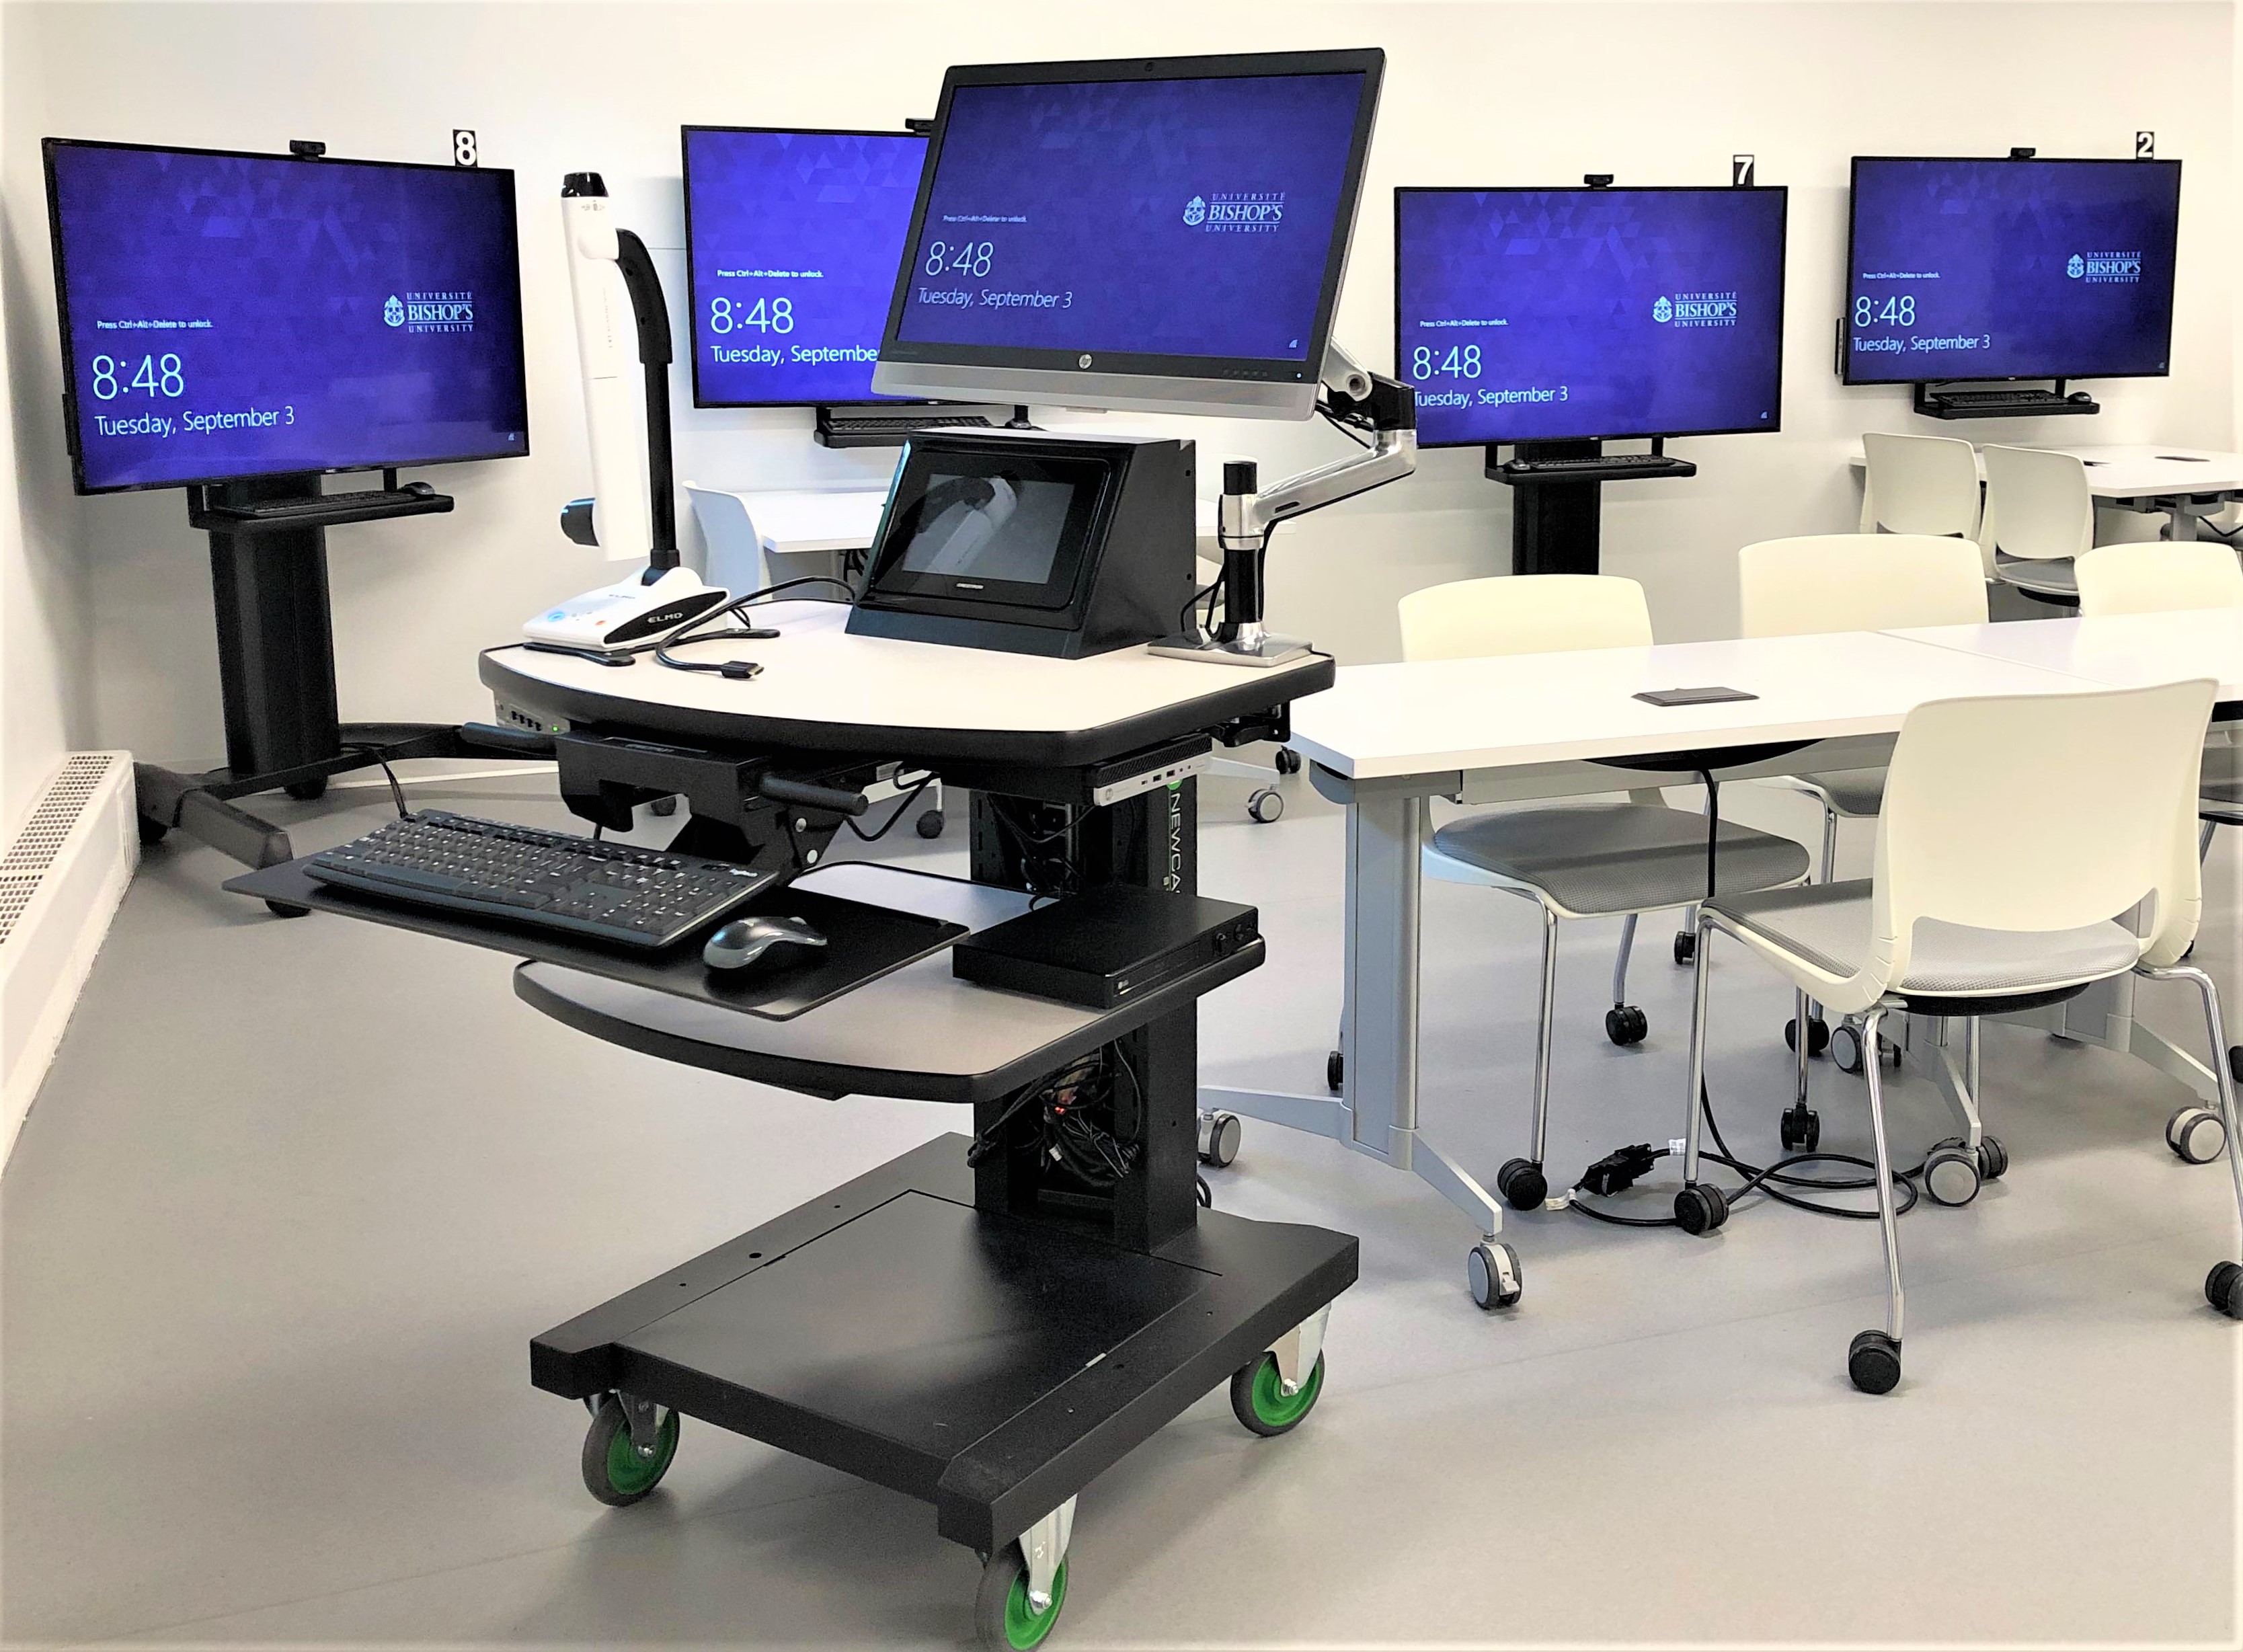
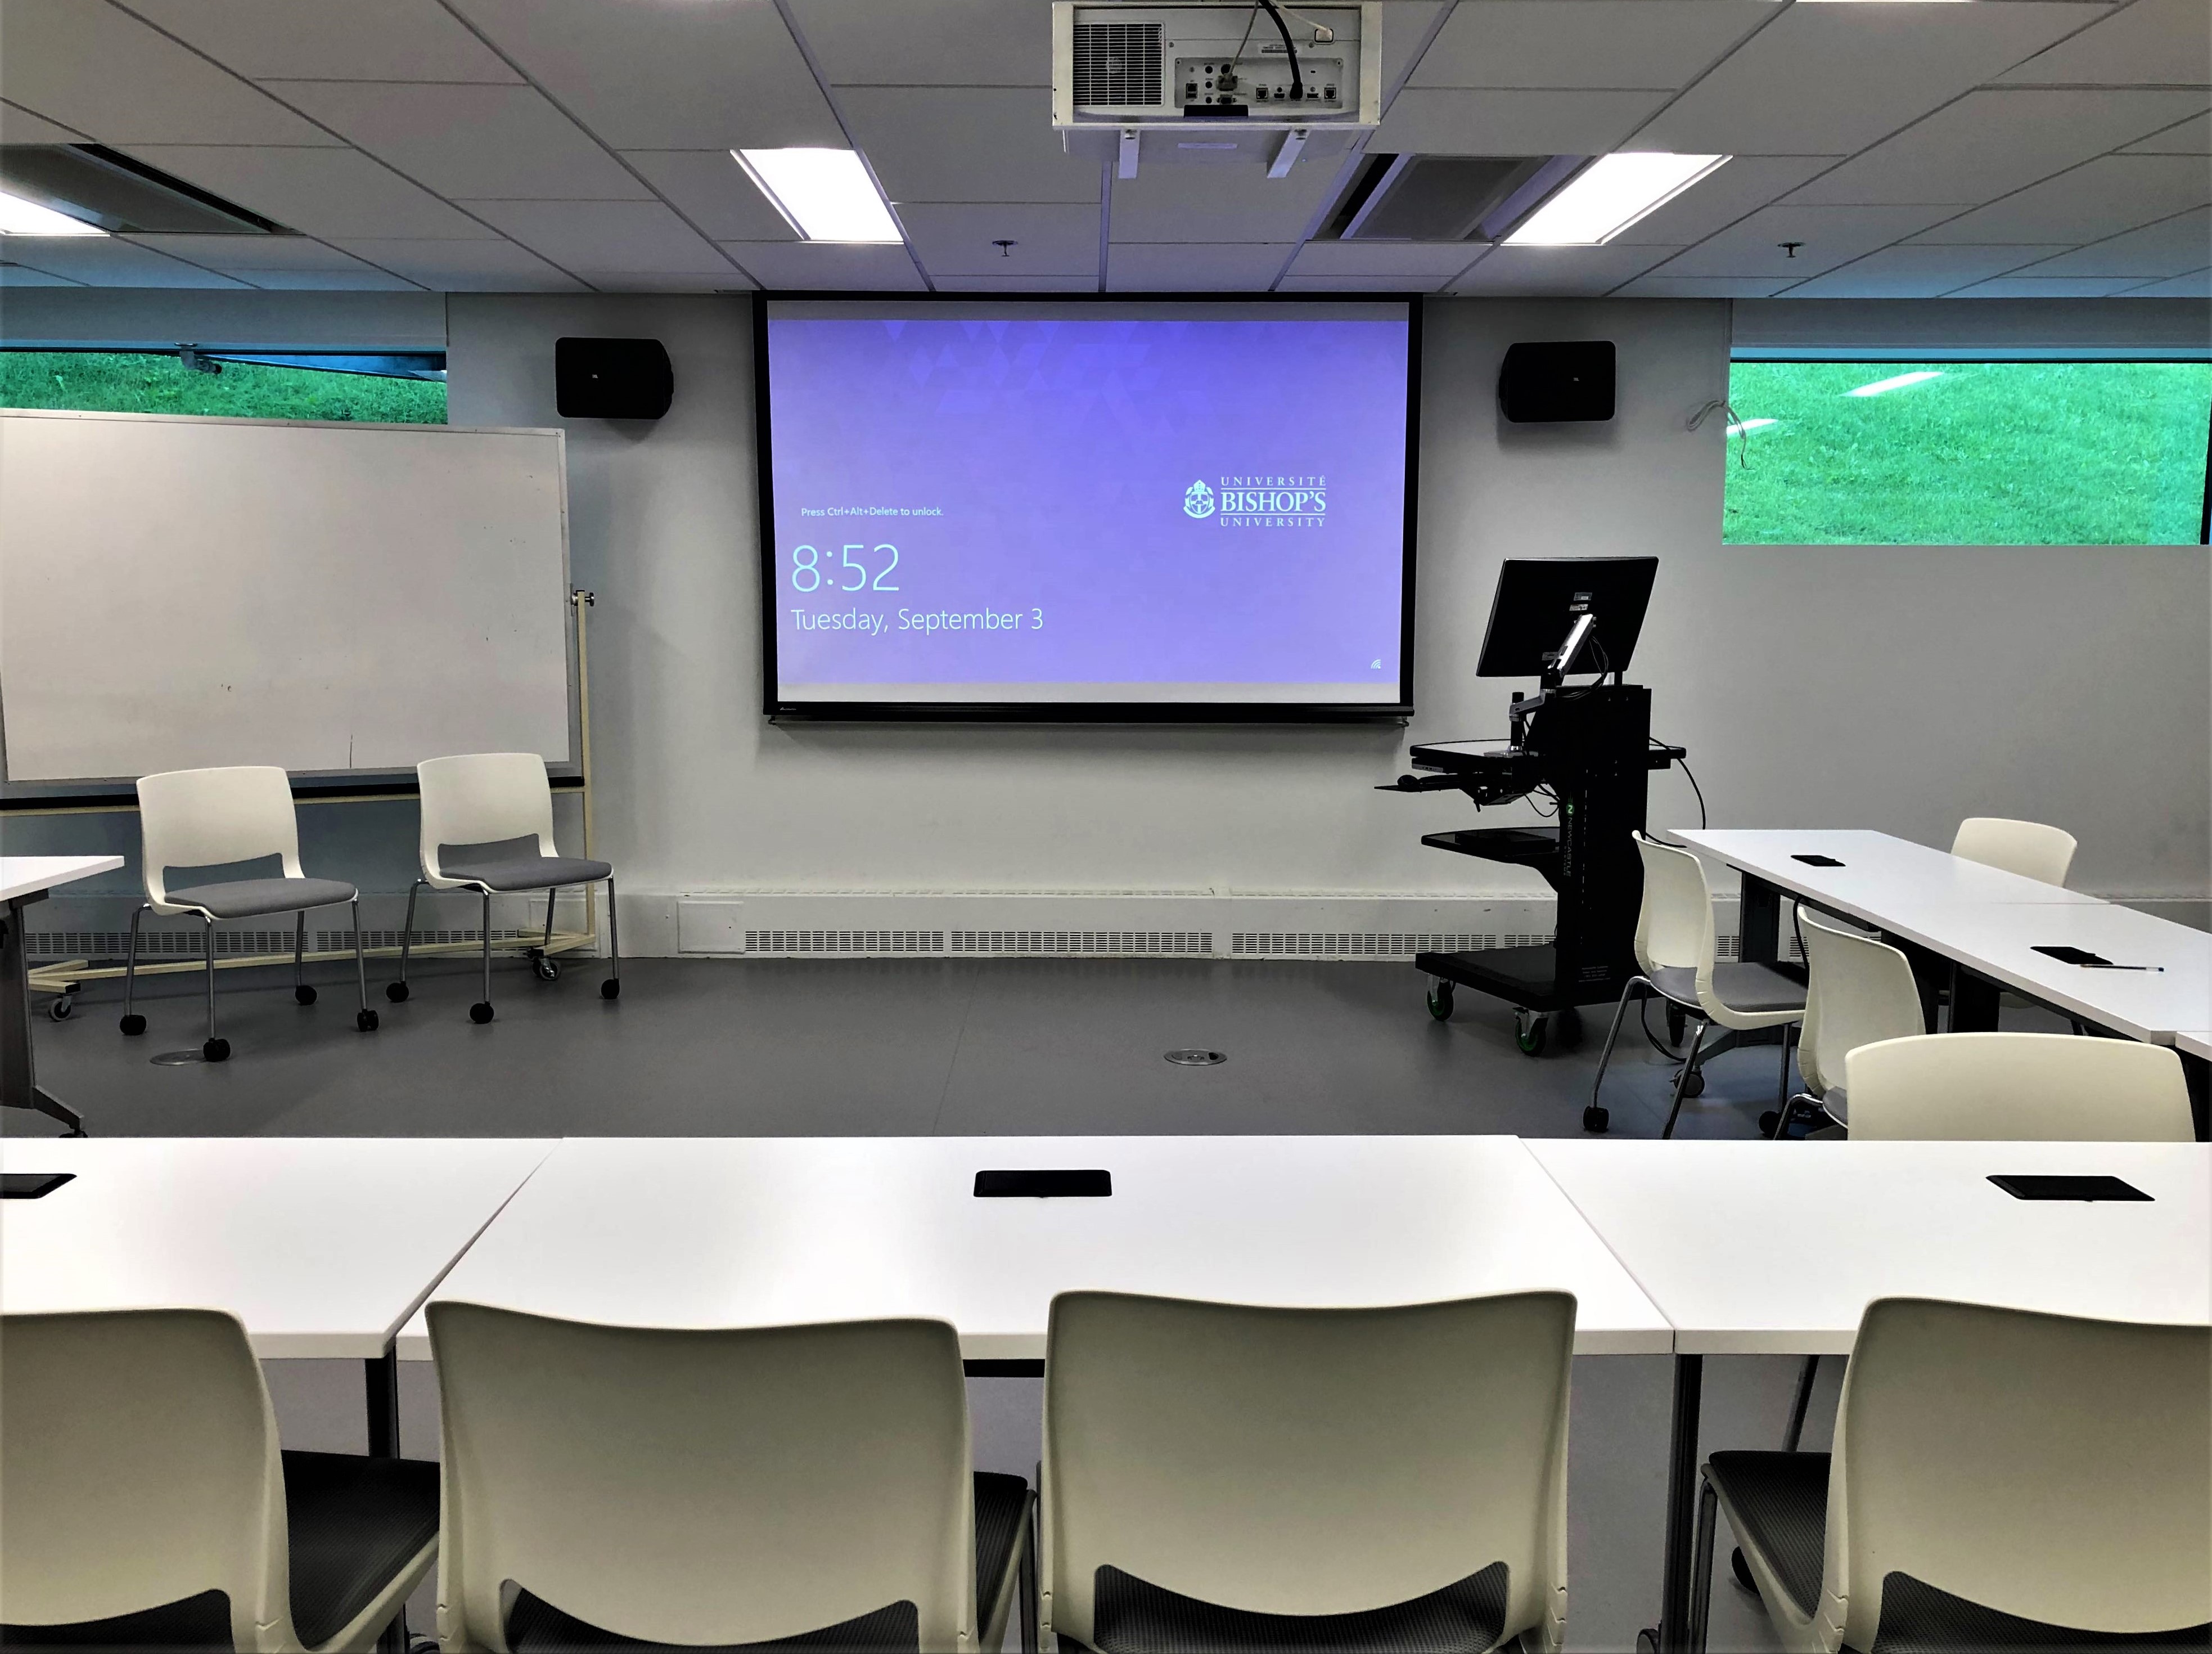
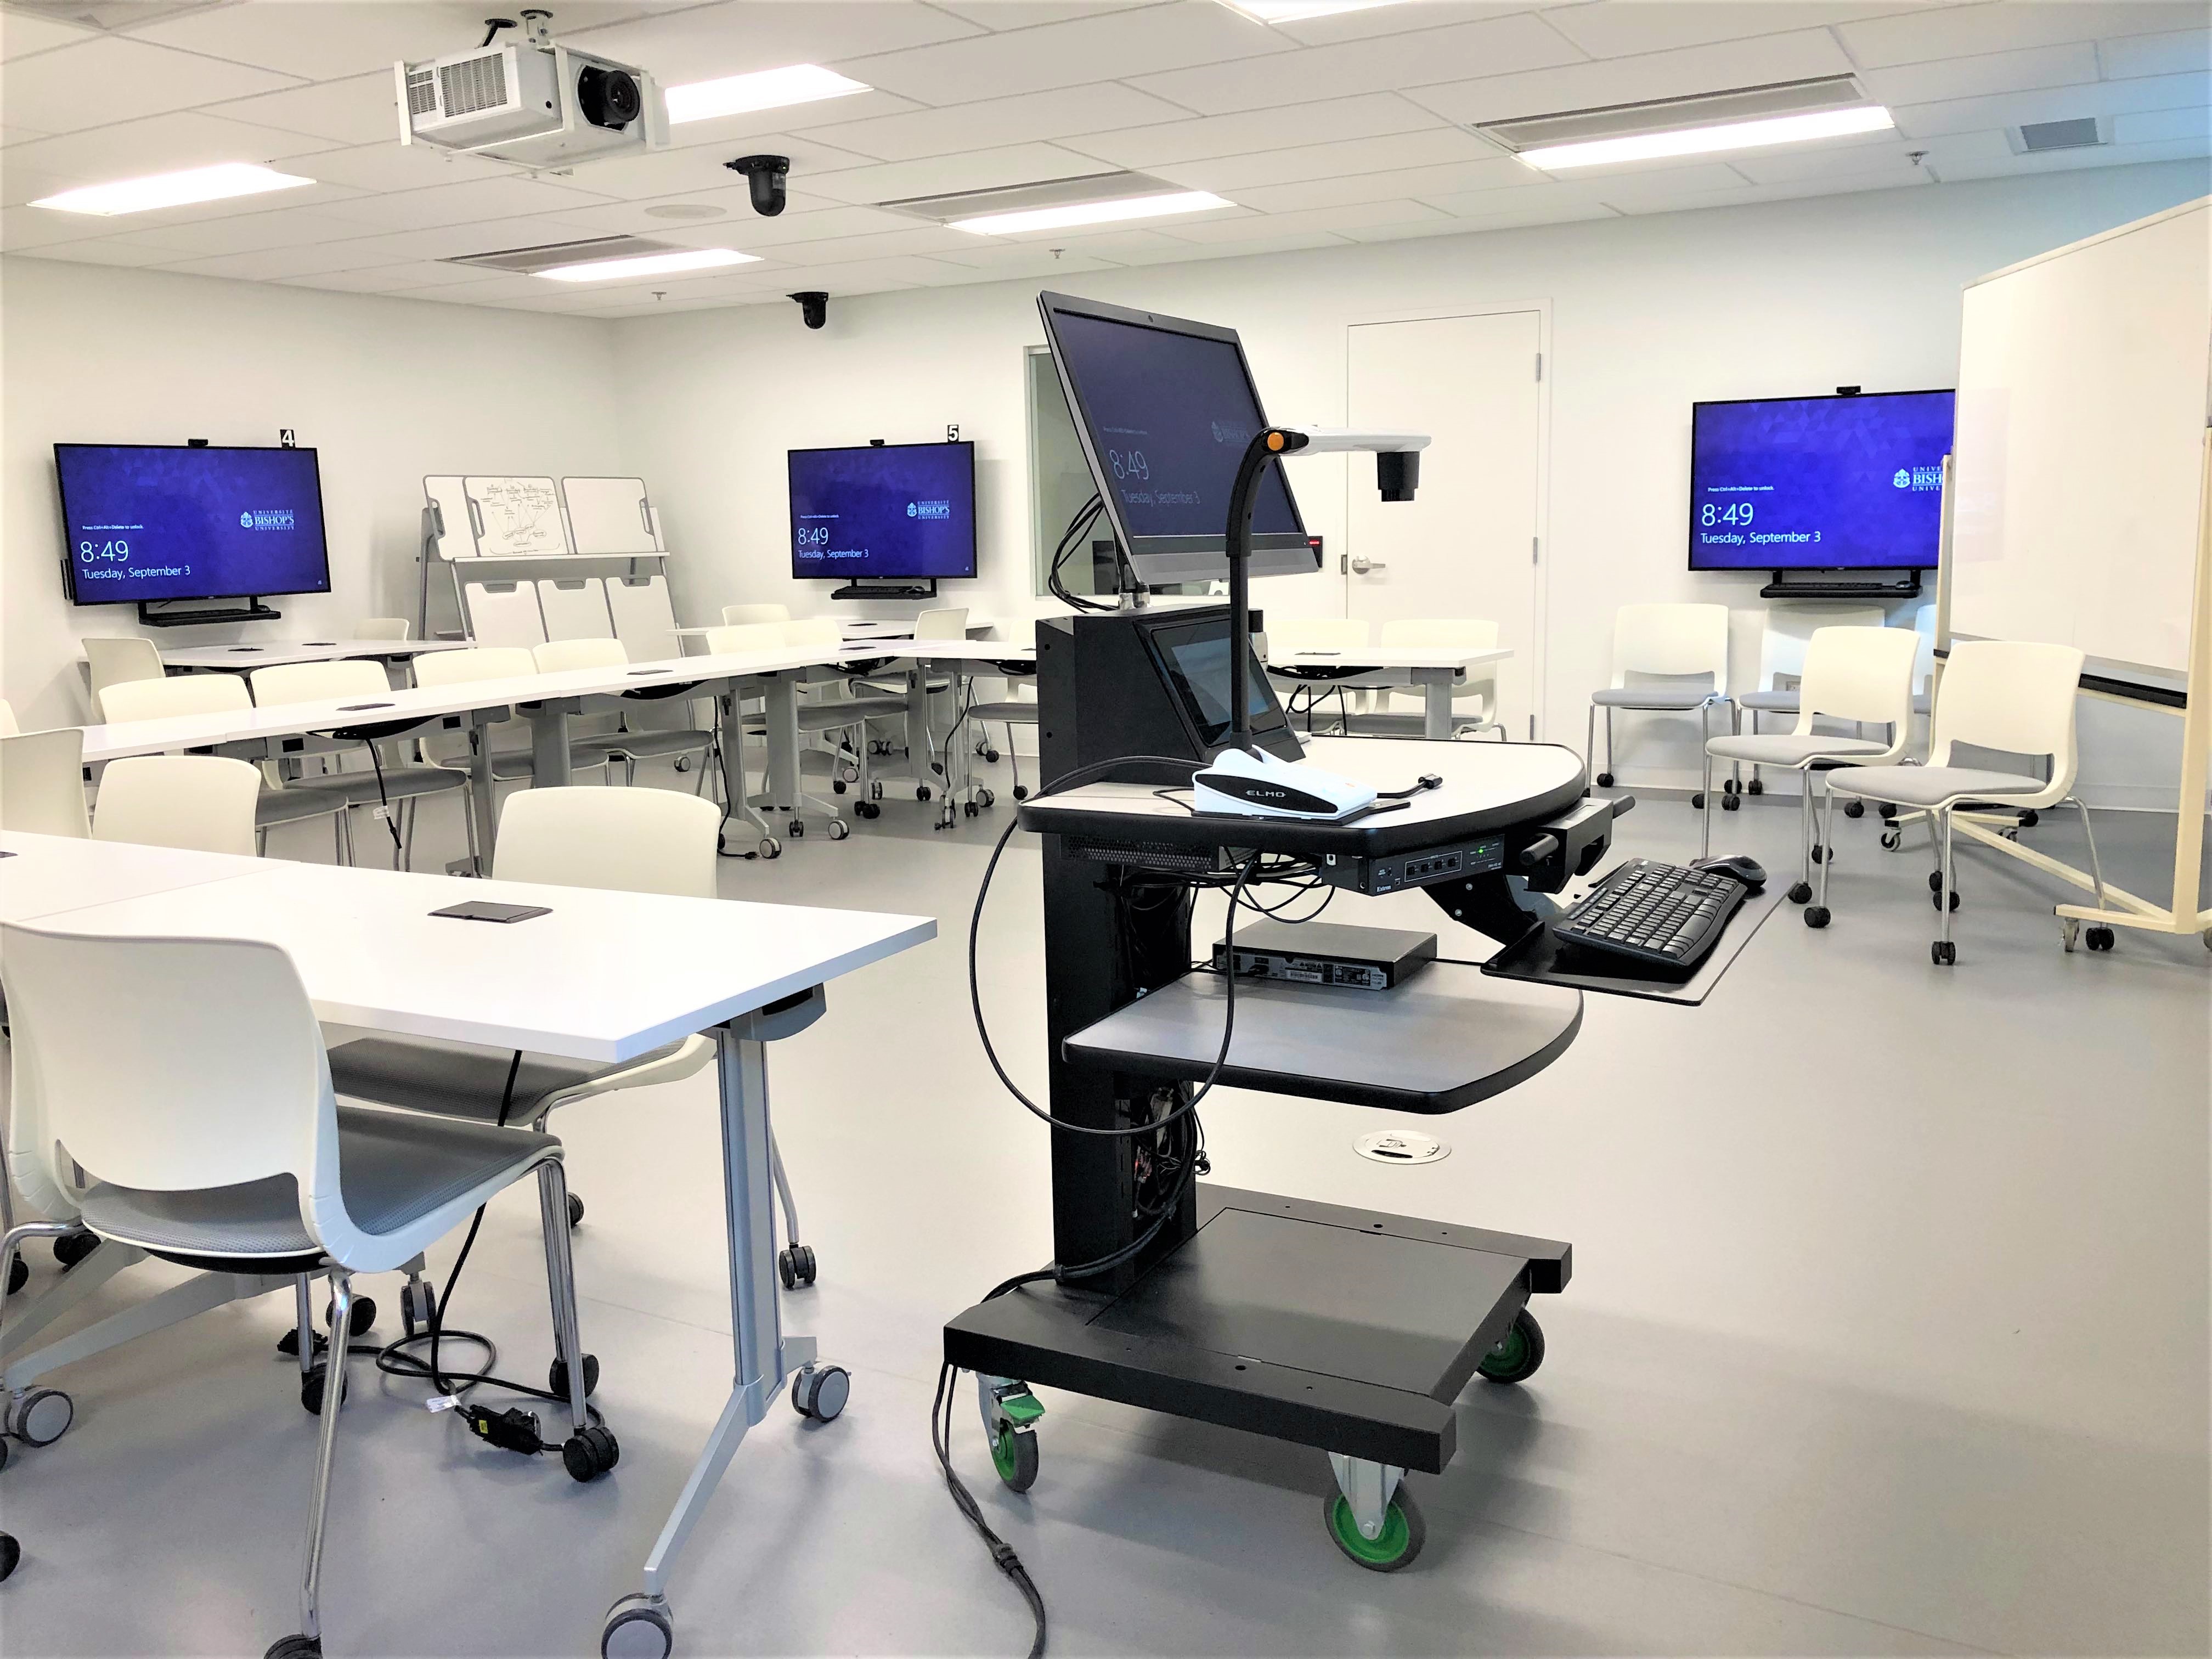
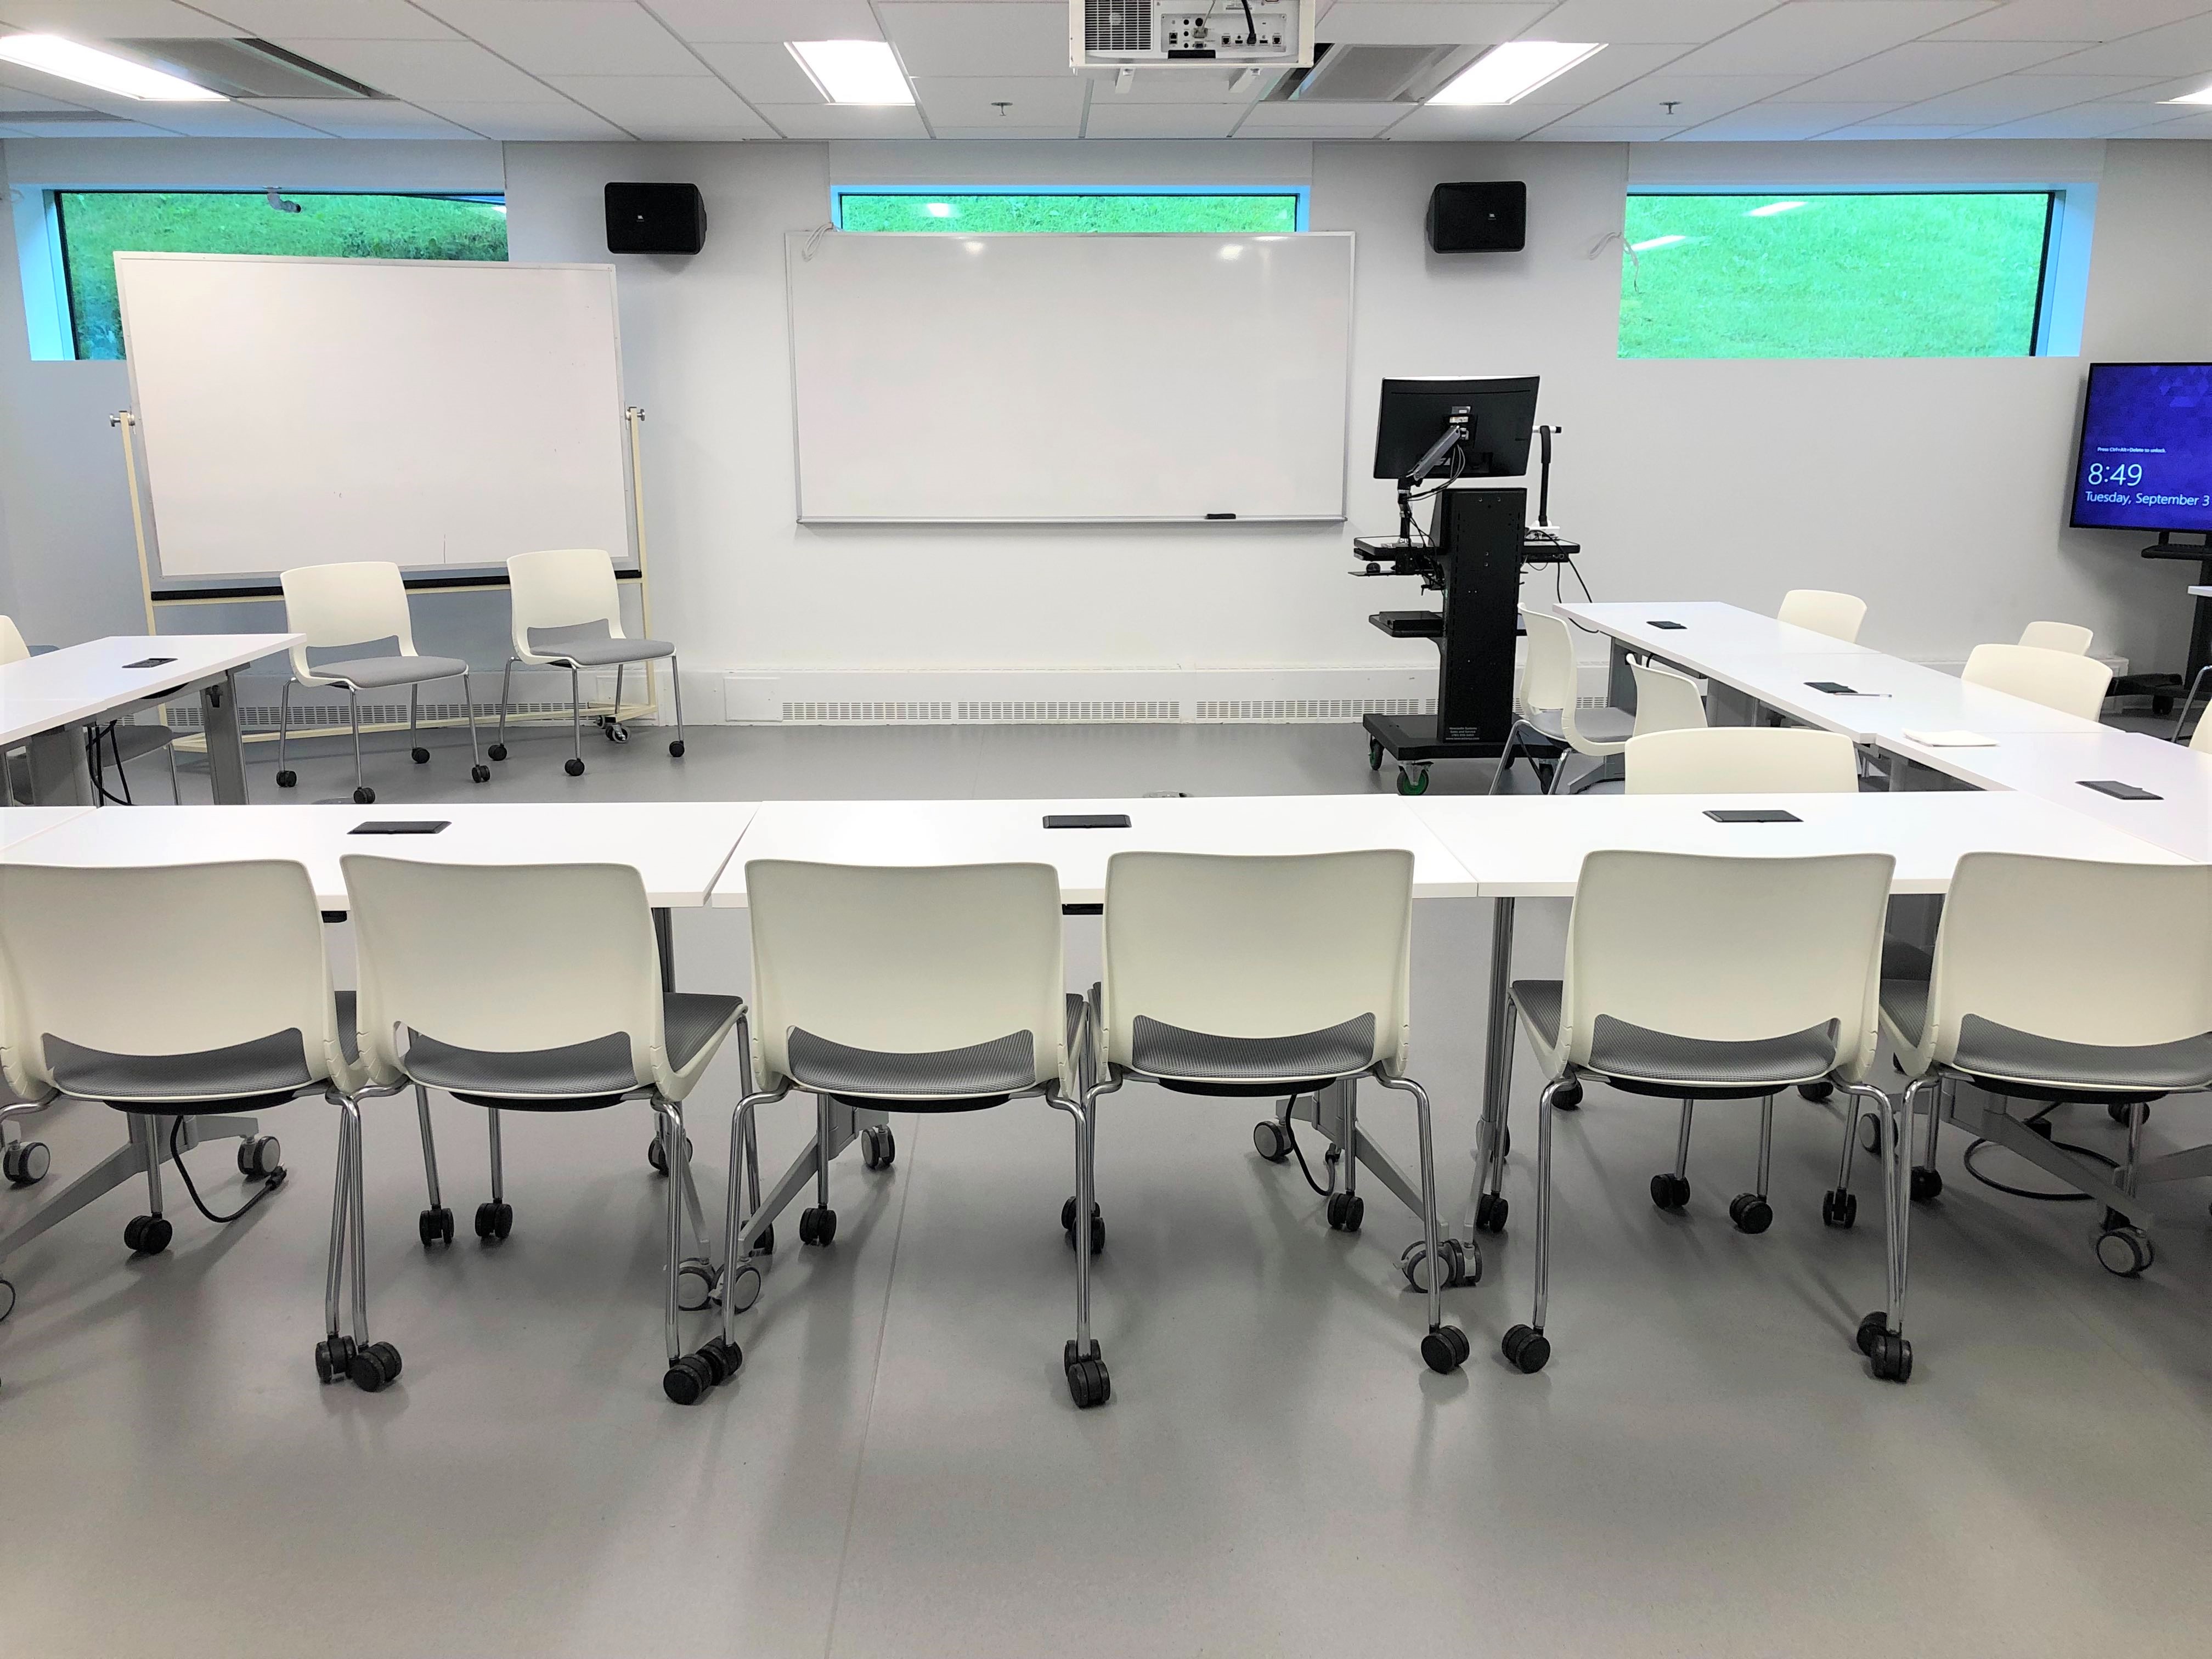
LLC 105 - Learning Lab
The learning lab is a flexible classroom located on the main floor of the Library Learning Commons.
COMING SOON: More information on how to use LLC105.
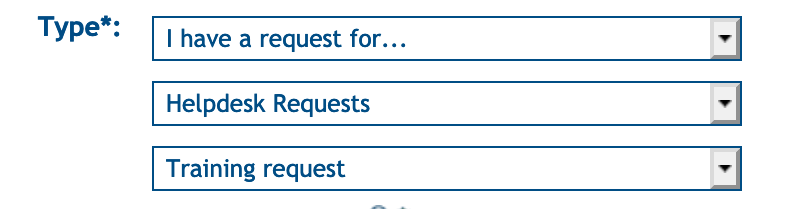
In the meantime, we will be happy to assist with any training request placed on the Octopus system.
A training session can also be requested at the IT Helpdesk
LLC 106 - The Sandbox
The sandbox is a flexible classroom located on the main floor of the Library Learning Commons.
COMING SOON: More information on how to use LLC106.
In the meantime, we will be happy to assist with any training request placed on the Octopus system.
A training session can also be requested at the IT Helpdesk
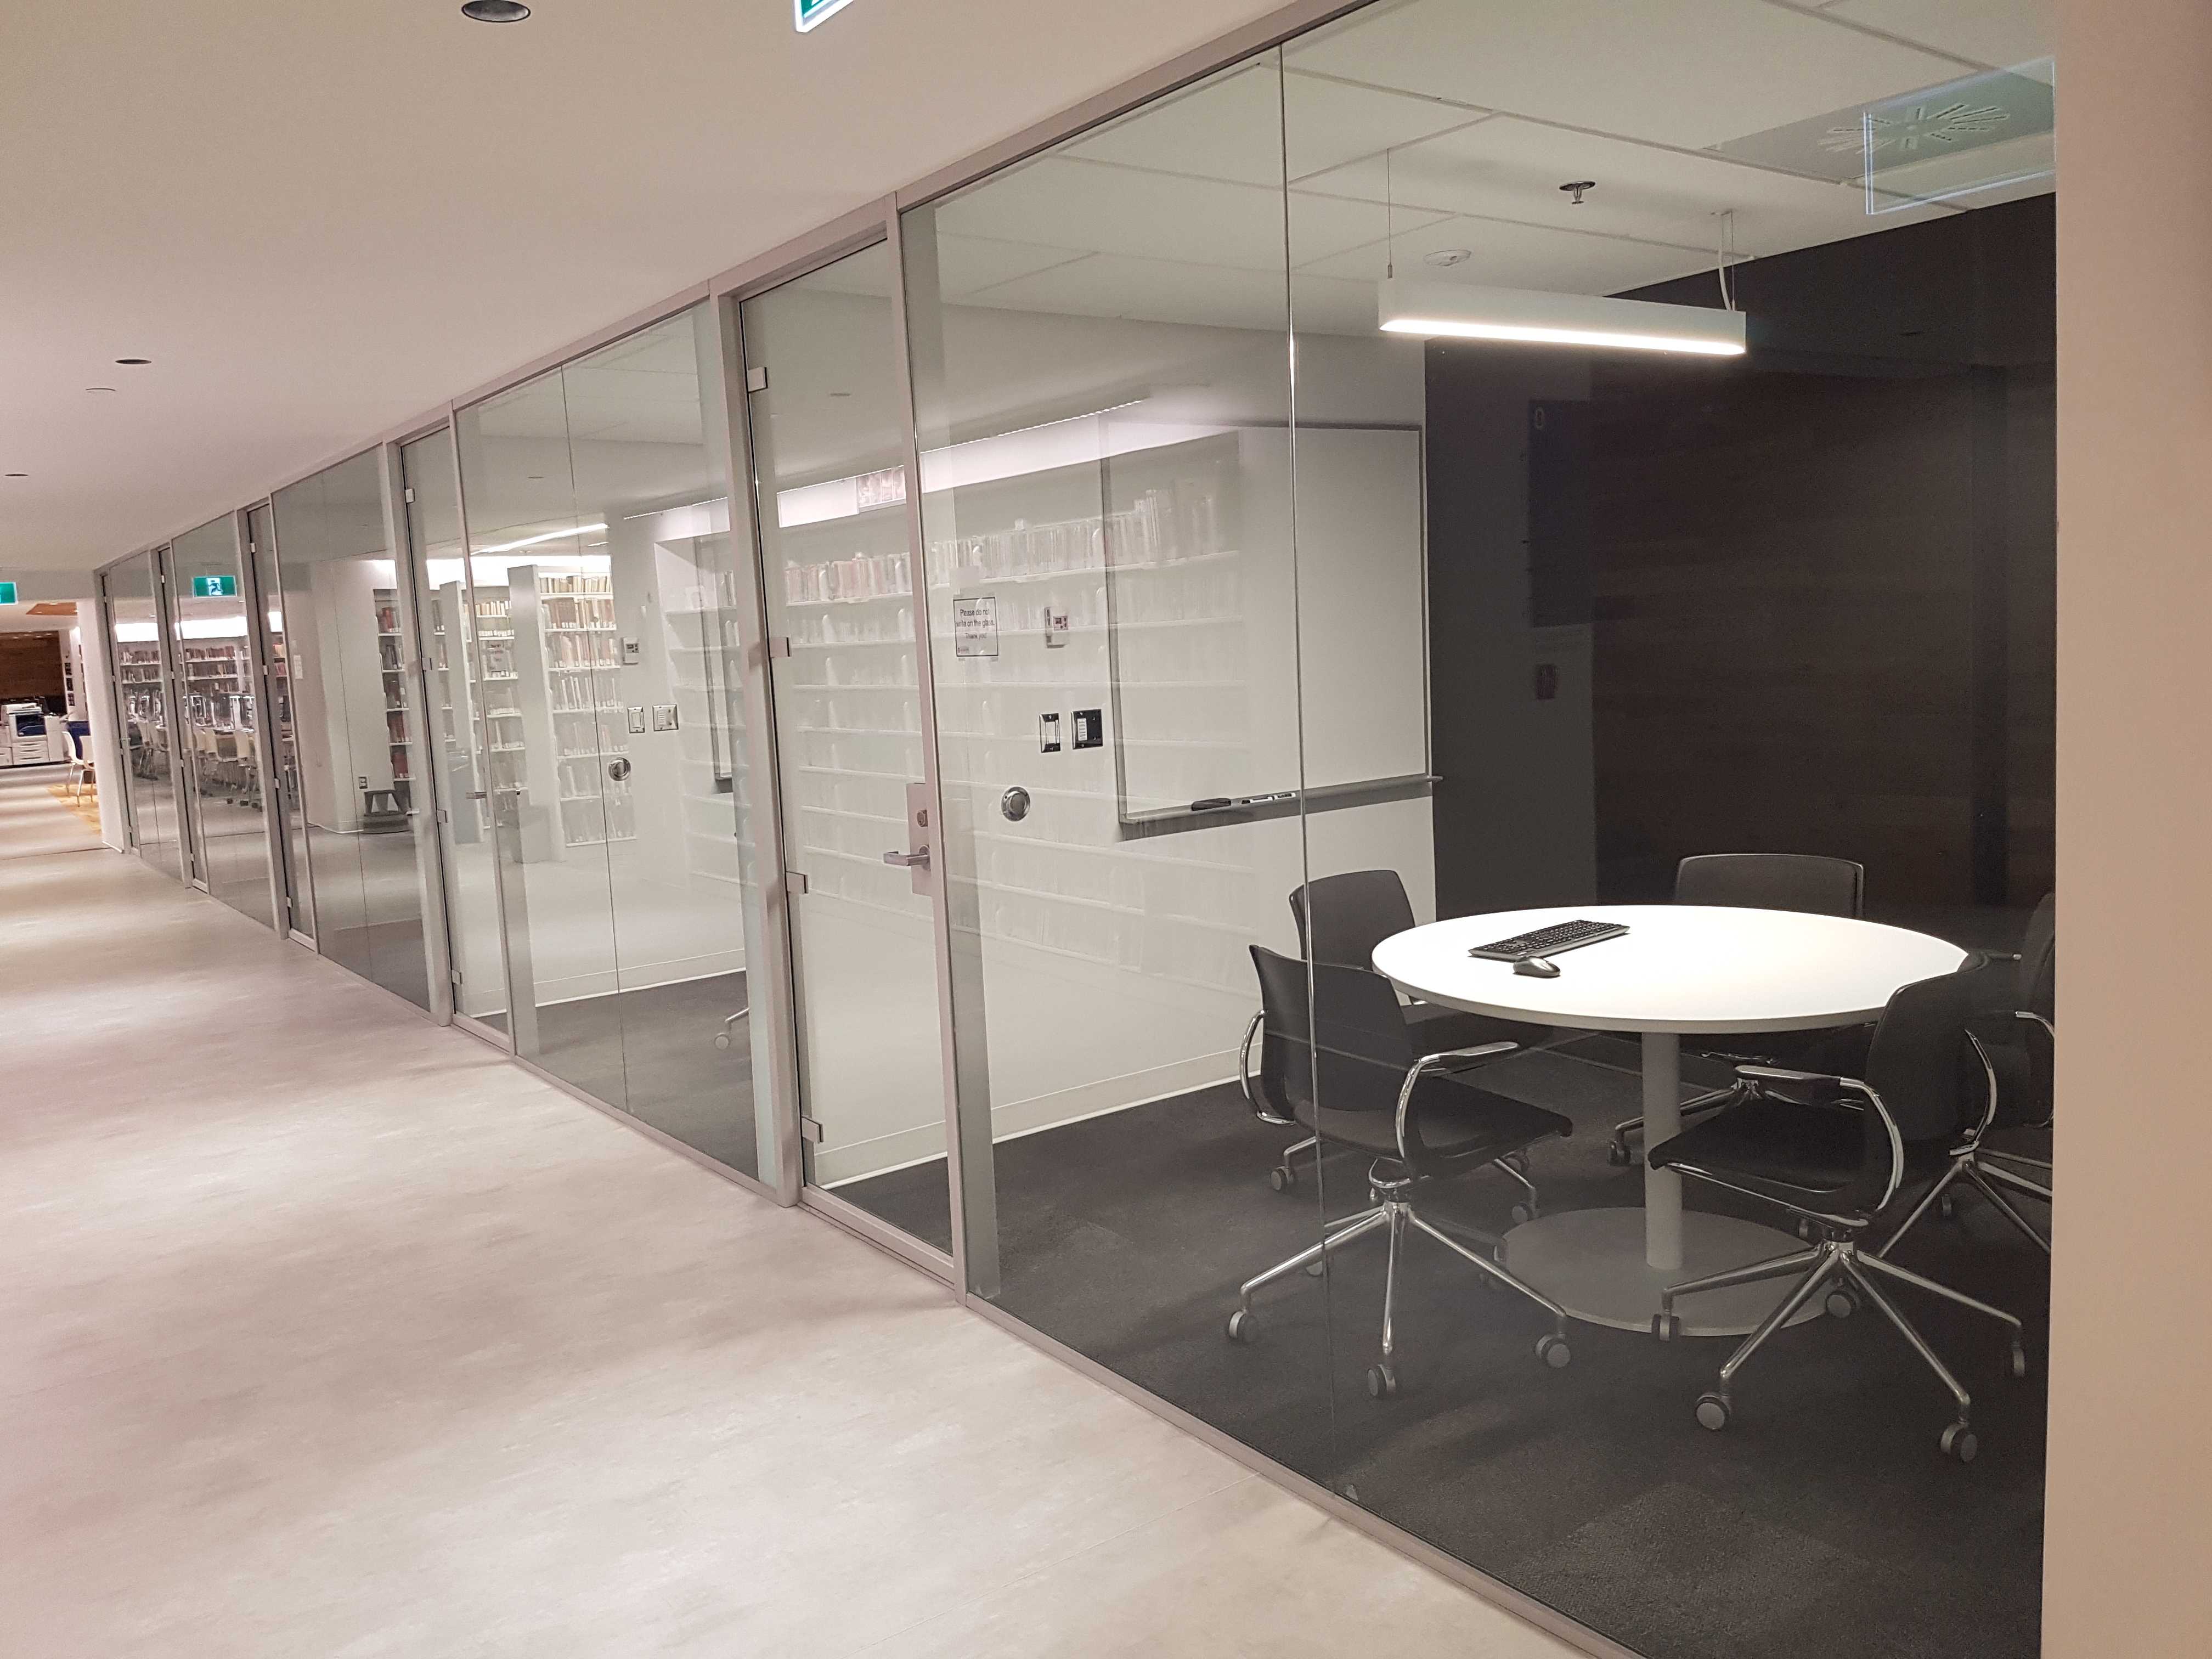
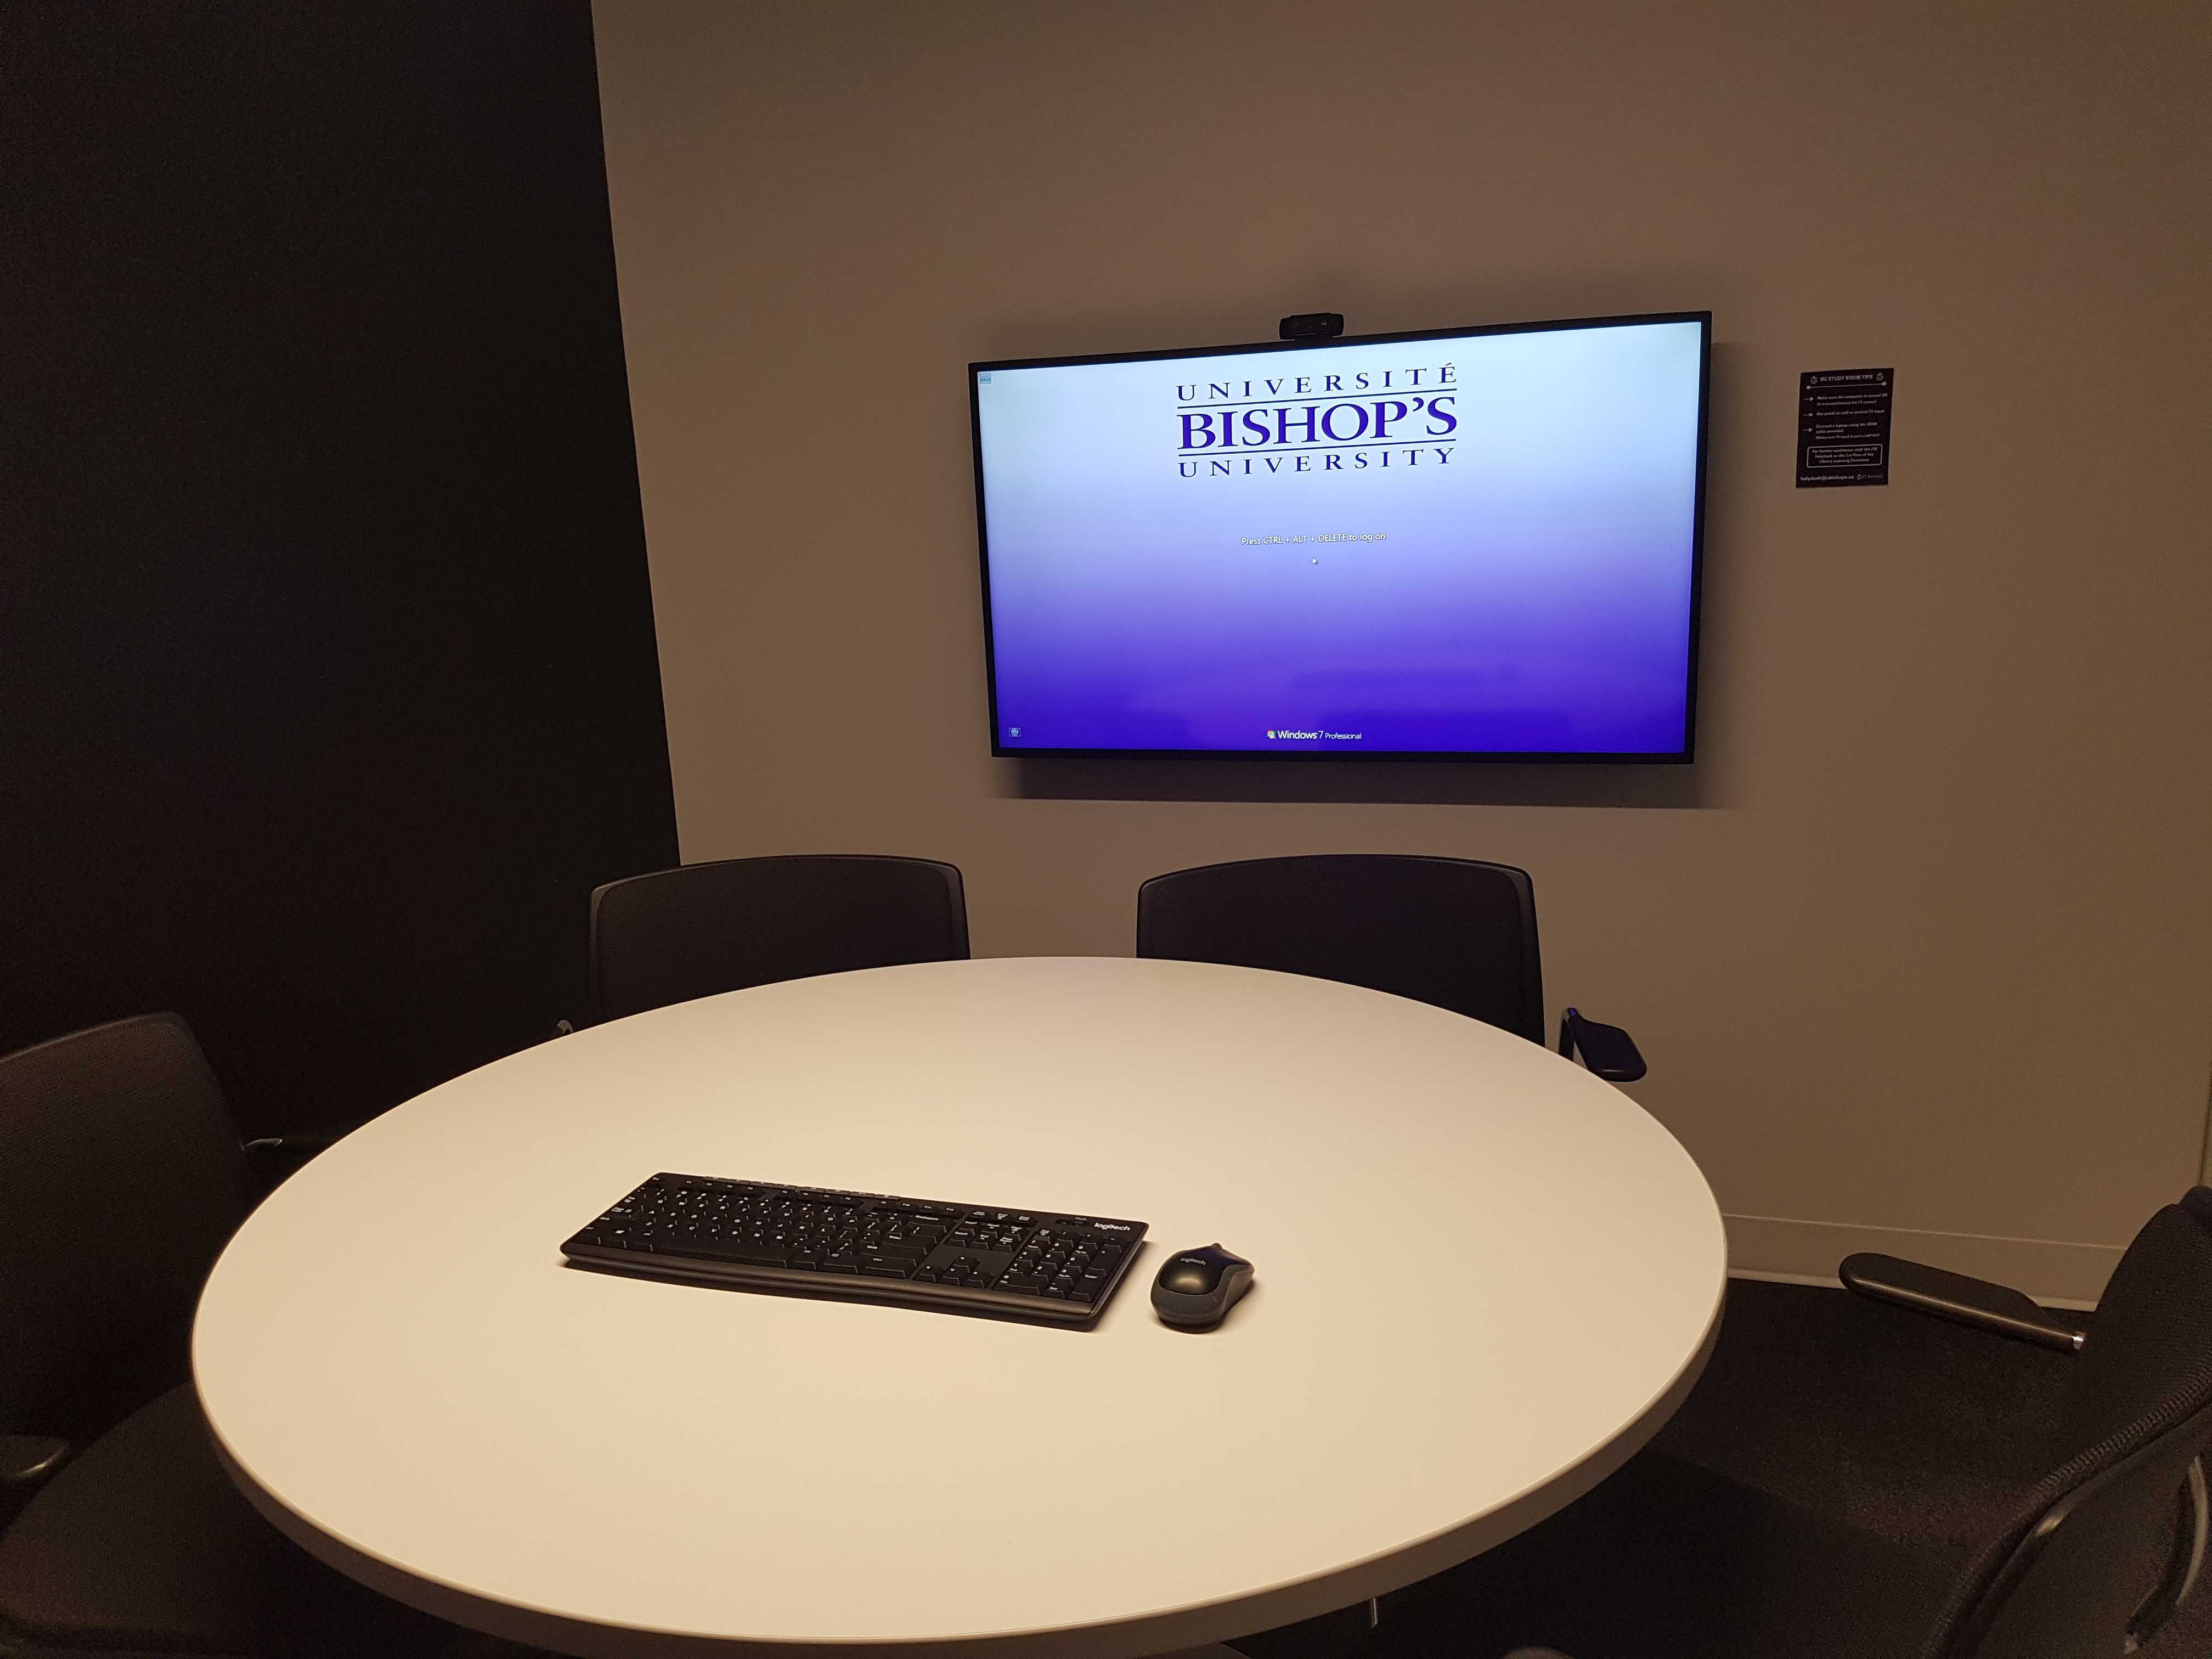
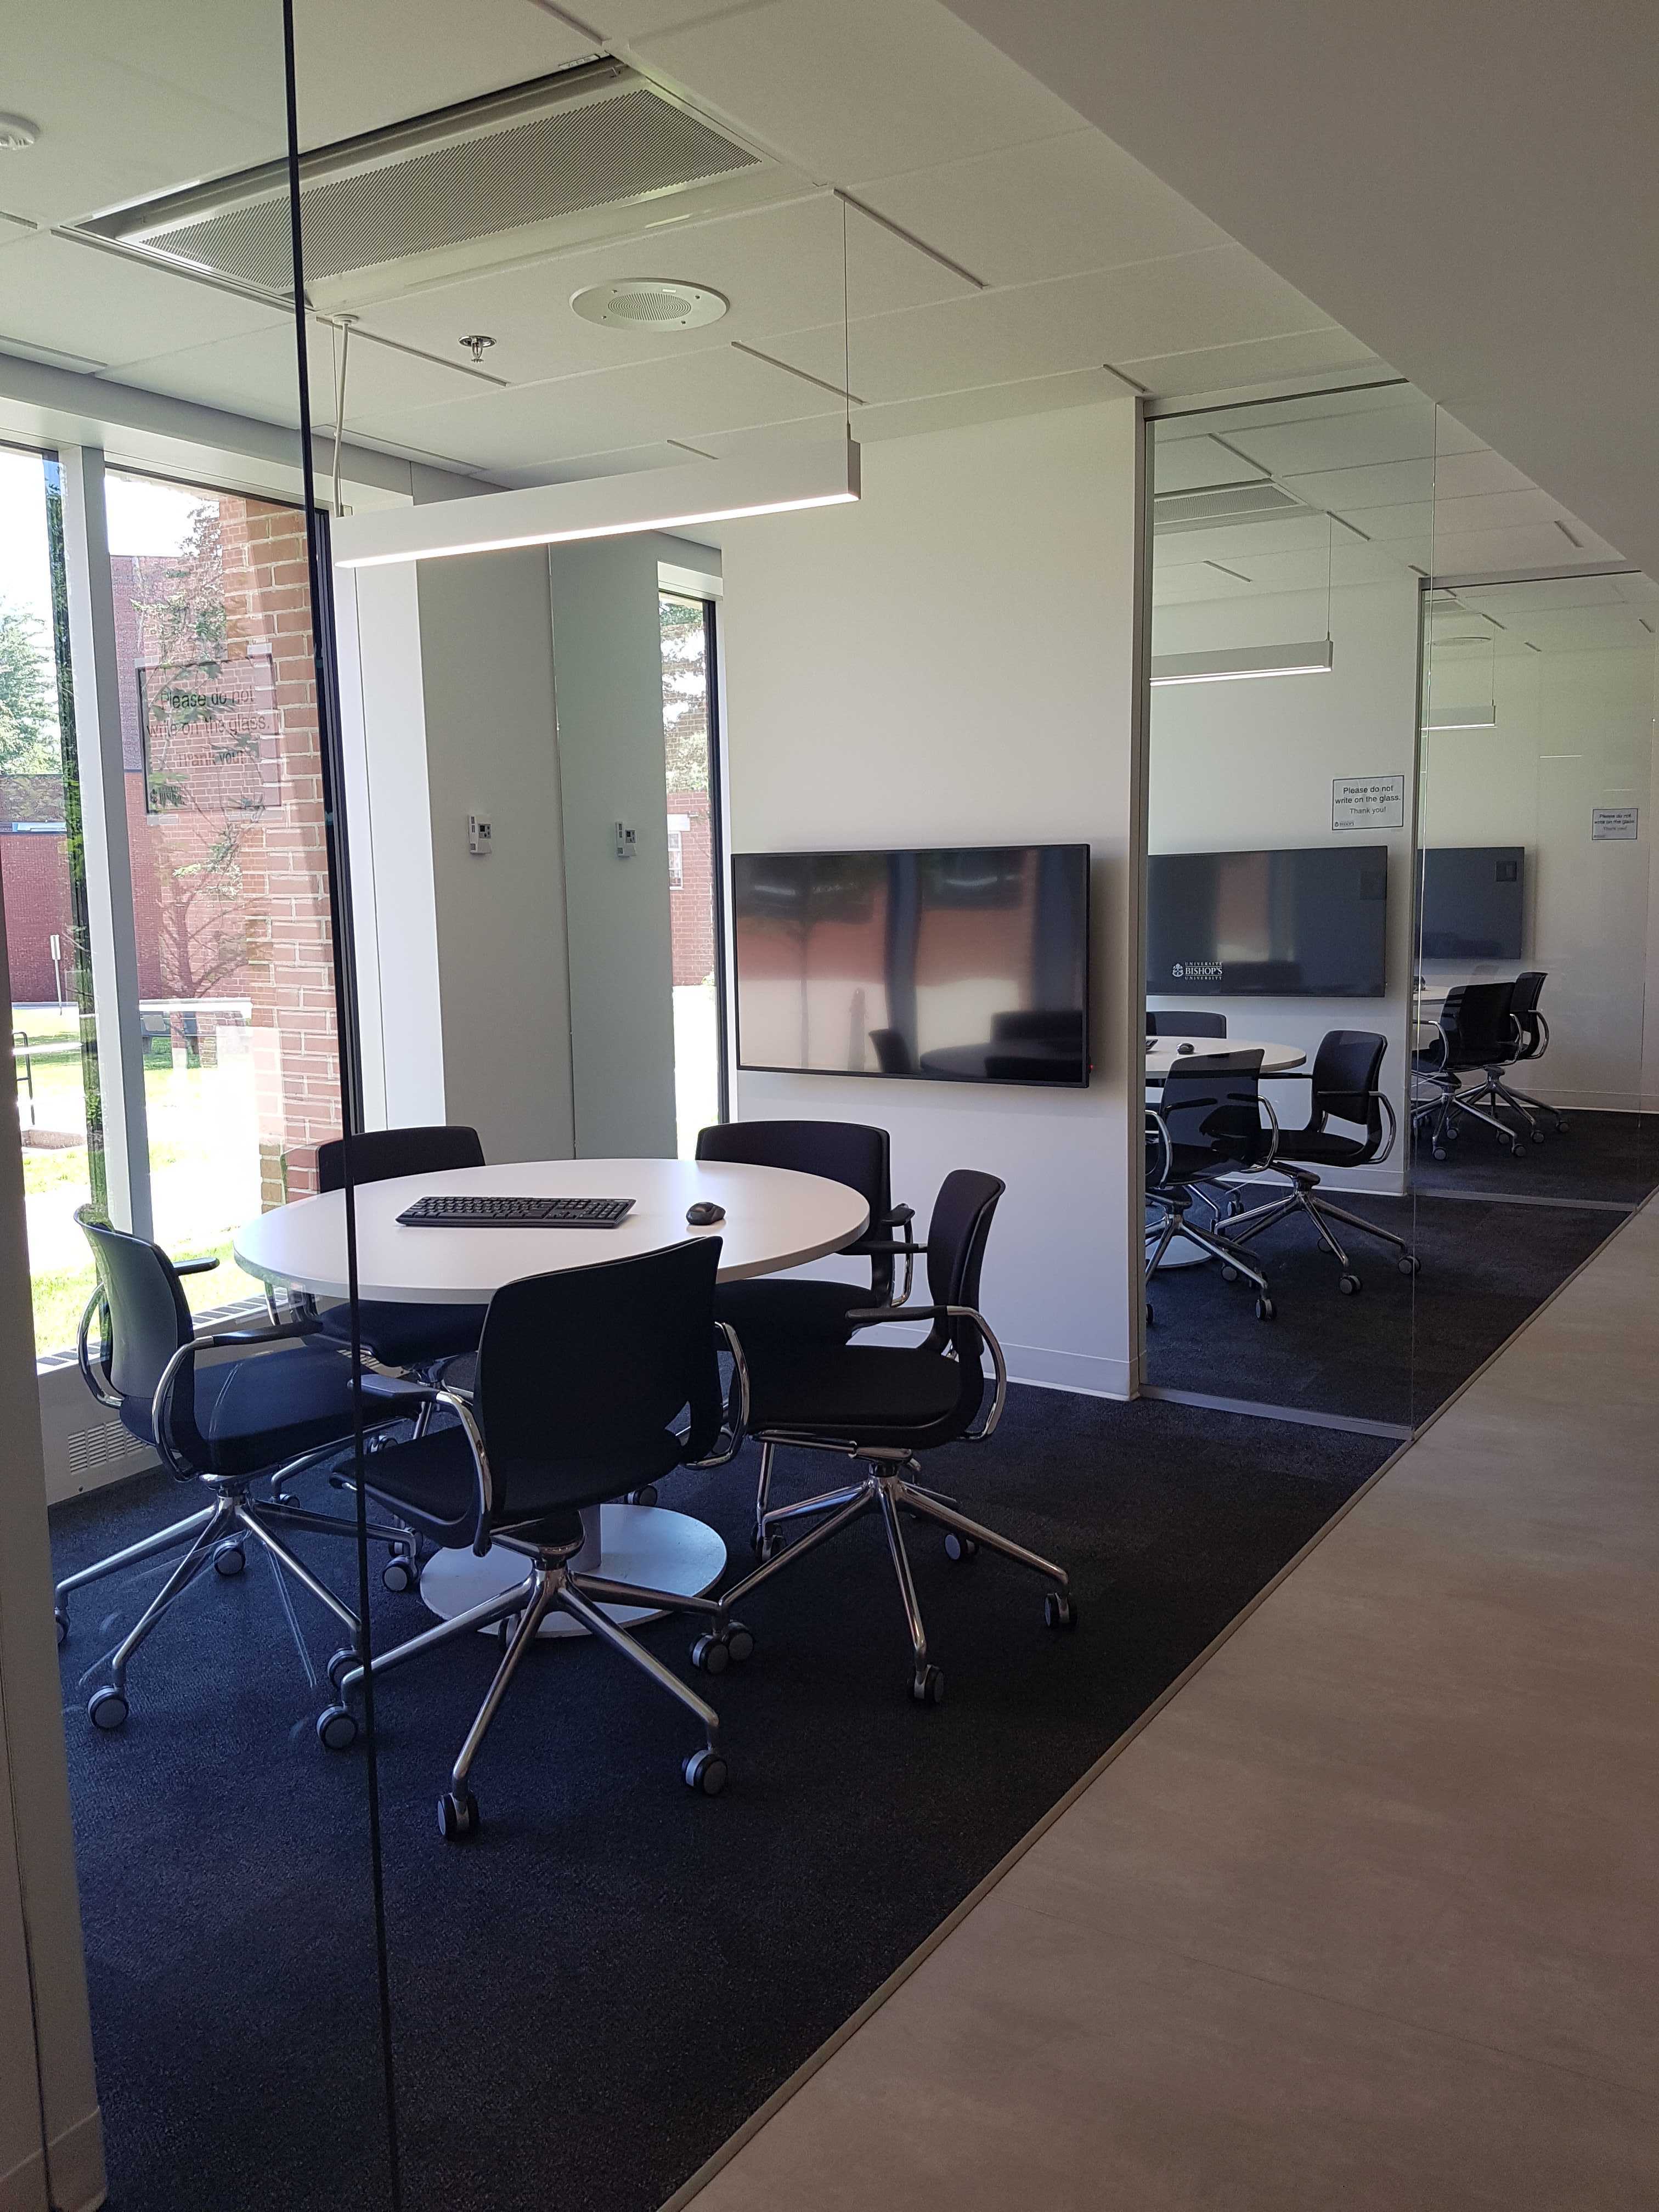
2. Study Rooms
The Library Learning Commons has 9 small study rooms and 6 large study rooms that are available for group study and work.
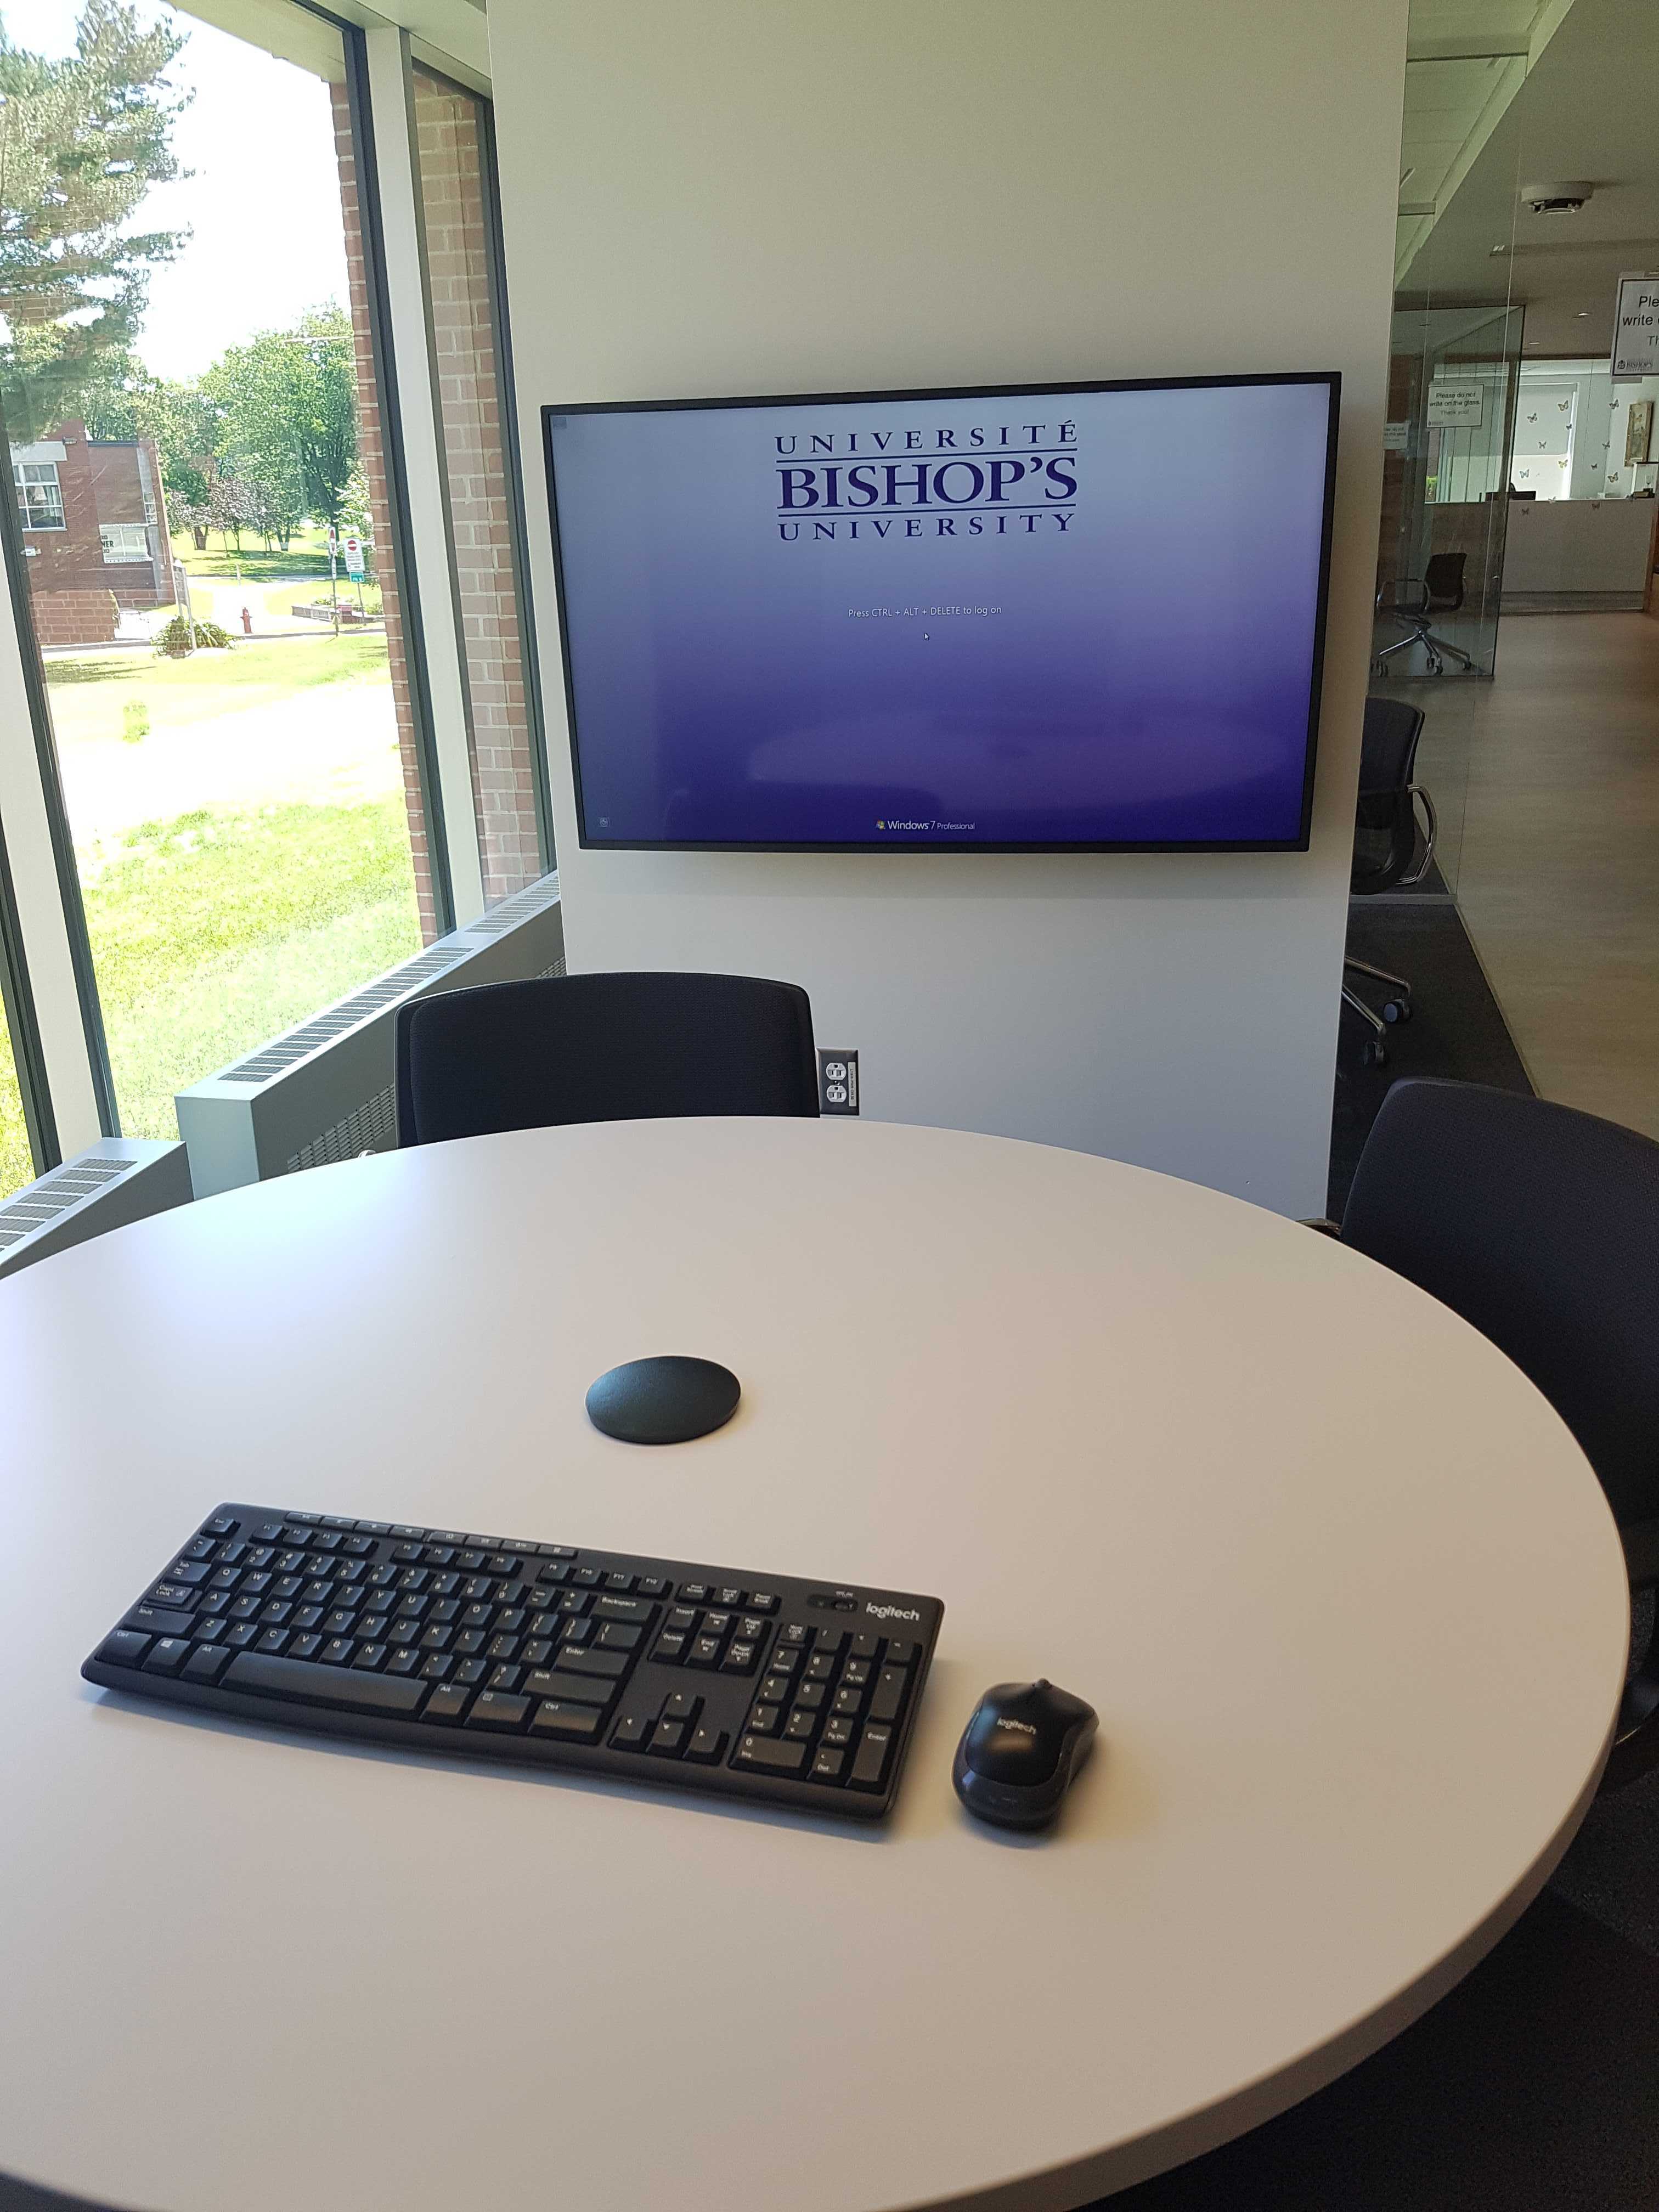
All study rooms, except for room 237, are equipped with a computer, a large screen, a wireless keyboard & mouse, and a webcam.
The study rooms can be booked 4 weeks in advance by Bishop's & Champlain's students, faculty, and staff members for a maximum of 2 hours per day per group. Users are require to present themselves with their ID card at the Circulation Desk to pick up the key for the room.
For any exceptions or special requests, please, speak with someone at the Library Services Desk.
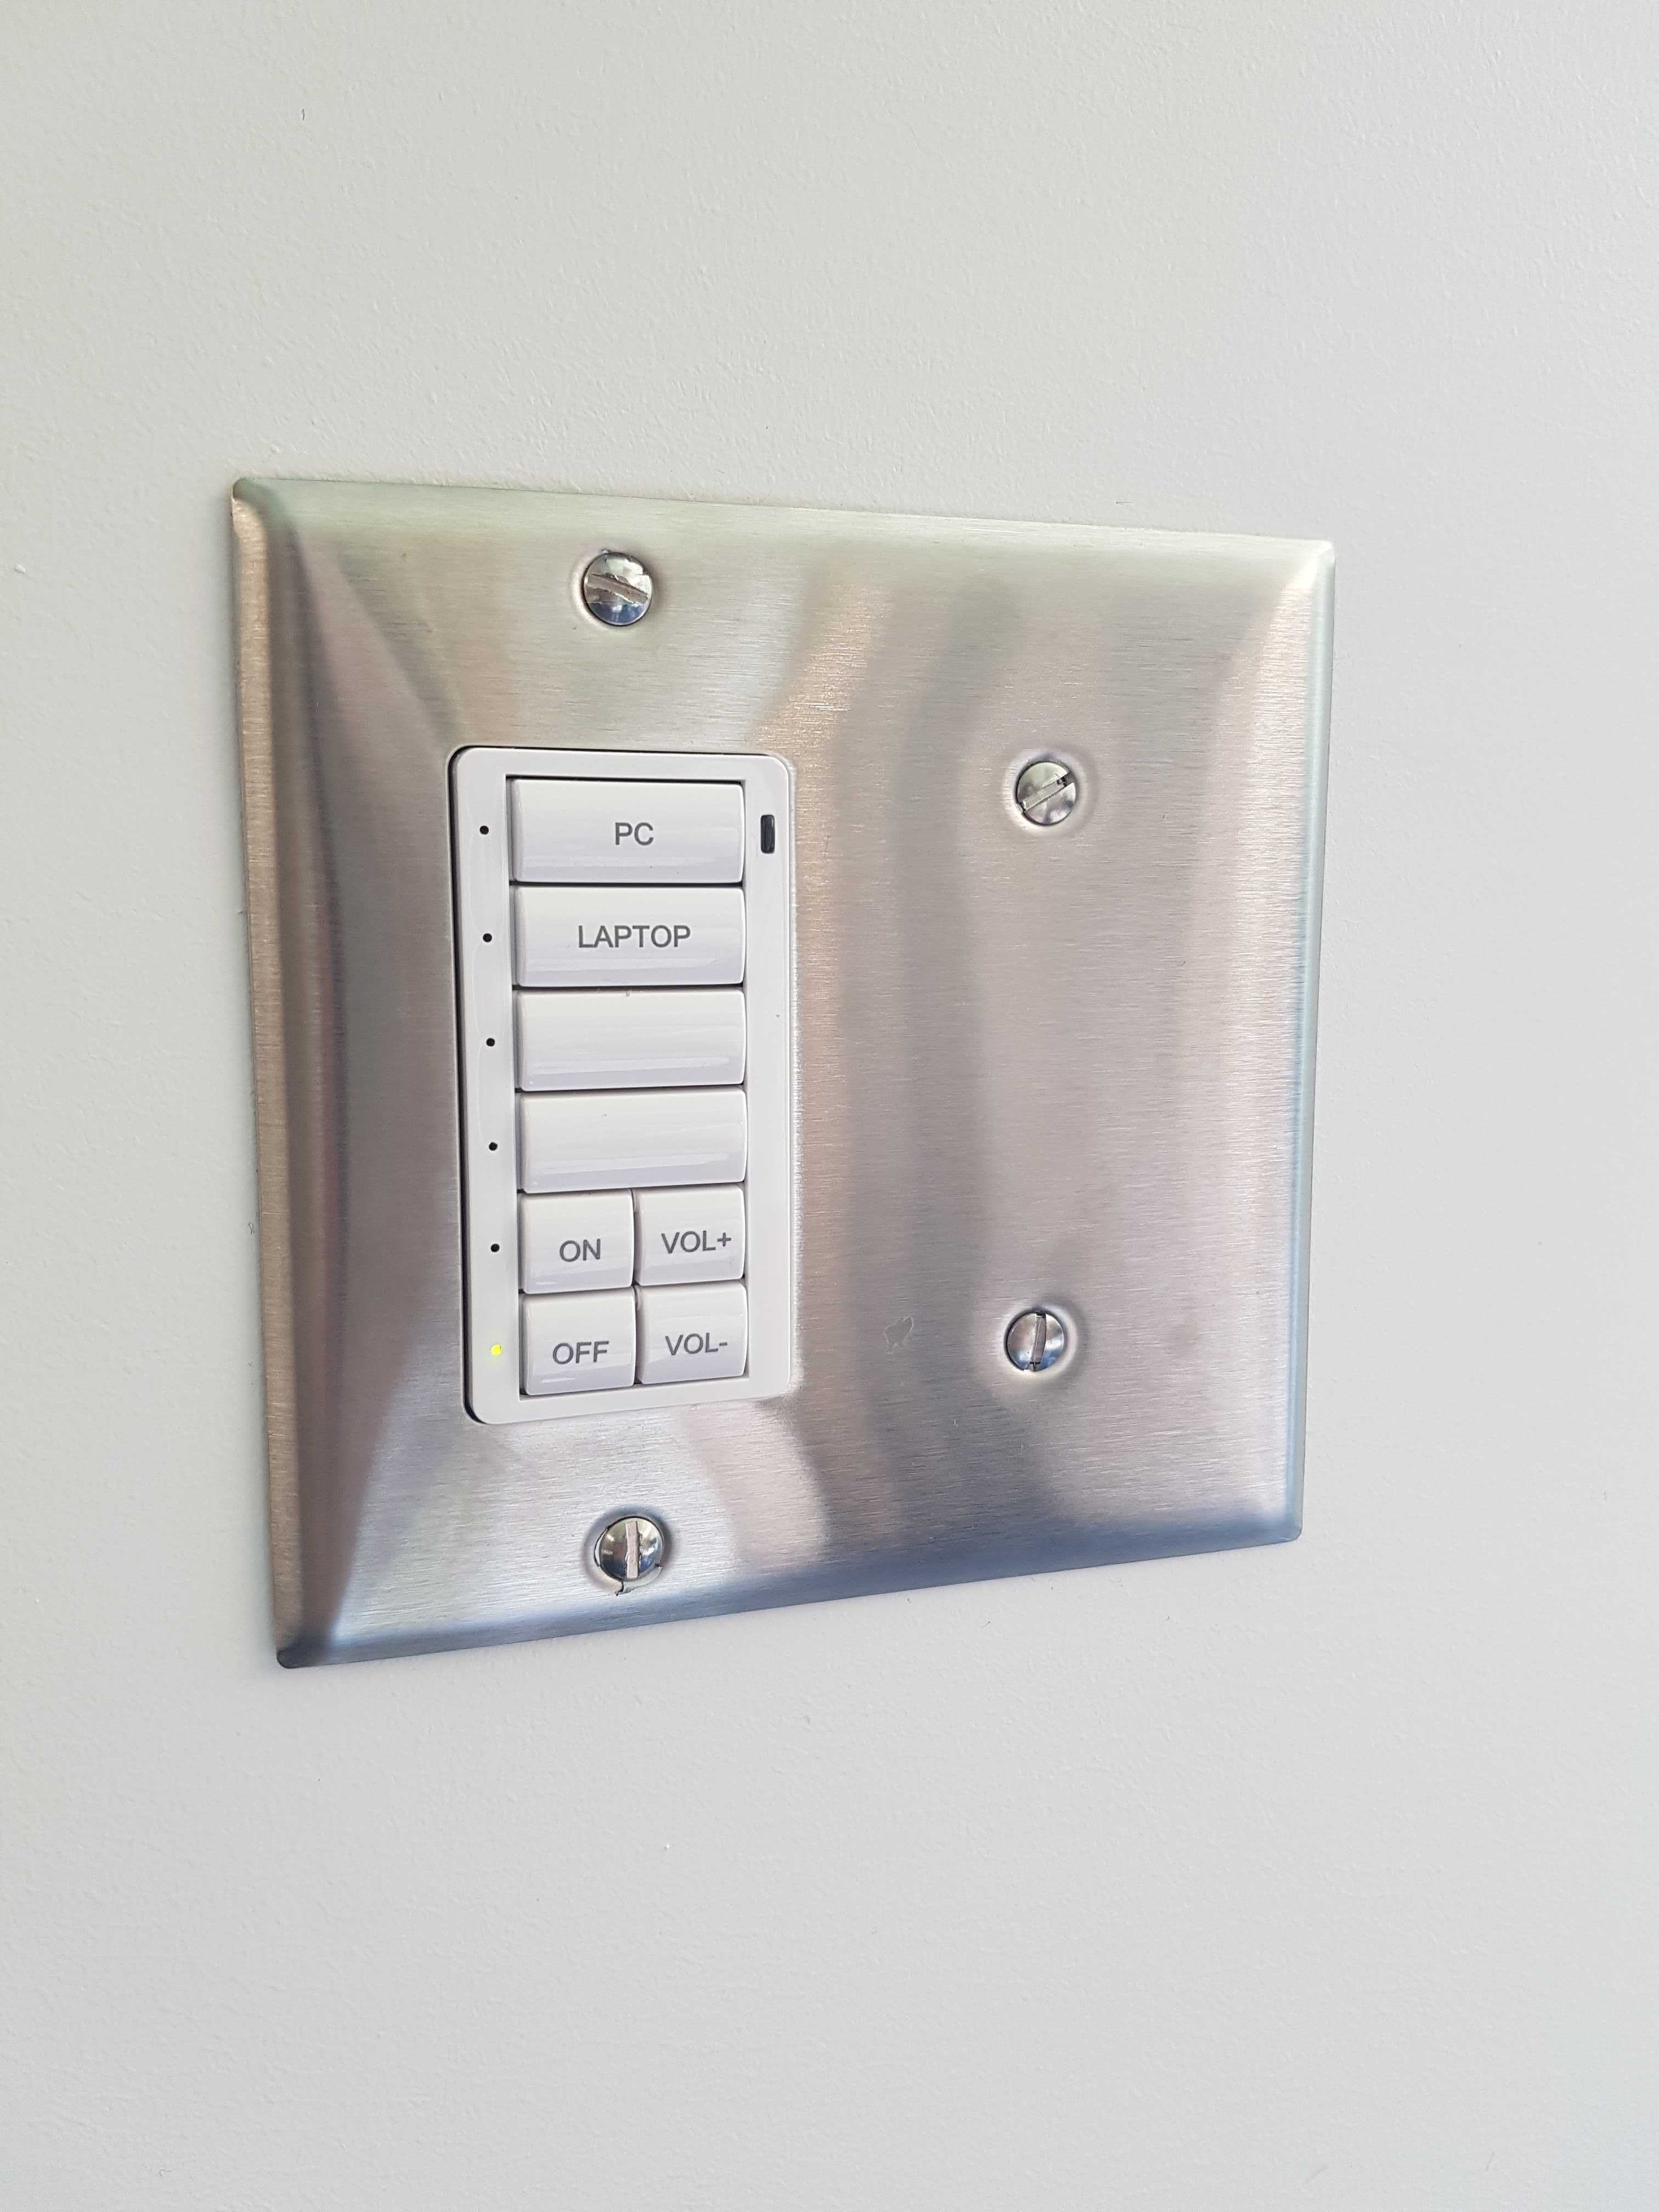
The wall panel:
In every study room, a control panel can be located on the wall. This controls the multimedia equipment available in the room.
To turn on the system, press ON.
Select PC if you want to use the provided computer or LAPTOP if you would prefer to connect your laptop* to the system.
*Laptop display is only available in study rooms: 020, 021, 204, 205, 218, 219, 220, 232, 234, and 239.
NOTE
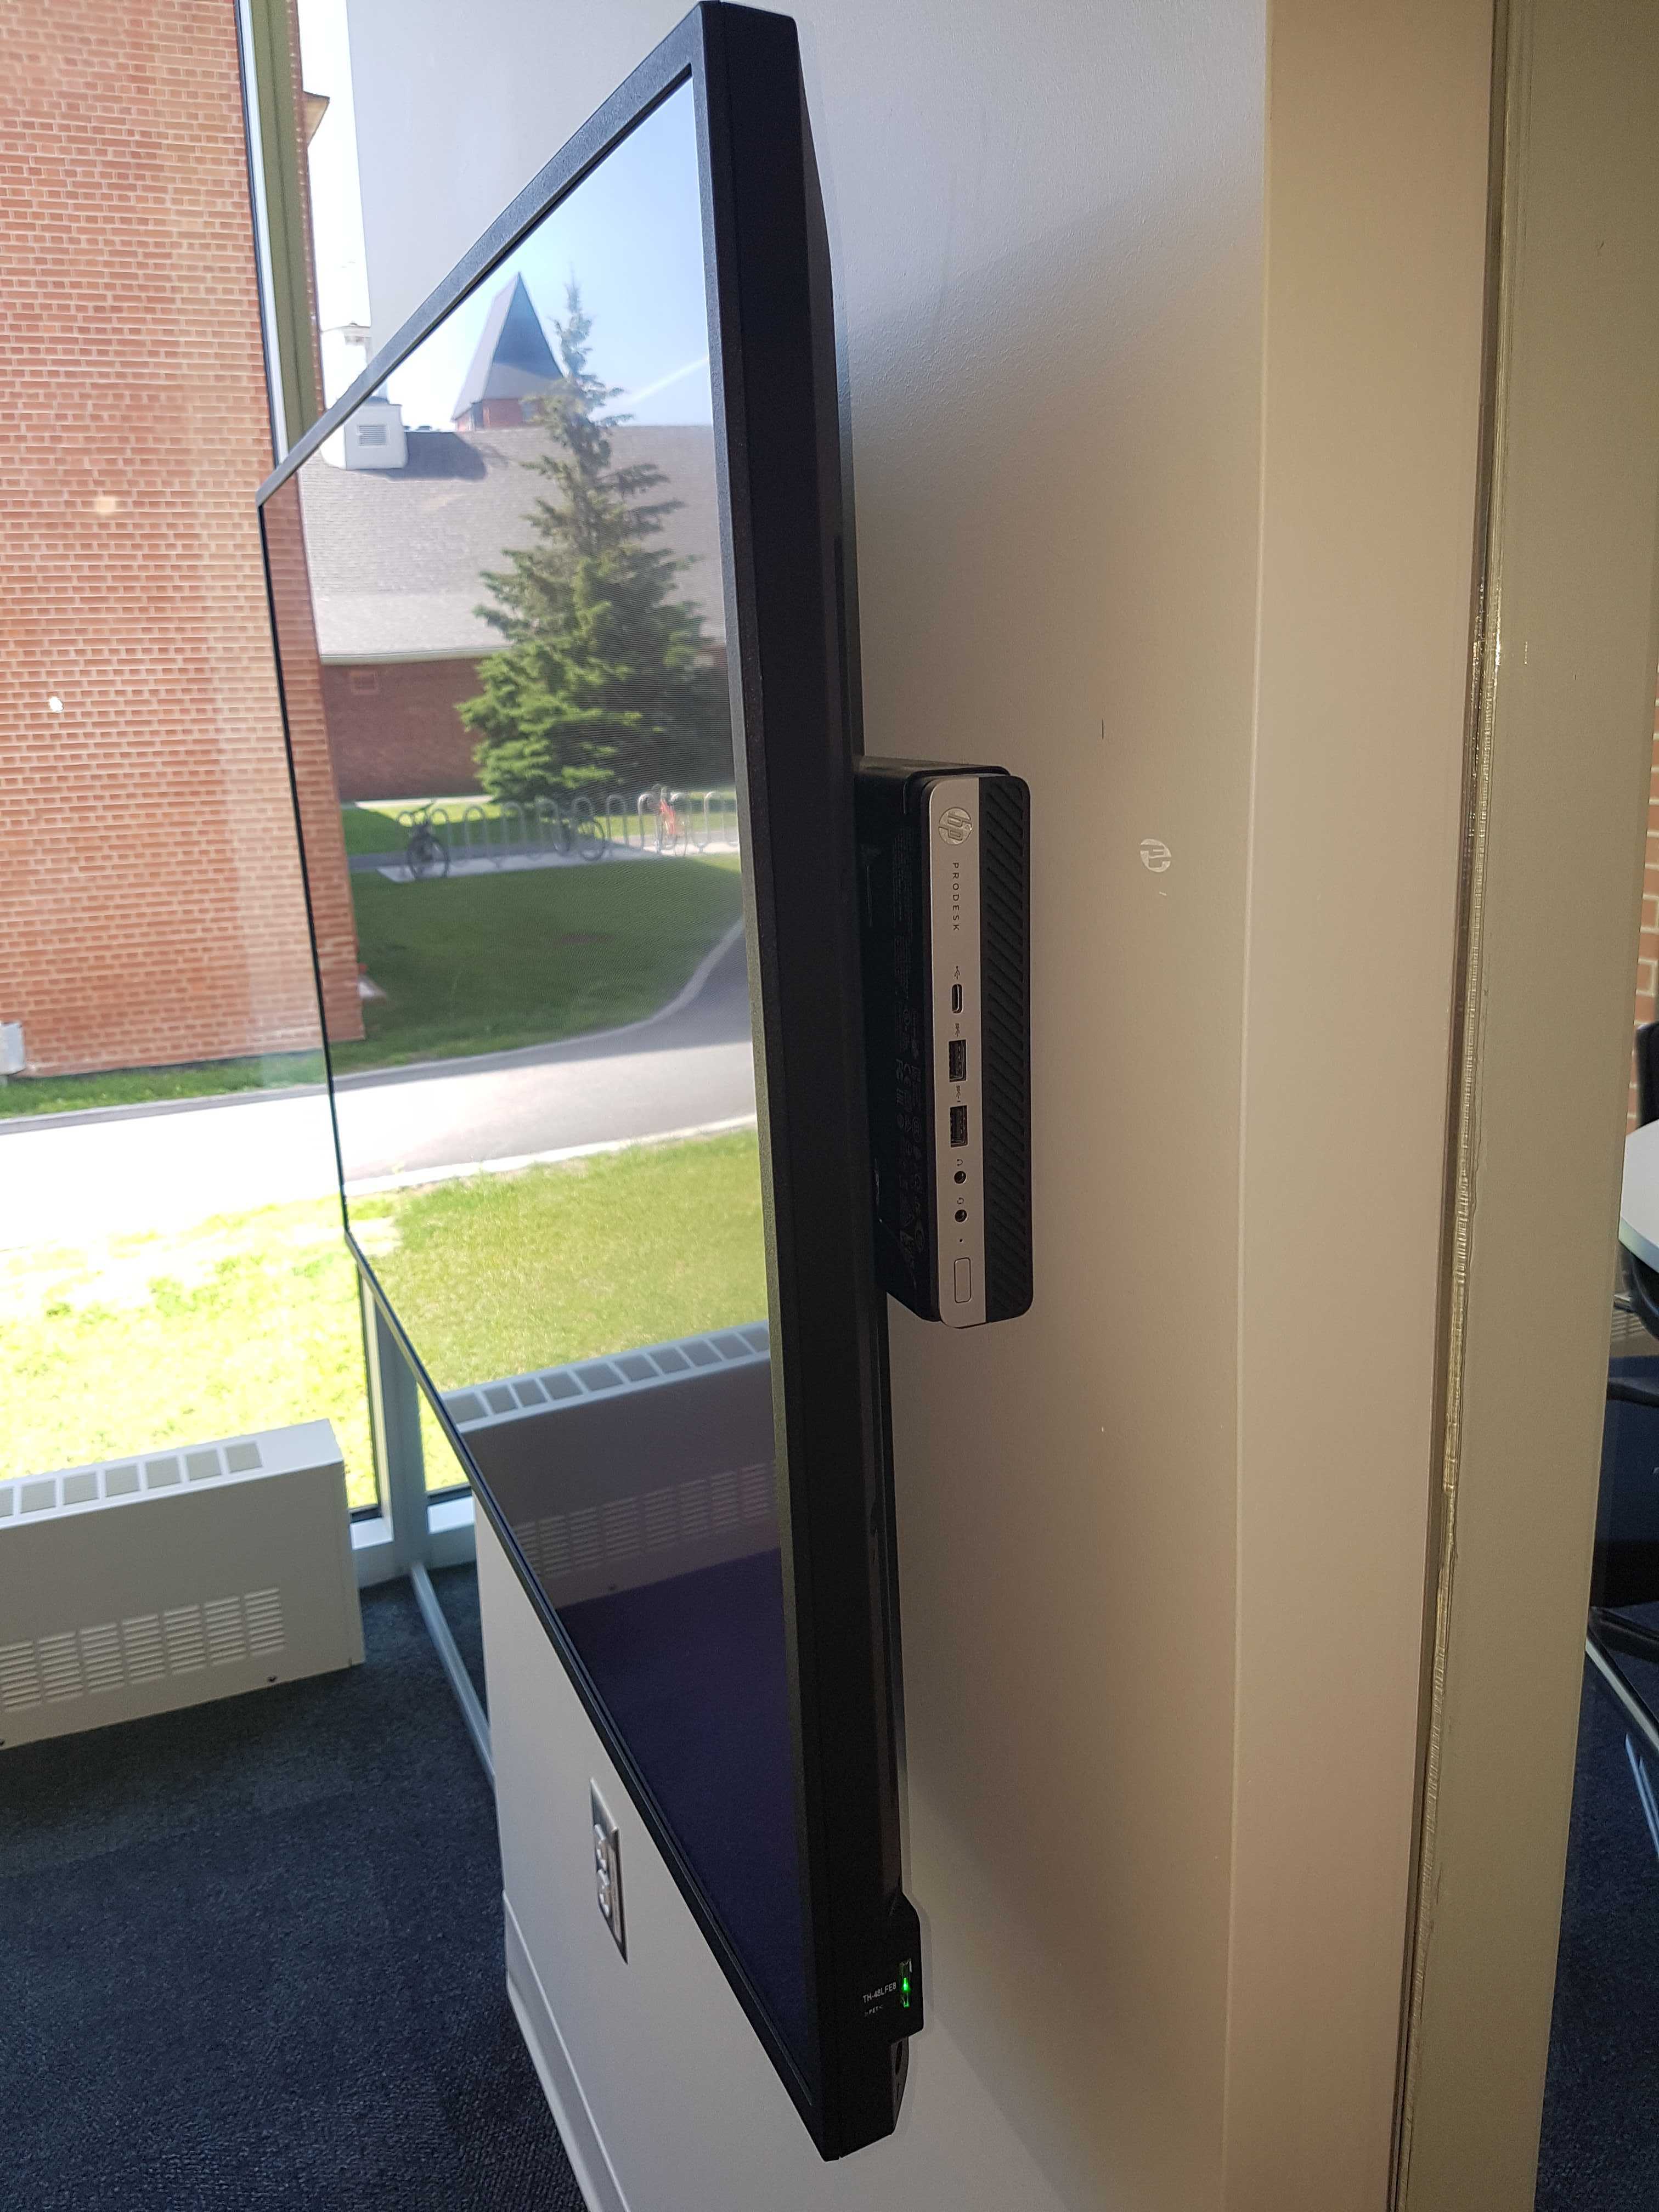
If you see no signal on the display, make sure that the provided computer is turned ON and that you are on the right INPUT.
The room's computer is located behind the TV screen. Make sure that the power button is lit. If no light appears on the power button, press it to turn the computer ON.
If needed, change the inputs from the side of the panel by pressing the INPUT button until you reach the desired input.
Select HDMI 1 to display the PC or HDMI 2 to display the Laptop.
2.2 How to connect your laptop to the system
There are two ways to connect your laptop to the TV in the study rooms. Some rooms will be equipped with an HDMI cable allowing you to connect your laptop to the screen. For the rooms without an HDMI cable or for users without an HDMI port on their laptop, Mirroring 360 will allow you to stream your laptop or mobile device on the provided PC.
Mirroring 360 is available on all the Library Learning Commons' computers.
To learn more about using Mirroring 360 refer to the "How to Use Mirroring 360" page.
3. Group Study Cubicles
Five open space cubicles are available on the main floor of the Library Learning Commons for group work. These cubicles do not need to be booked and allow students, faculty, and staff members to access the provided computer.
All group study cubicles are equipped with a computer, a large screen, a wireless keyboard & mouse, and a webcam.
The wall panel:
In every group study cubicle, a control panel can be located on the wall. This controls the multimedia equipment available in the cubicule.
To turn on the system, press ON.
Select PC if you want to use the provided computer*.
*Laptop display is only available in study rooms: 020, 021, 204, 205, 218, 219, 220, 232, 234, and 239.
NOTE
If you see no signal on the display, make sure the provided computer is turned ON and that you are on the right INPUT.
The room's computer is located behind the TV screen. Make sure that the power button is lit. If no light appears on the power button, press it to turn the computer ON.
If needed, change the inputs from the side of the panel by pressing the INPUT button until you reach the desired input.
Select HDMI 1 to display the PC.
3.2 How to connect your laptop to the system
Mirroring 360 will allow you to stream your laptop or mobile device on the provided PC.
Mirroring 360 is available on all the Library Learning Commons' computers.
To learn more about using Mirroring 360 refer to the "How to Use Mirroring 360" page.
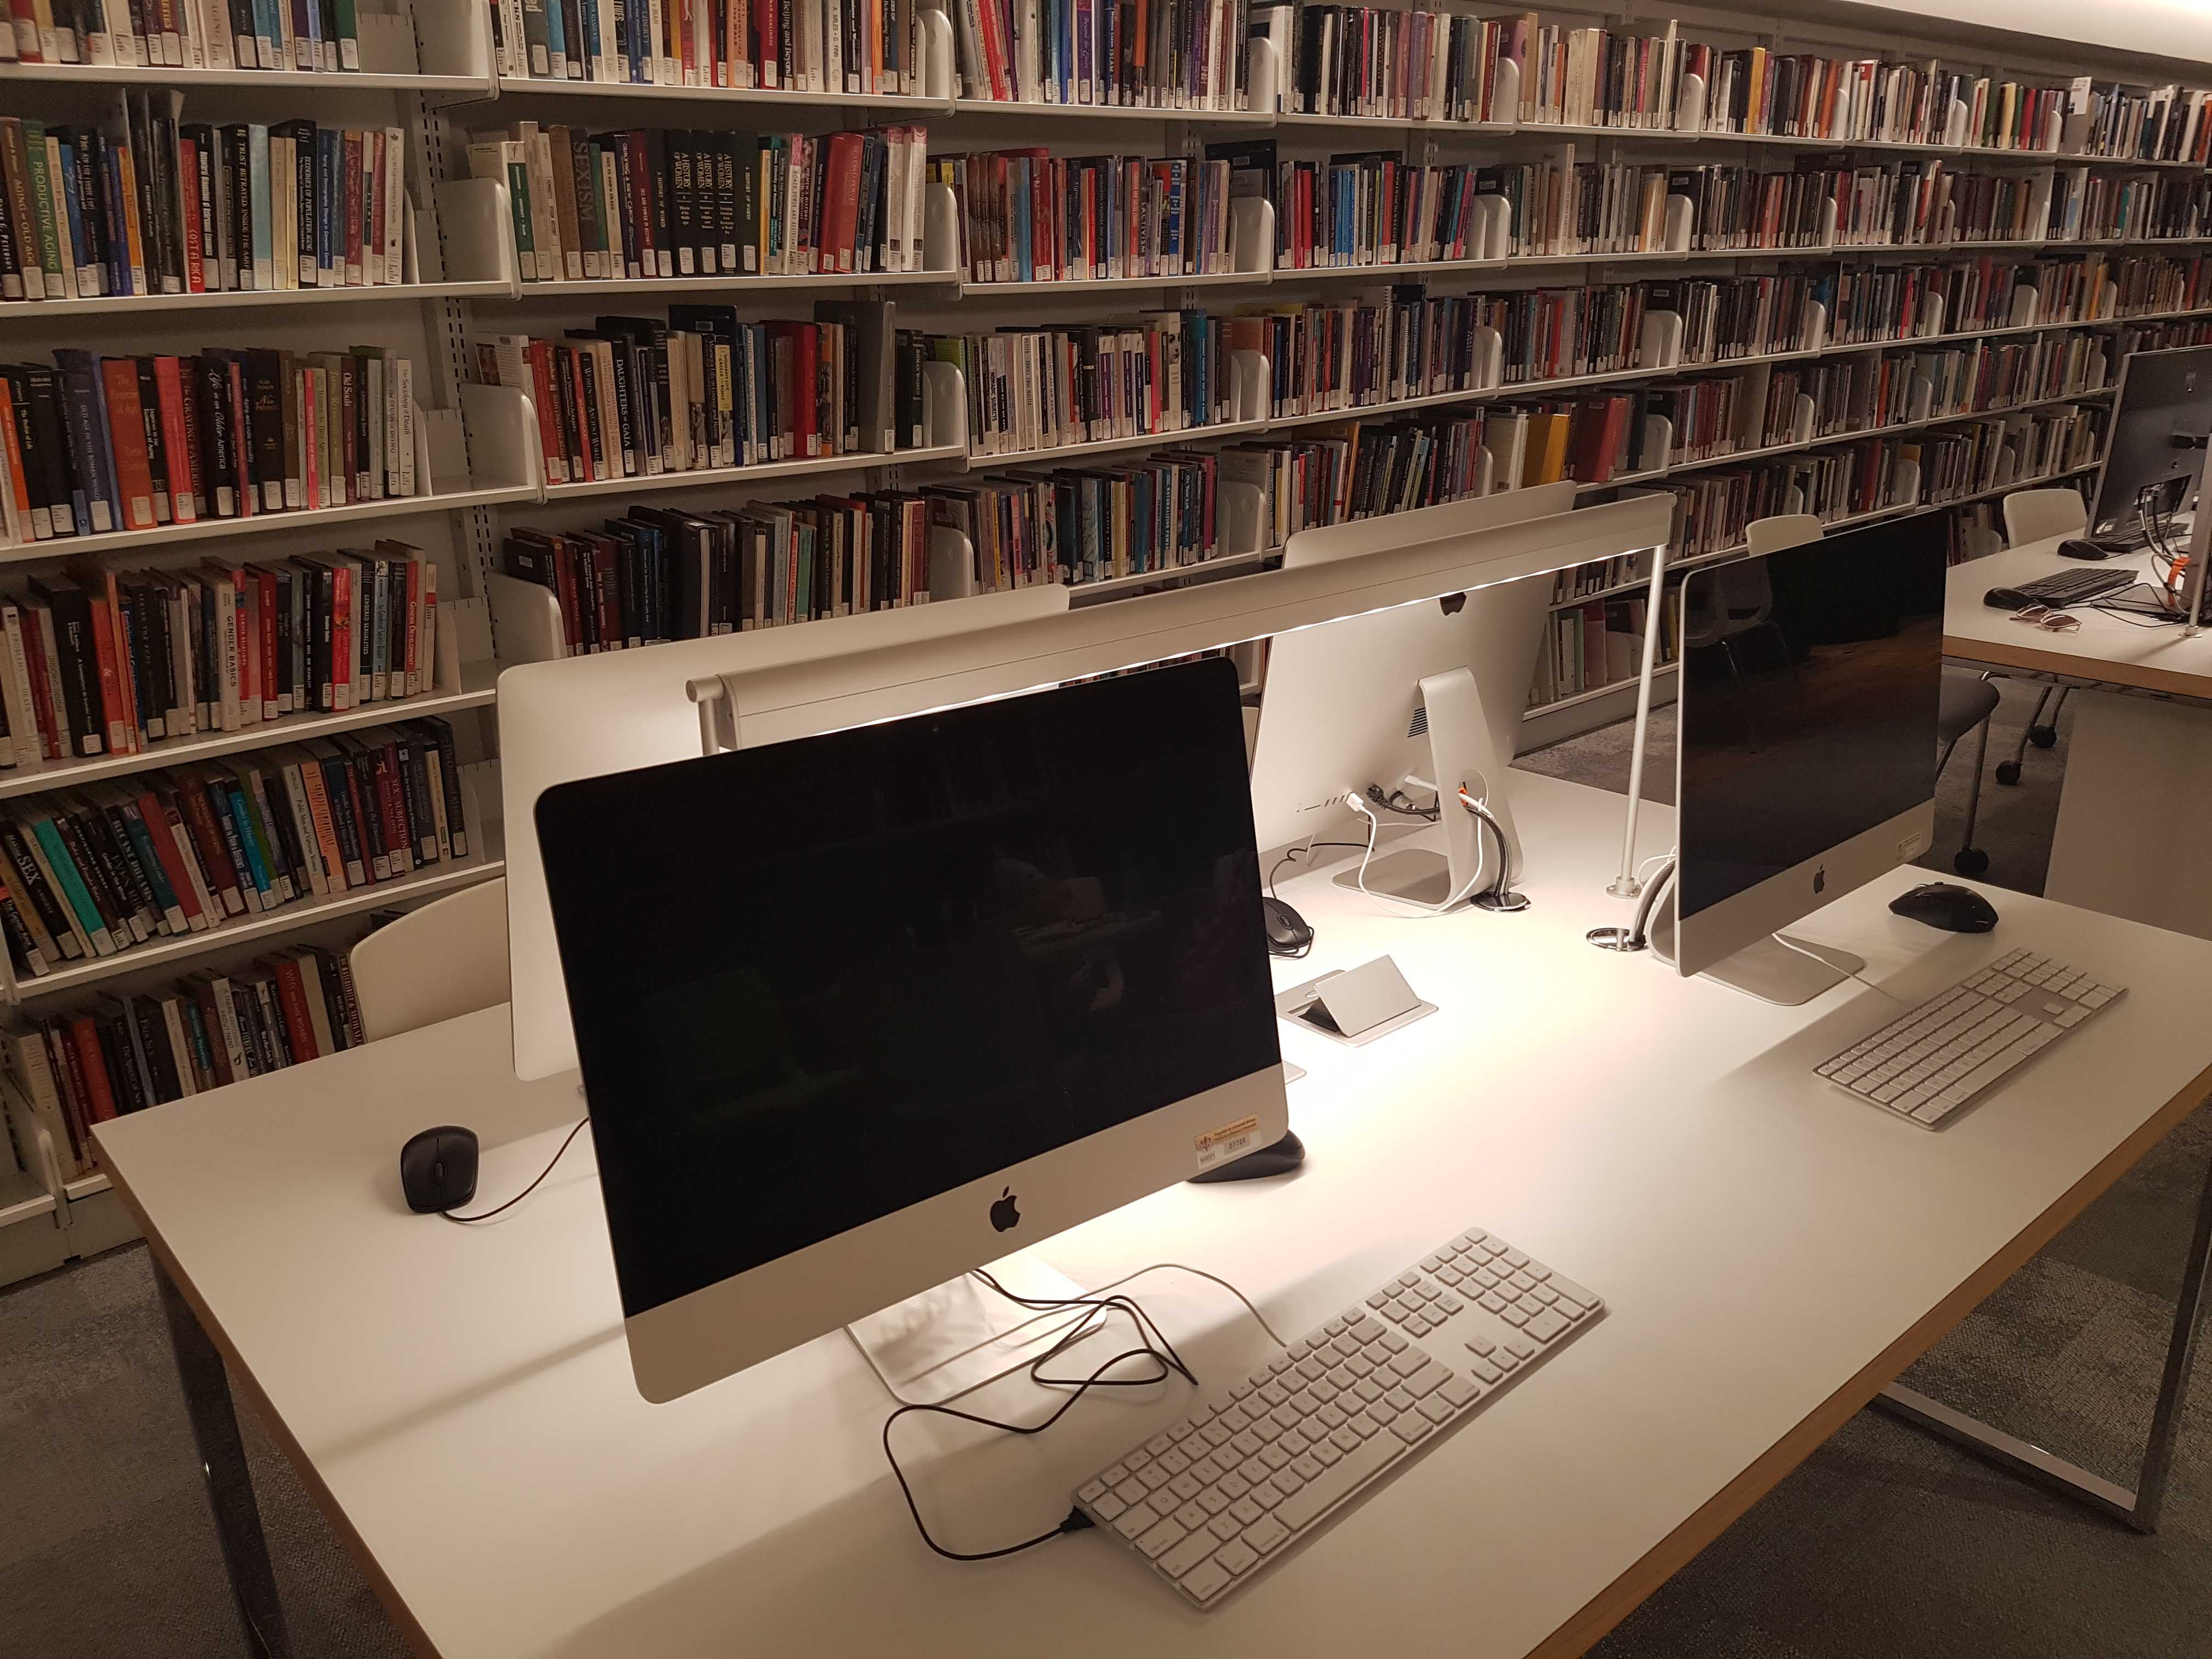
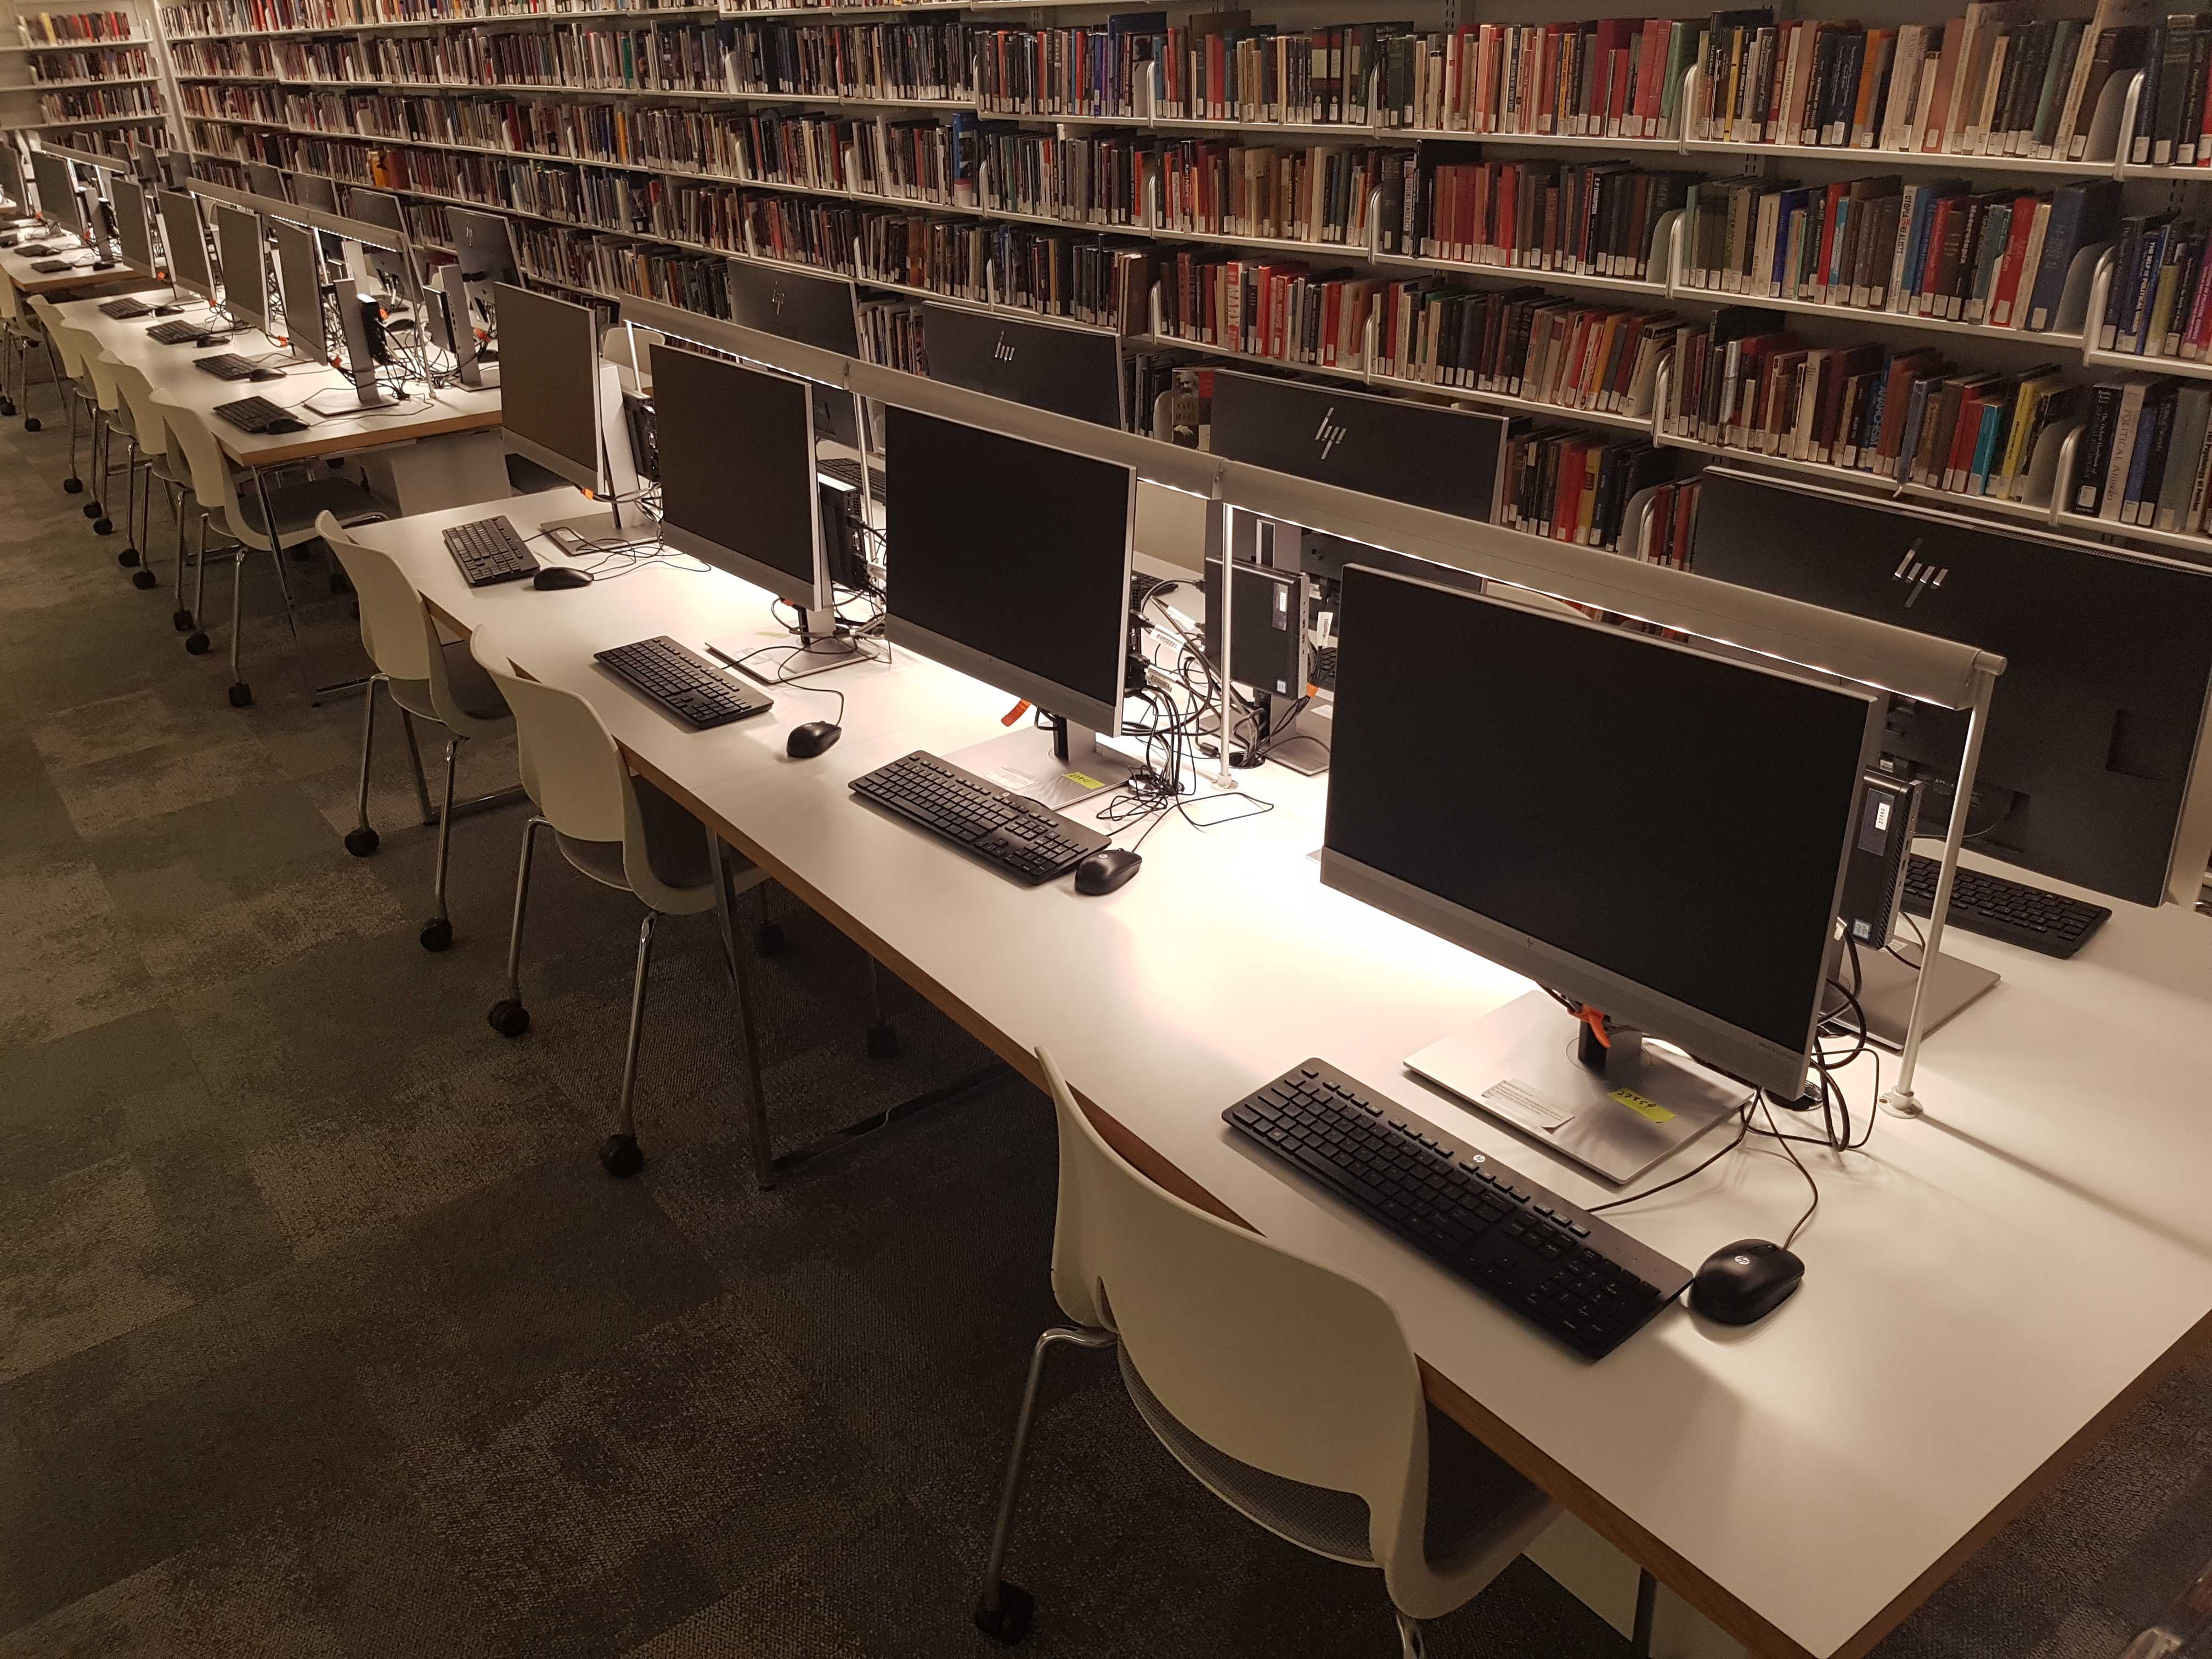
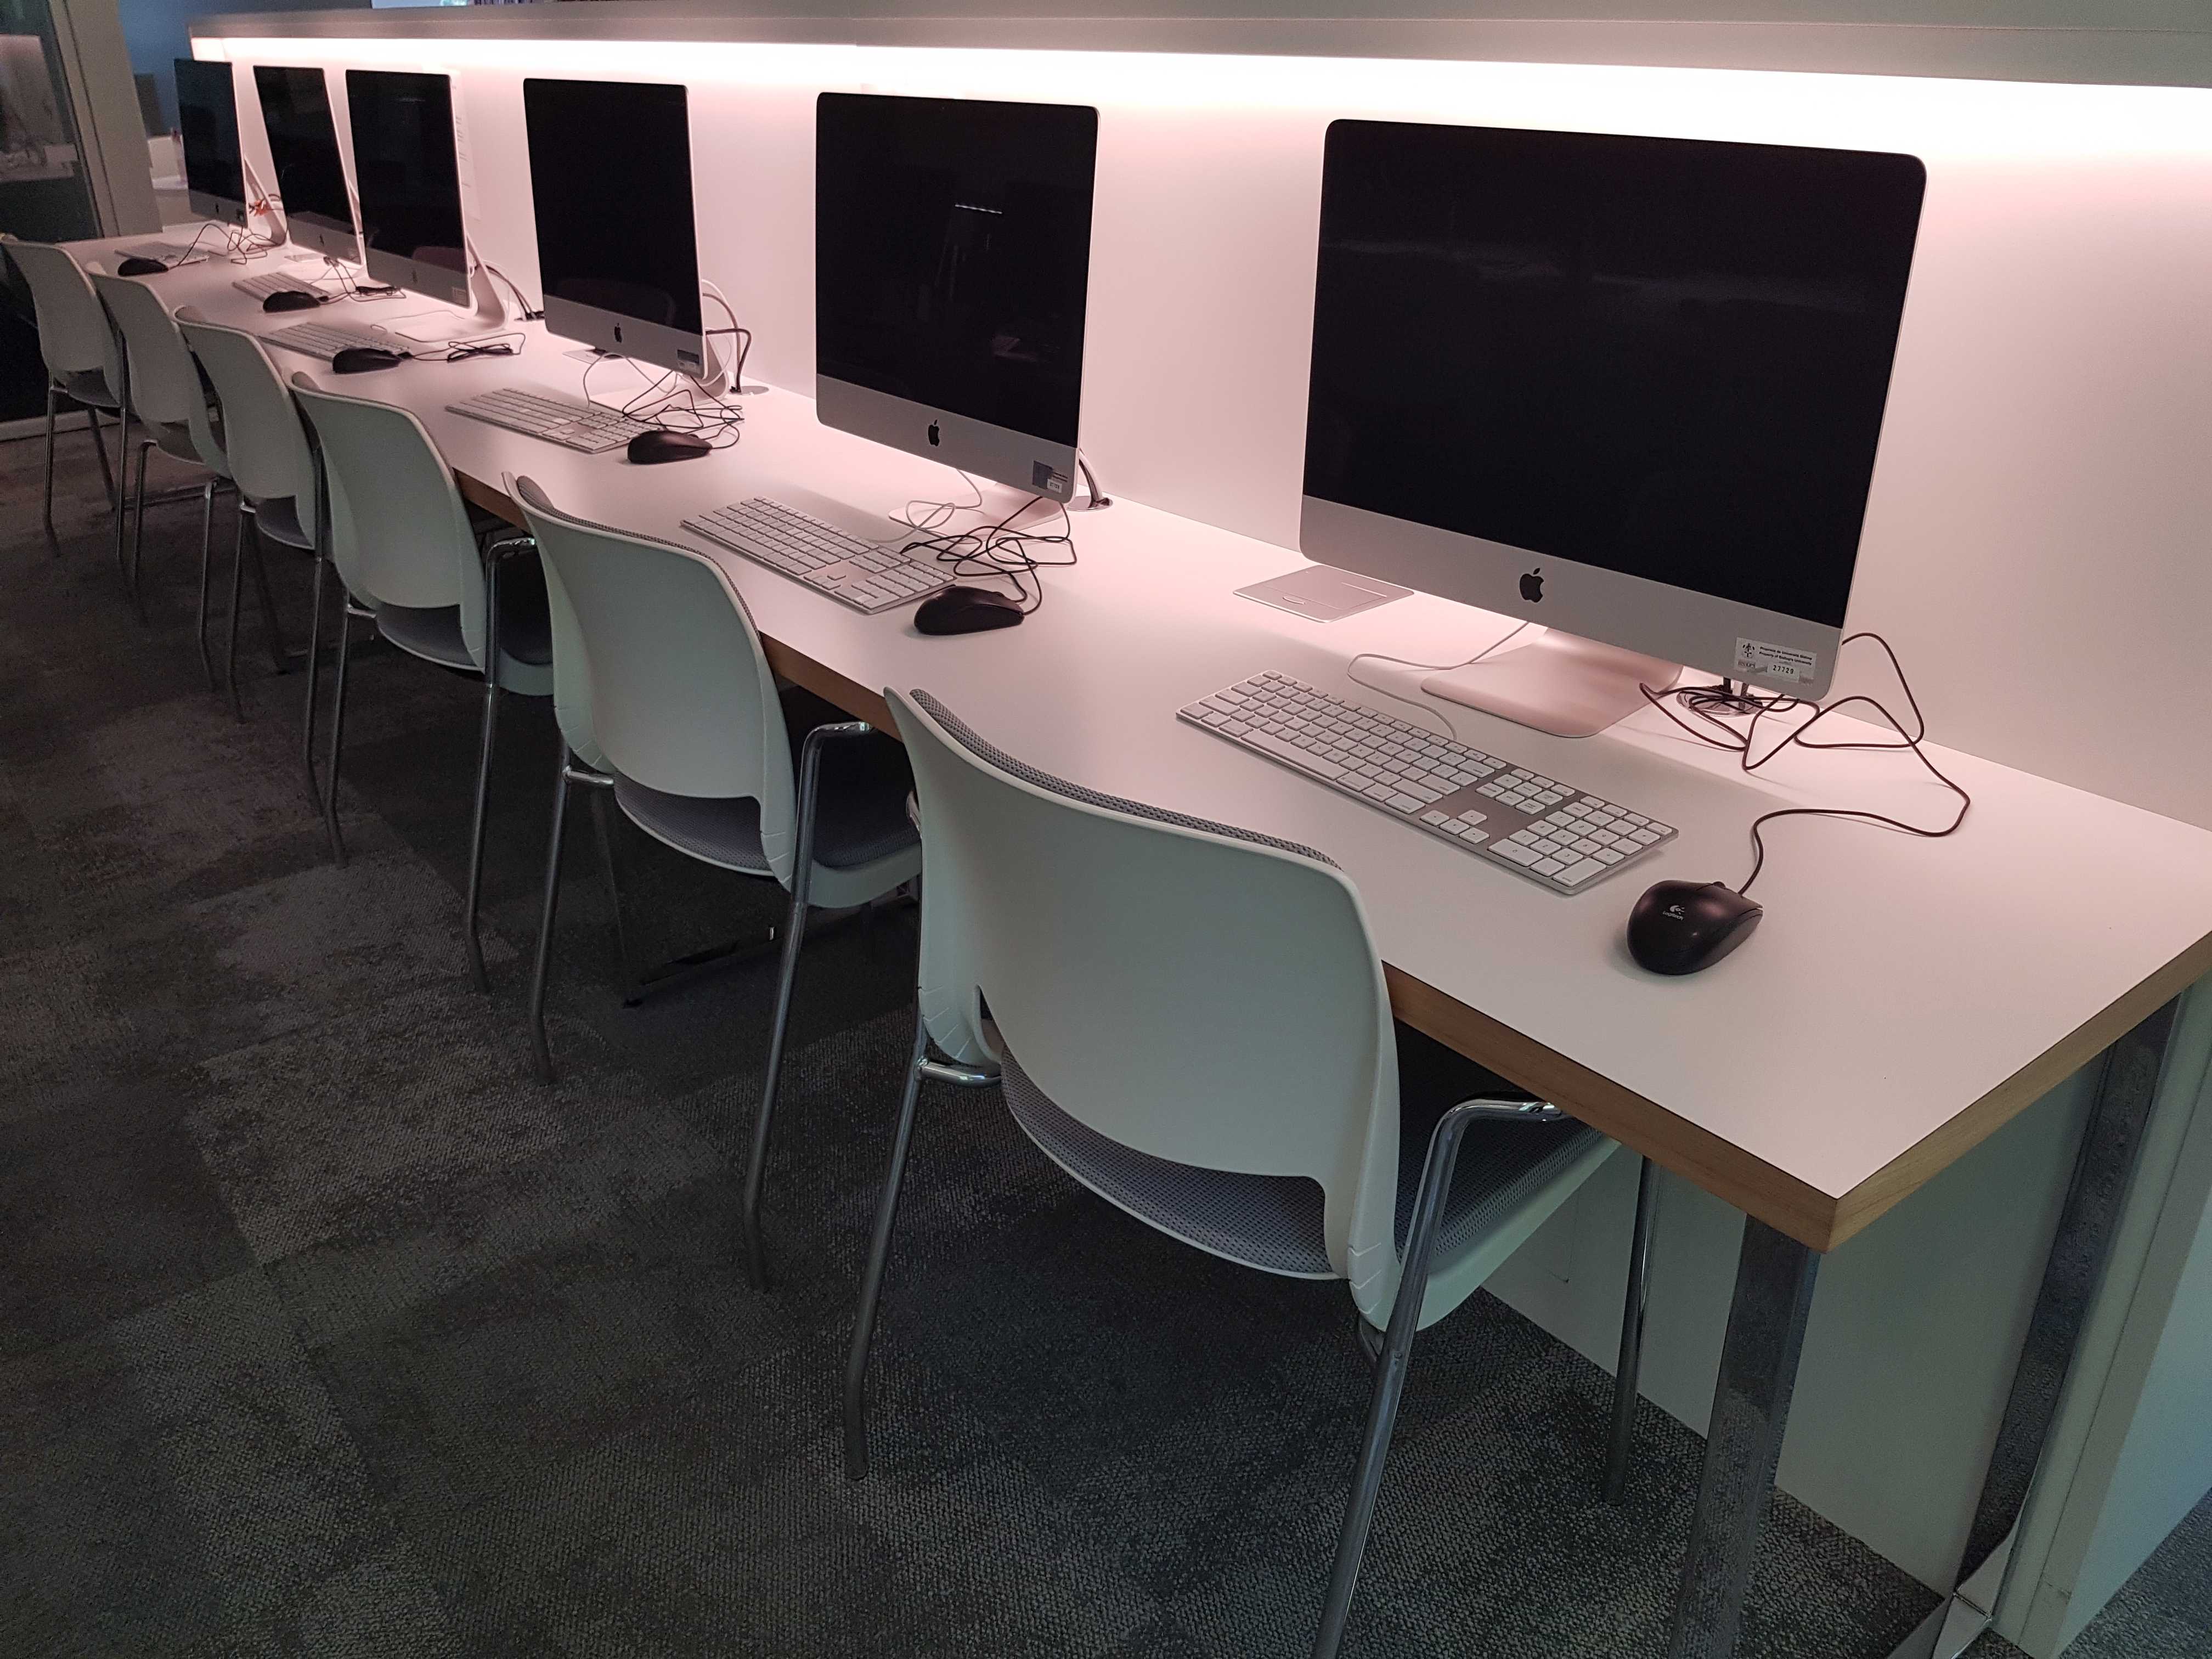
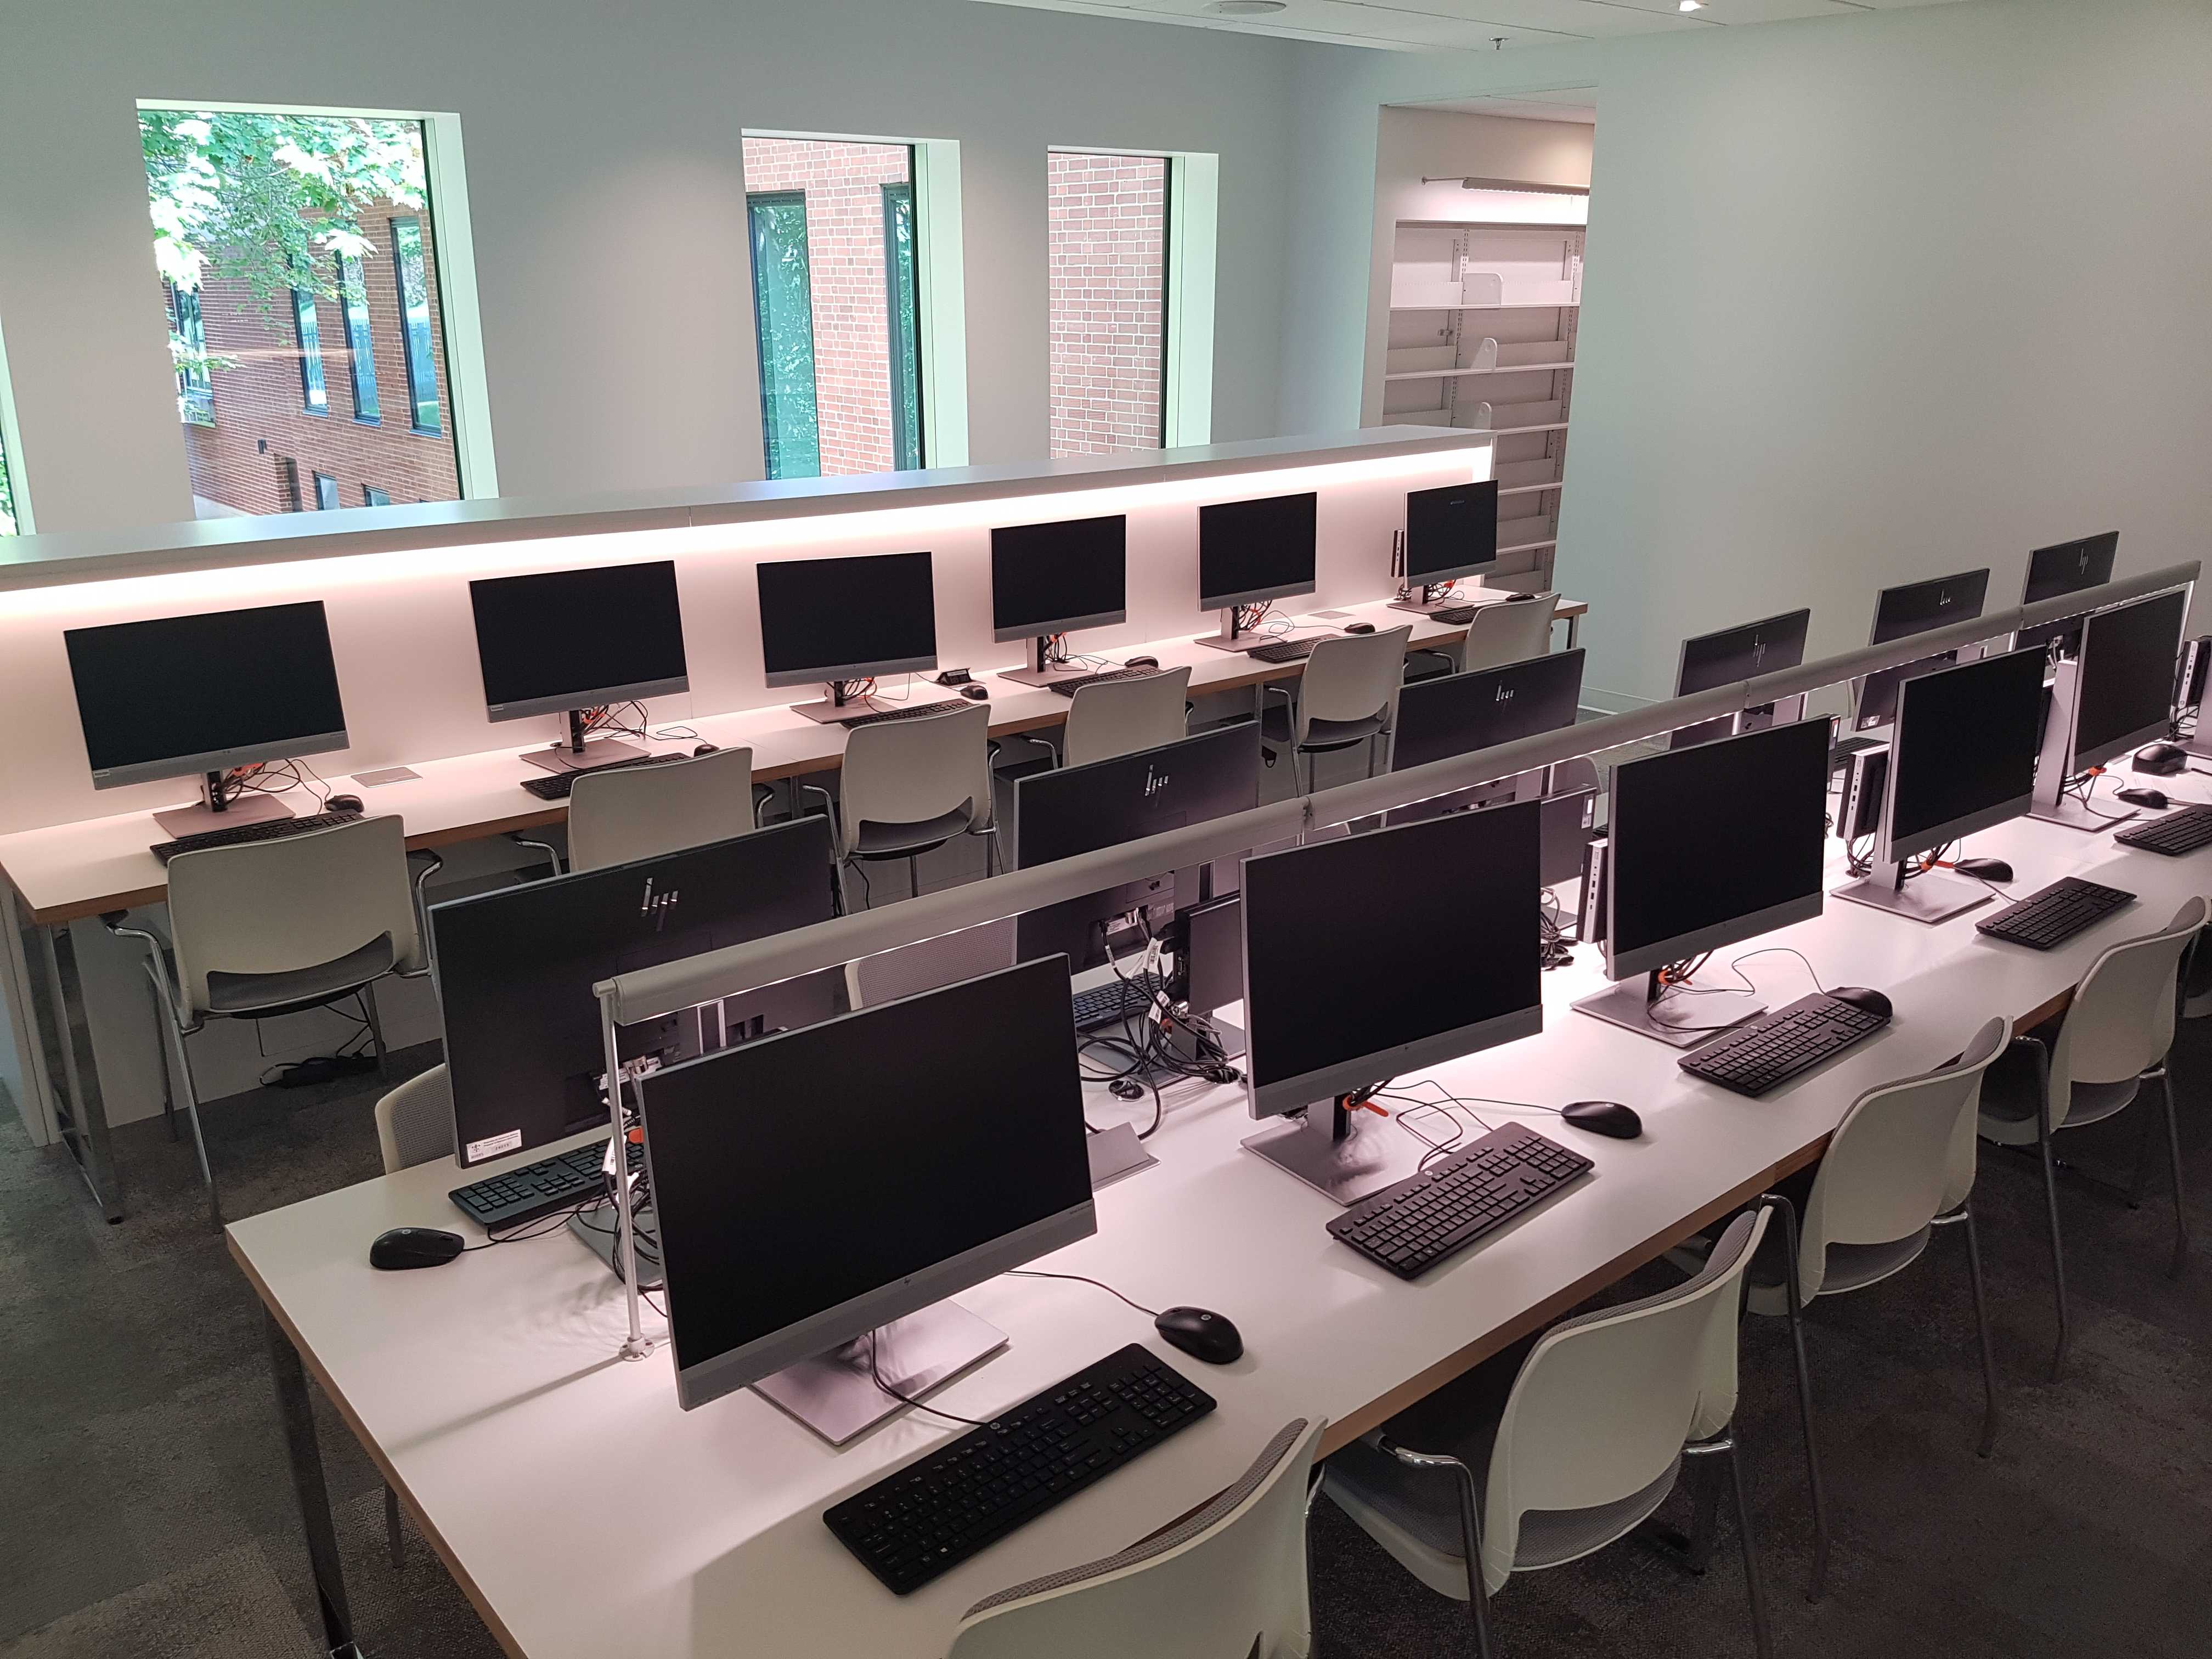
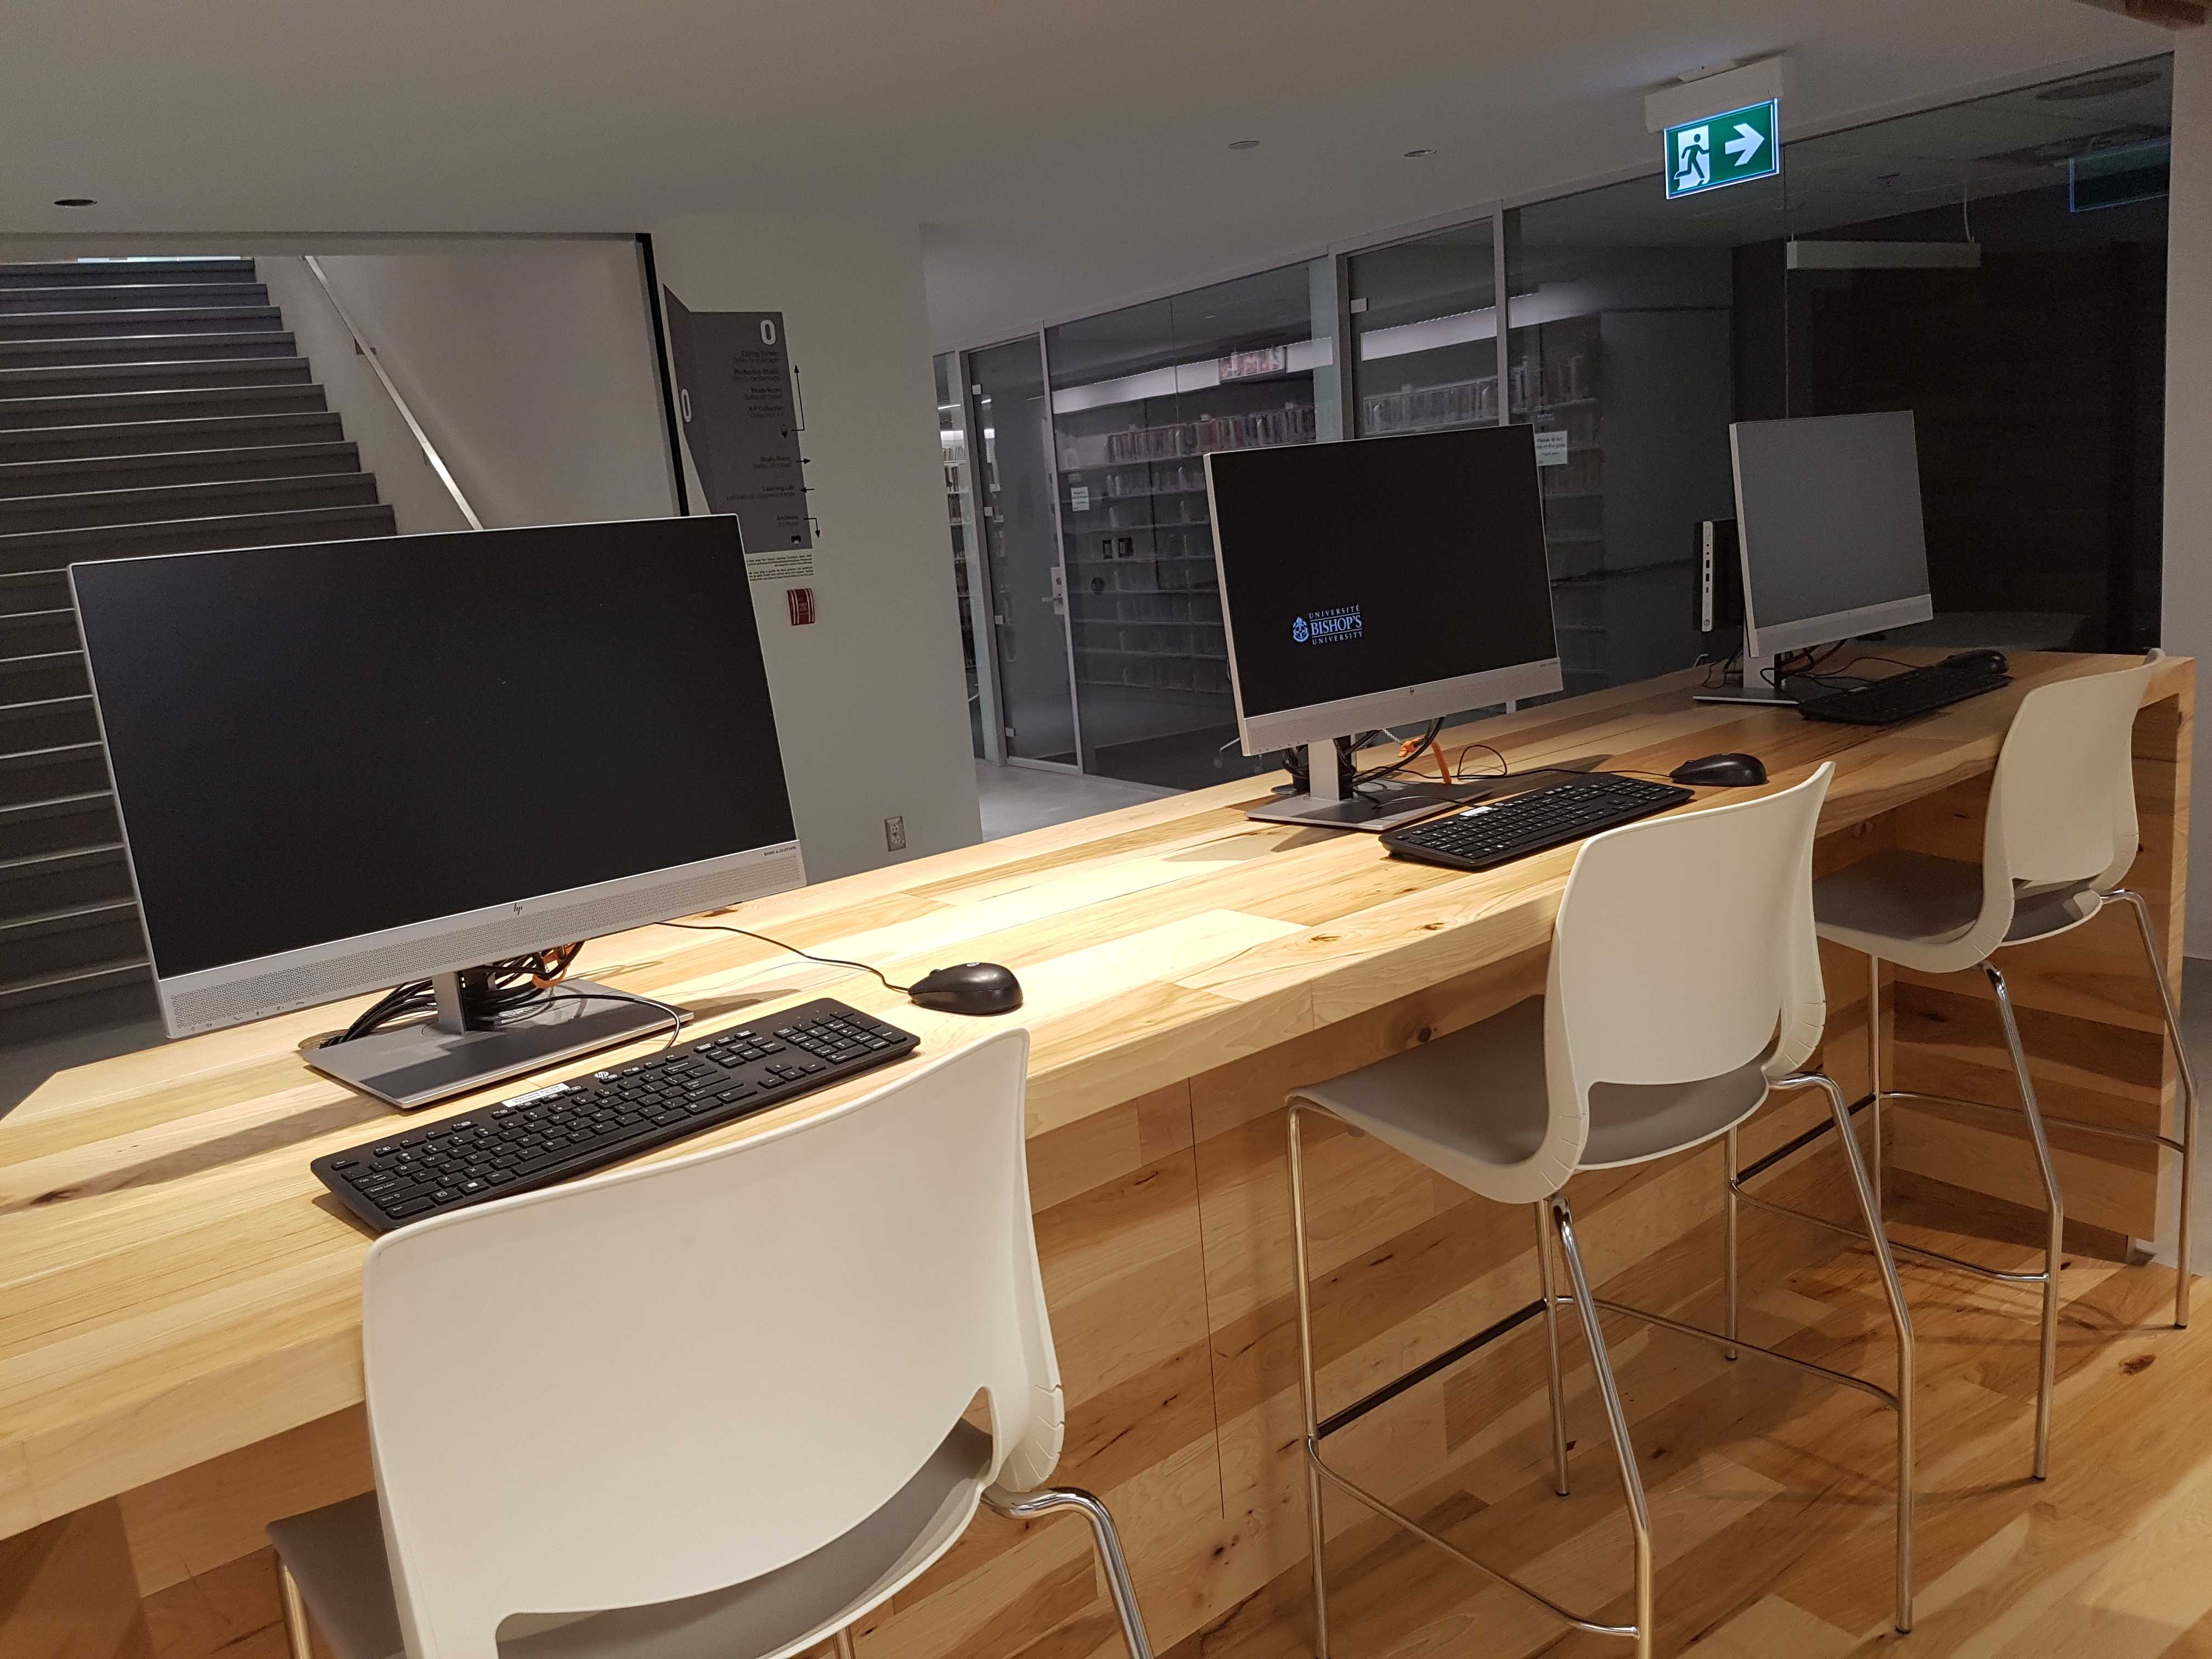
4. Computer Zones
Two computer zones are available for the students, faculty, and staff members to use. They are located in the basement and on the second floor of the Library Learning Commons. Both computer zones include Windows and Mac operating systems to accommodate all users. These computer zones are open spaces located in silent areas to allow for peaceful studying and researching.
To learn more about printing, refer to the "How to print in the Library Learning Commons" section.
Basement
2nd Floor
4.1 How to use the computer zones
To access the computer, students, faculty, and staff members, are required to login using their Bishop's credentials.
Champlain students have access to a selection of 30 computers in the Library Learning Commons computer zones. To learn more about which computers Champlain students have access to and how to use them, refer to the CRC - IT Services page.
Community members who wish to access a computer should refer to the Community Stations section.
A viewing station is available in the basement of the Library Learning Commons. It allows users to view BluRays as well as international DVDs. An instruction sheet is located on the desk next to the viewing station describing how to switch the inputs between the two players.
Since the viewing station is located in a quiet area, users wishing to view BluRay/DVDs are required to wear headphones. Headphones are provided directly at the station but any personal headphones can be plugged instead of the provided one, if desired.
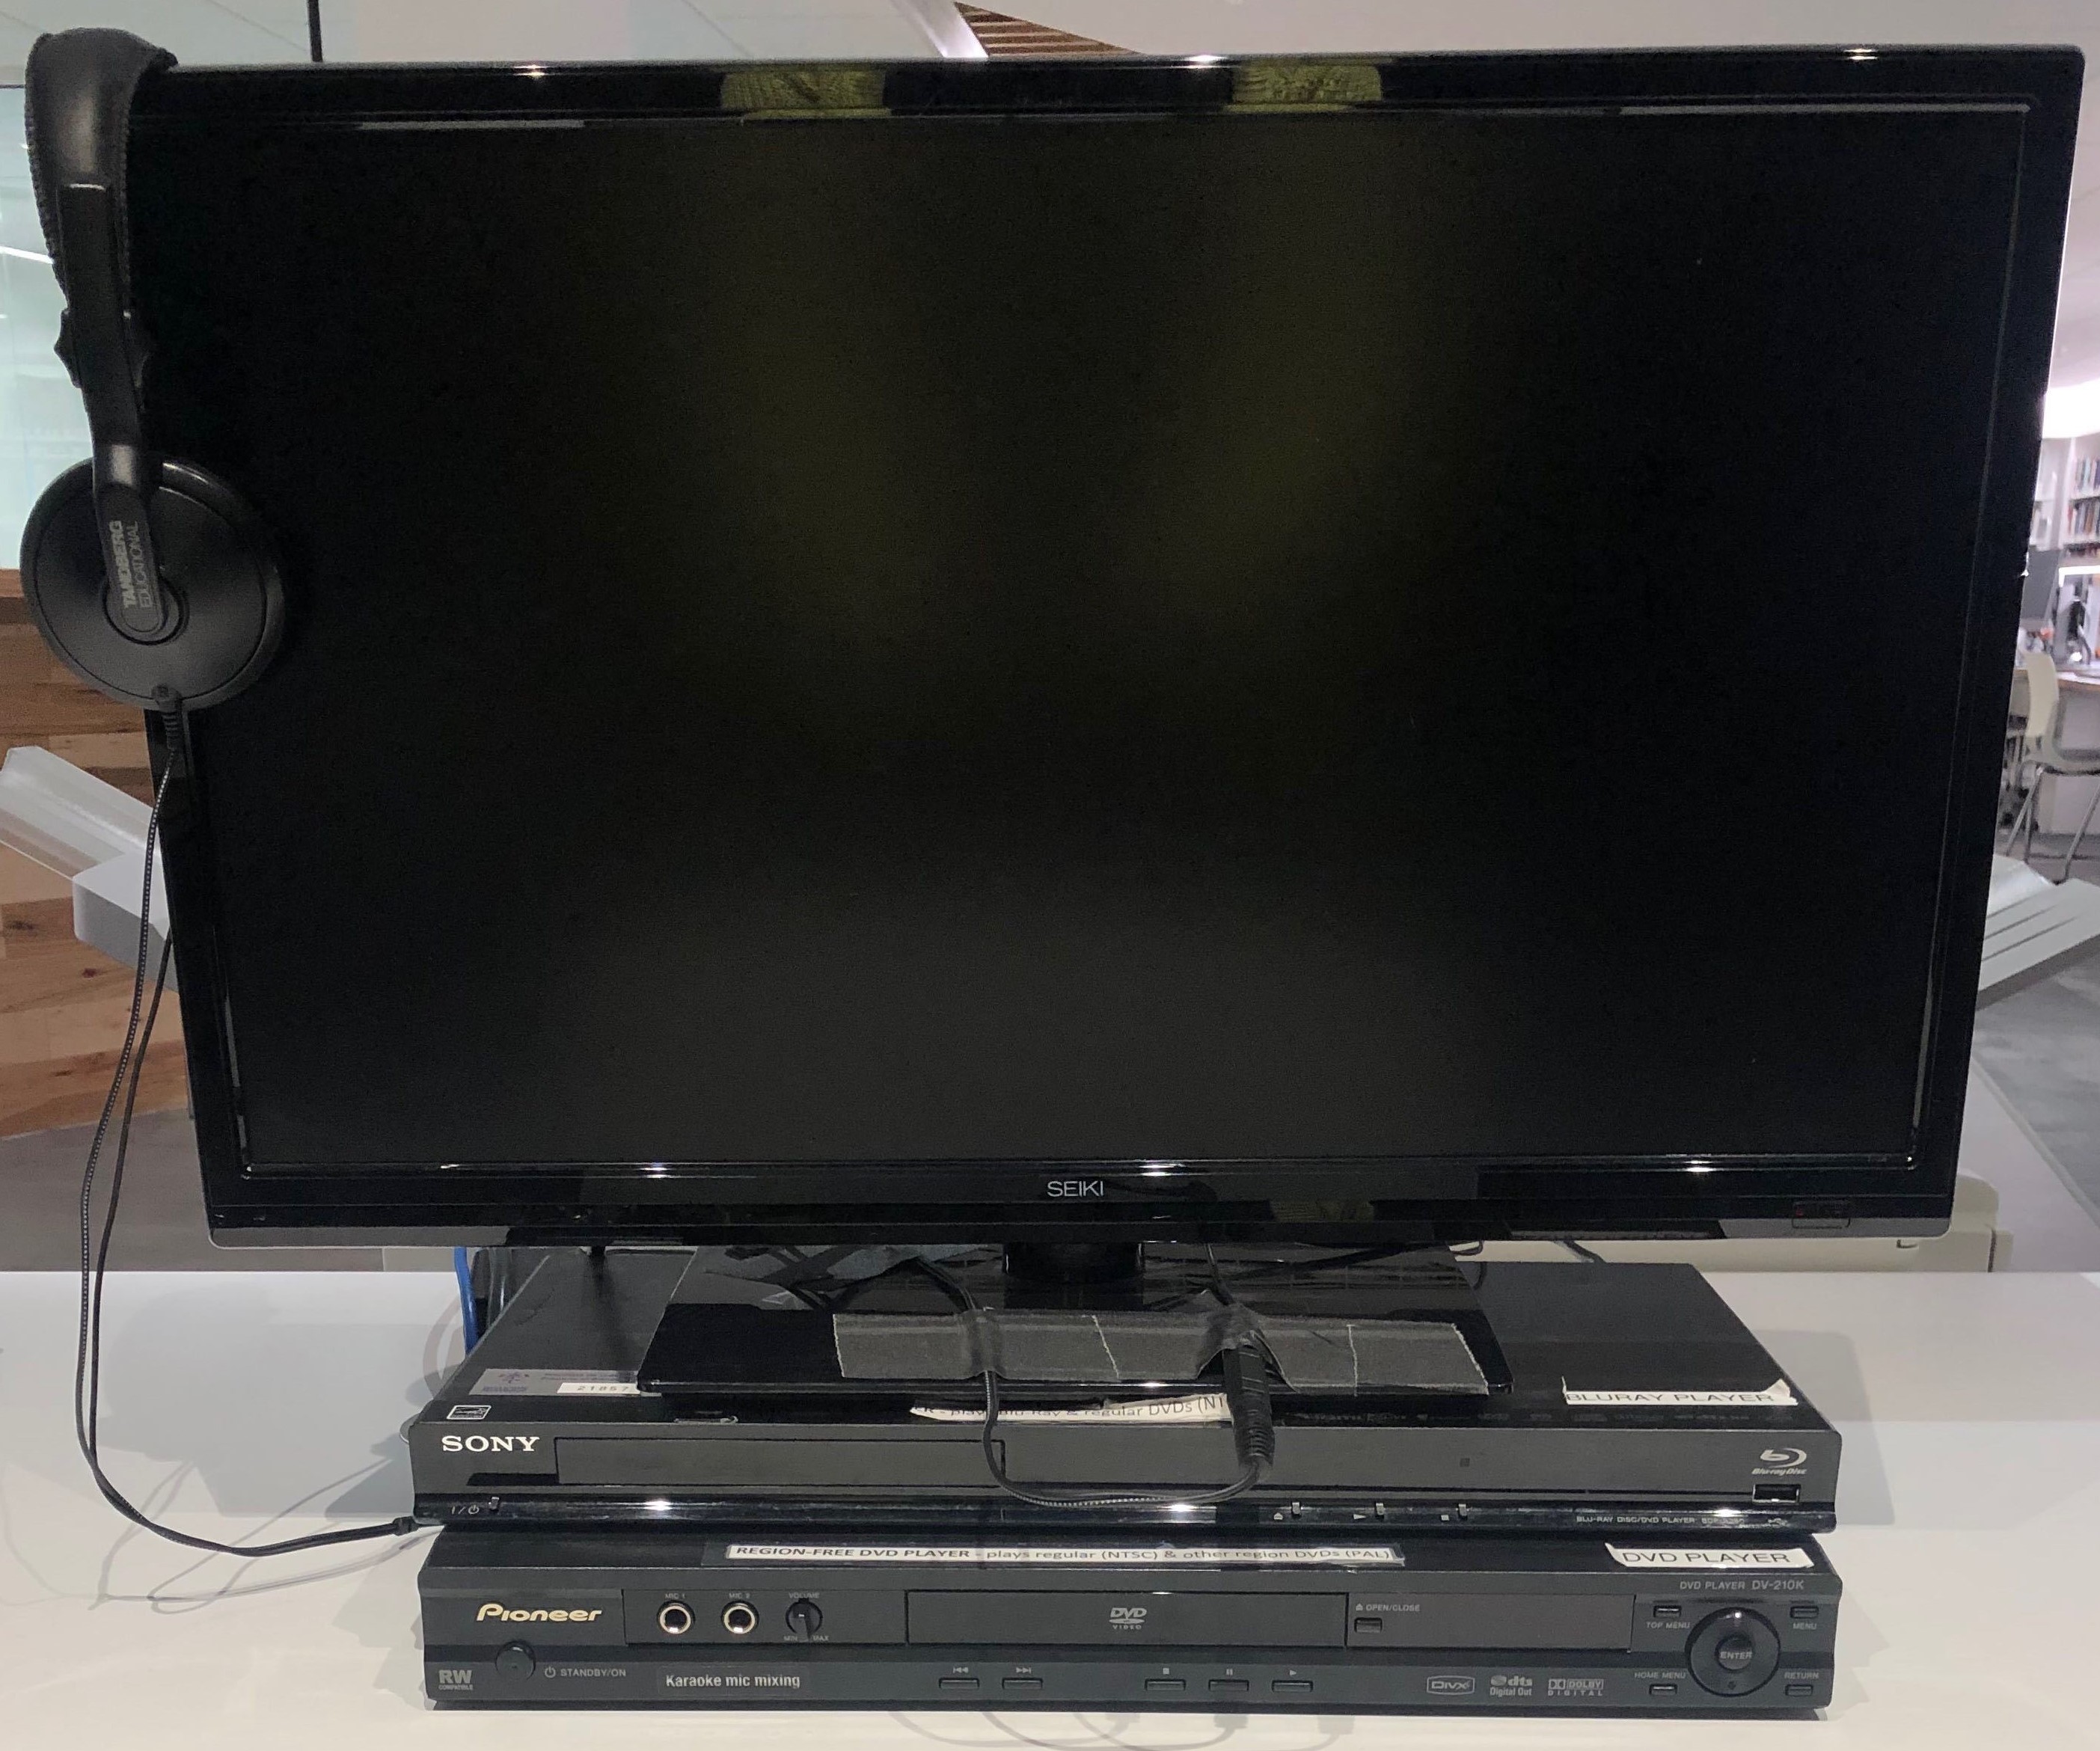
Note: There are no remote control available directly at the station. Most features are accessible from the player's front panel buttons. If needed, you can request a controller for the desired player from the IT Helpdesk on the main floor.
6. Audio Workstation
Two audio workstations are located in the production nook of the Library Learning Commons' basement. These allow Bishop's user to login with their credentials in order to edit and create audio files.
Users can edit their audio files on a Window's PC or with MacOS. Both operating system will offer different types of editting programs, be sure to use the one you feel more comfortable with.

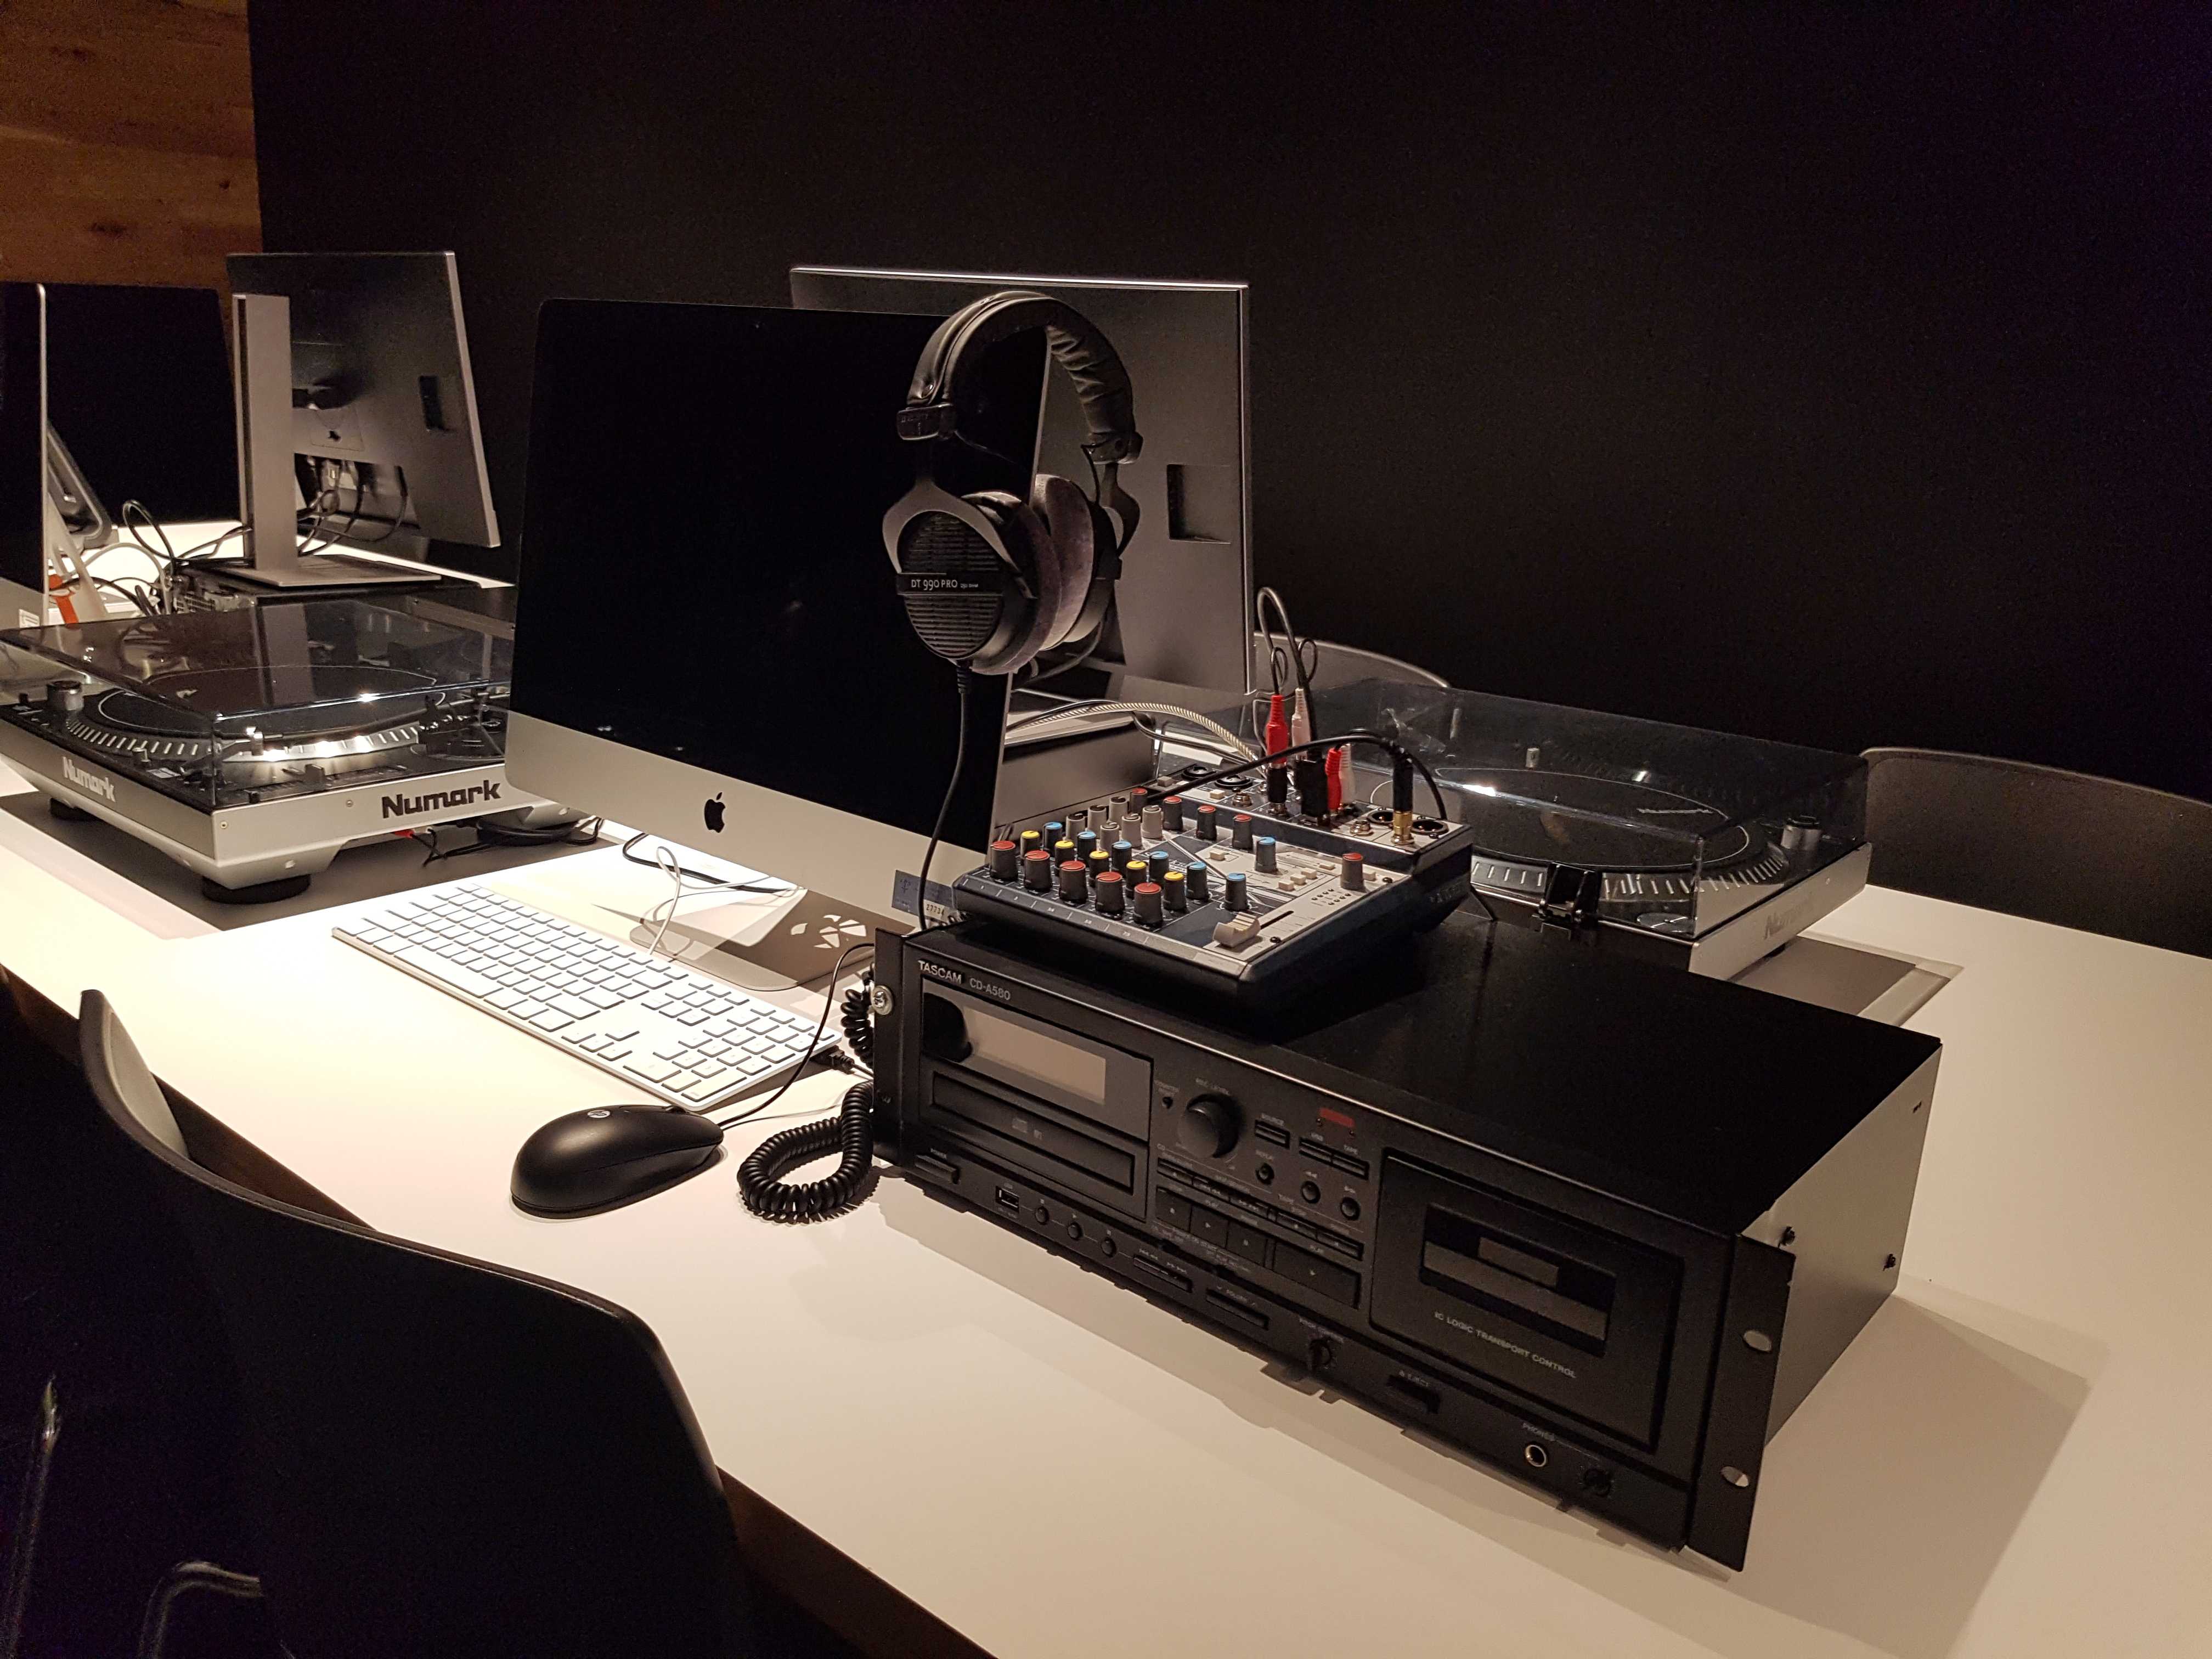
The audio workstations equipment
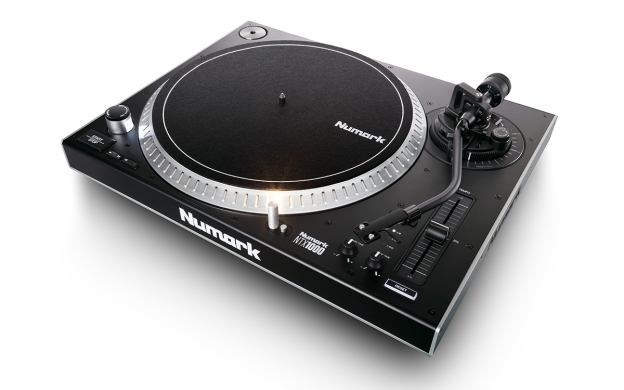
Full-size platter with high-torque direct-drive motor
2-speed design: 33 1/3 and 45 RPM
S-shaped tonearm for accurate tracking
Tonearm with height adjustment, damped cueing and anti-skate control
Pitch range adjustable to ±8%, ±16%, and ±50%
Adjustable counterweight for perfect tonearm balance
Pitch fader with reset button
Start and stop time knobs for adjustable time ramping
45 RPM adapter included
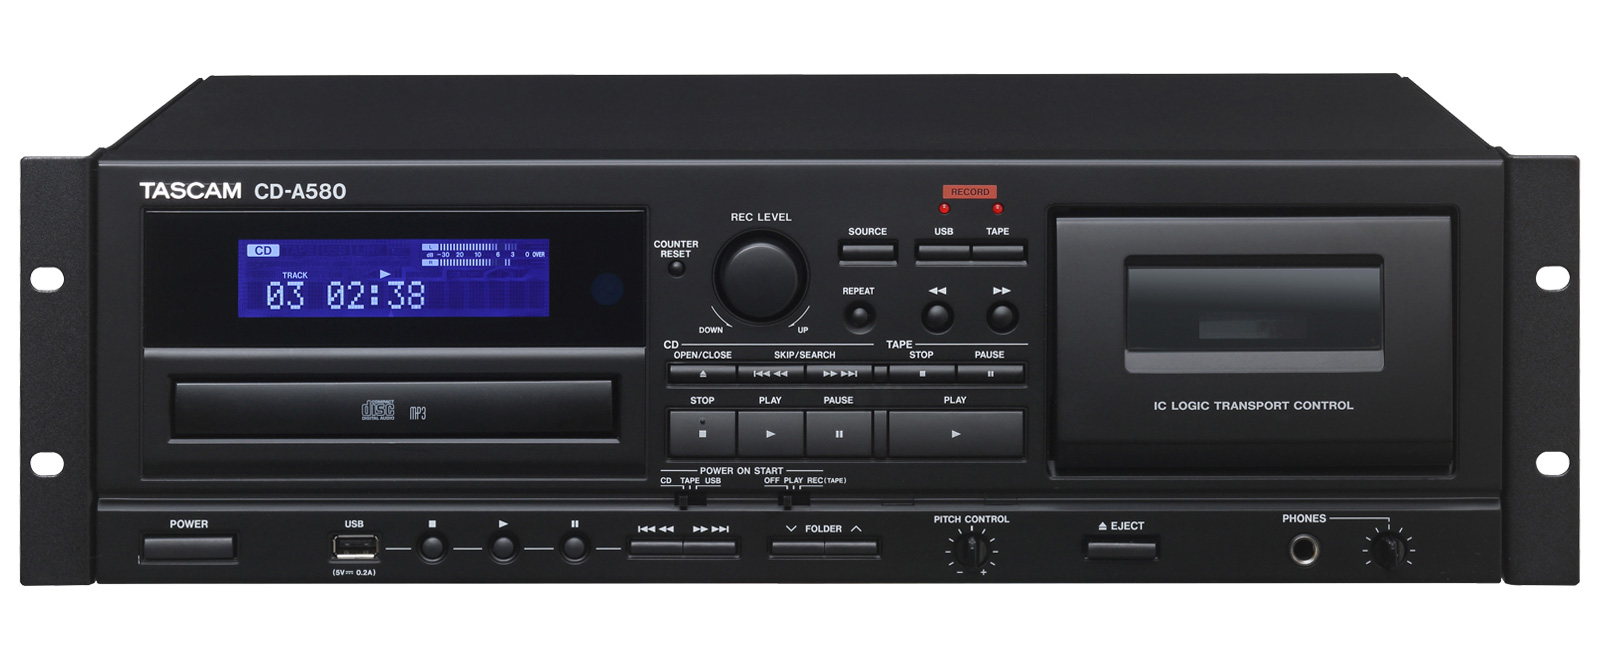
Multi-purpose CD-A580 plays from cassette, CD, or USB flash media. Cassette and USB recording is also available, allowing cassettes to be archived to USB as MP3 files.
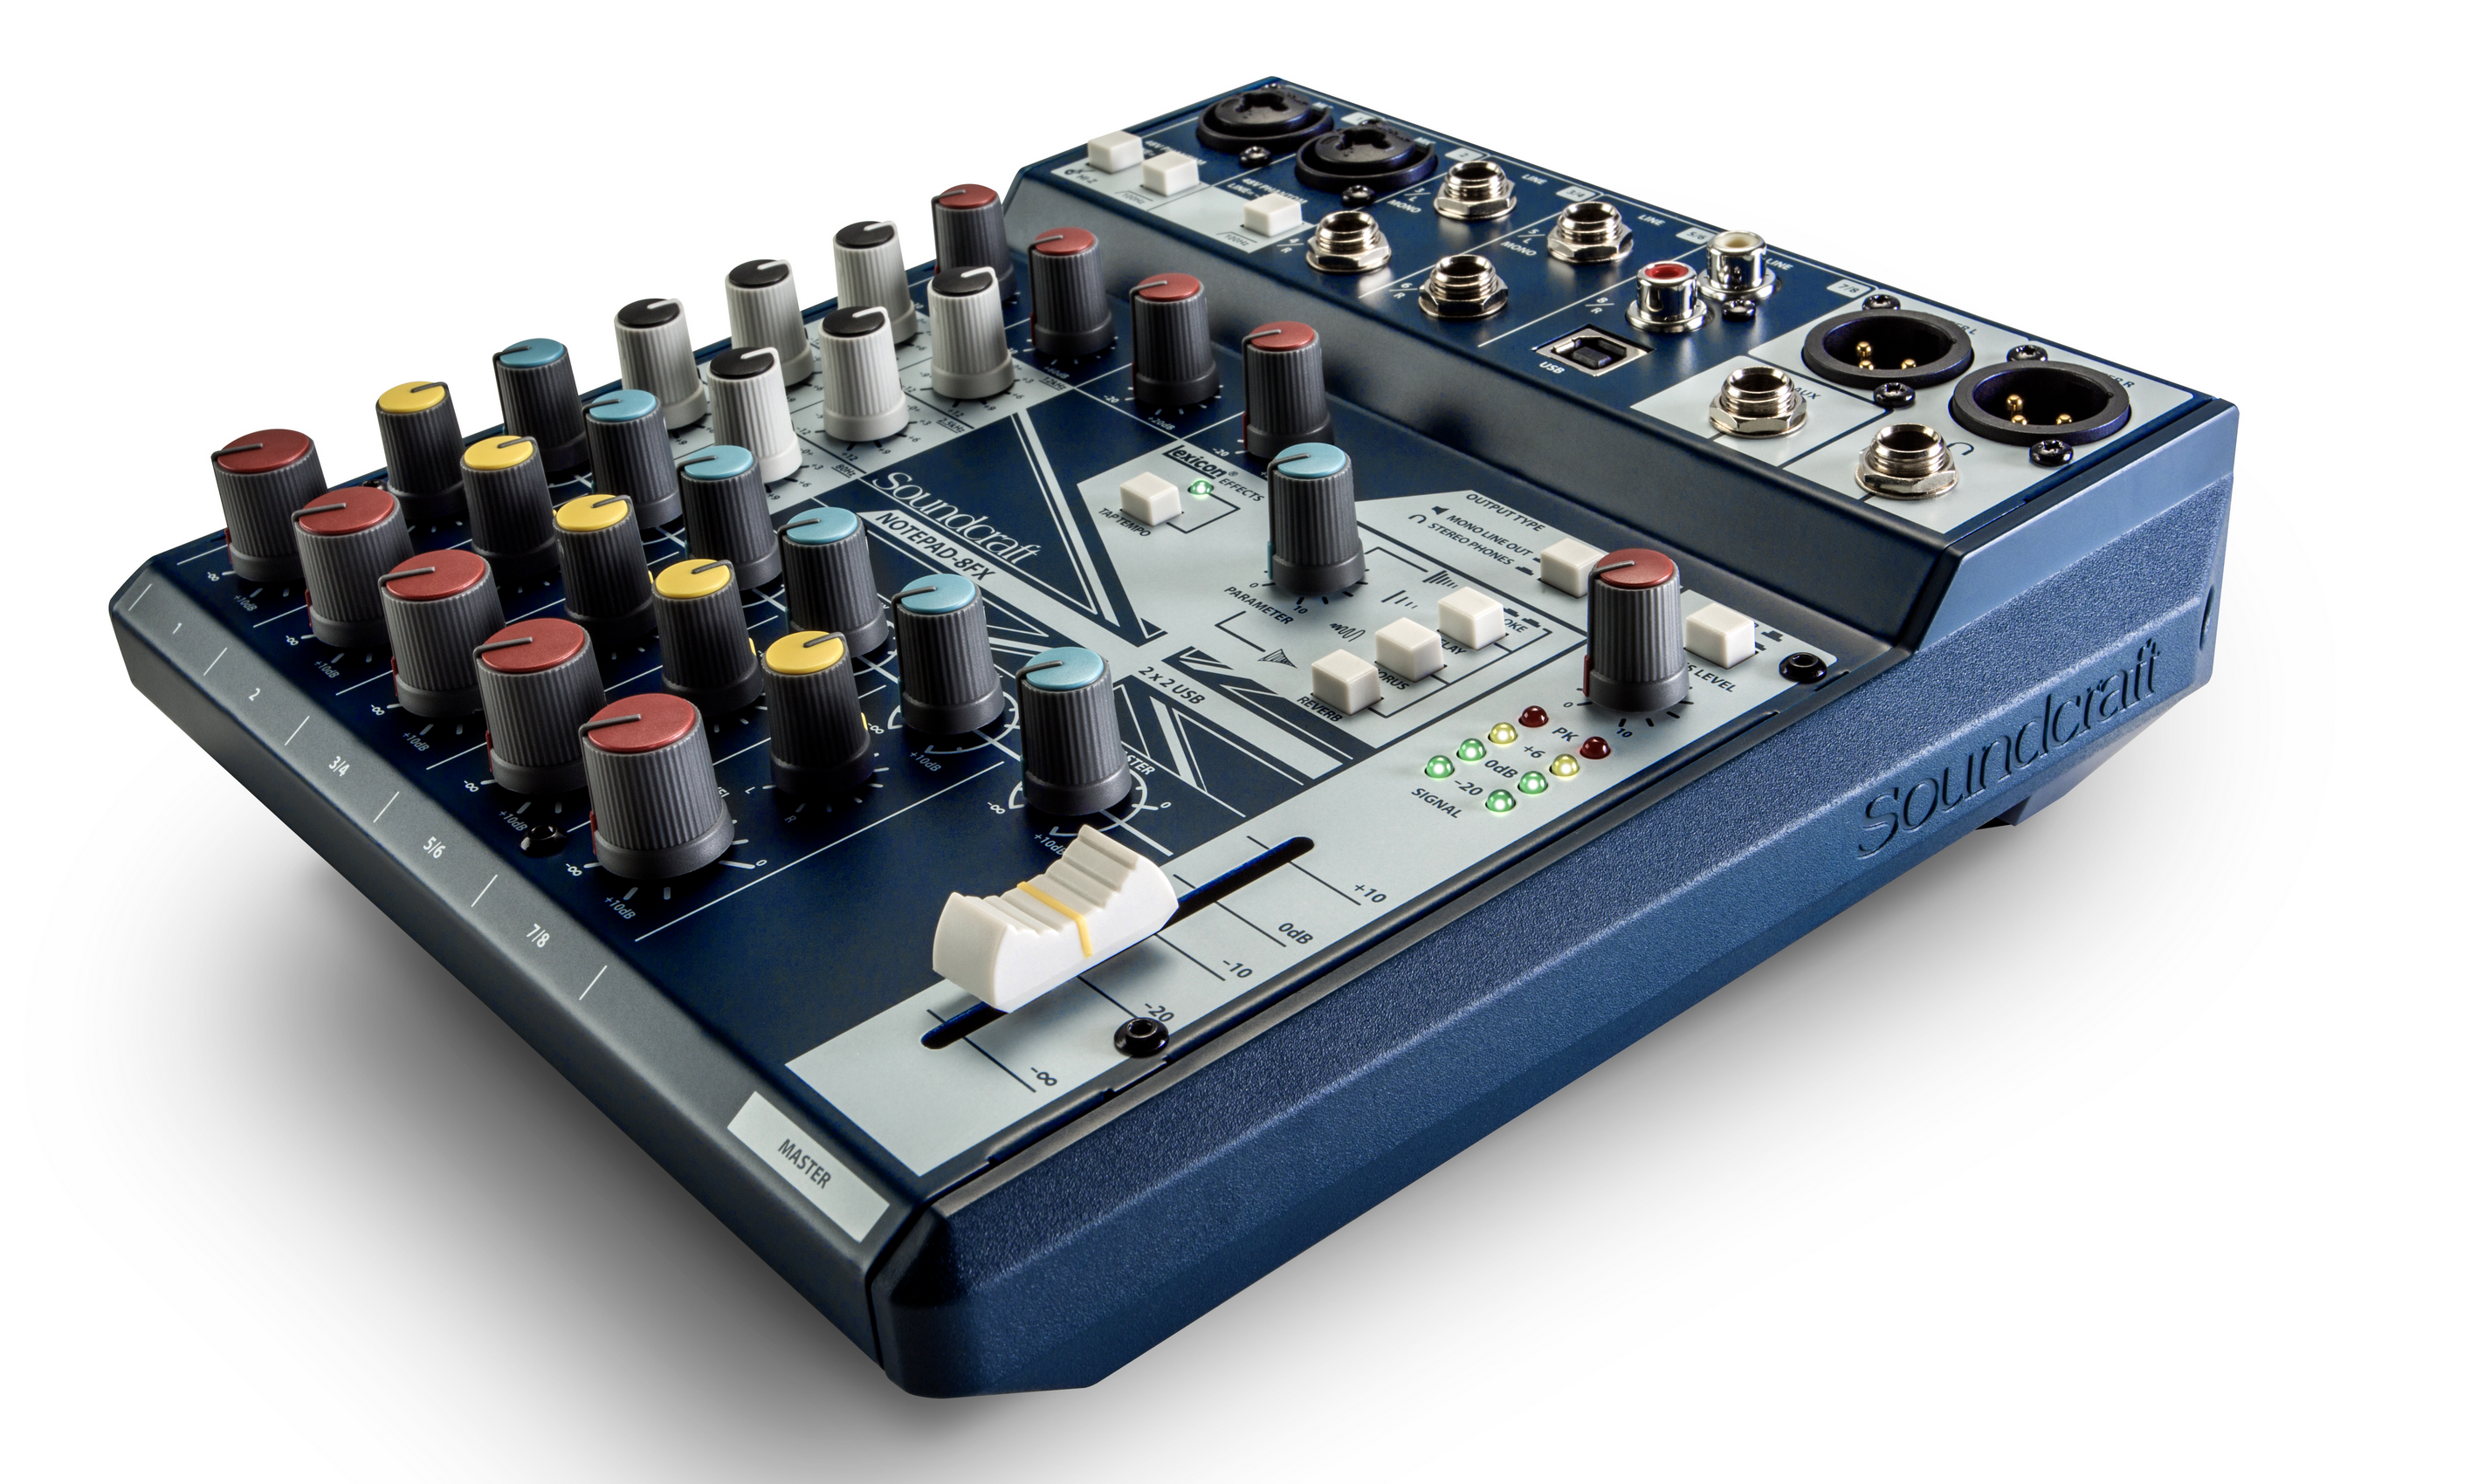
The Notepad-8FX 8-channel mixer makes it easy to get legendary Soundcraft sound for your music, podcasts or videos. The Notepad-8FX combines professional-grade analog components, renowned HARMAN digital signal processing and a built-in USB audio interface to use with your favorite Mac or PC editing software.
6.4 Audacity
Audacity is a free and open-source digital audio editor and recording application software availble on the audio workstations.
To learn more about getting started with Audacity, visit the "How to get set up with Audacity" page.

7. Production Studio
Our production studio is located in the basement of the Library Learning Commons and has everything you need to create excellent quality live streams and video recordings. If you have an idea for a project that could benefit from professional quality audio and video, consider booking time in our studio!
We currently offer different three sets designed to suit your needs:
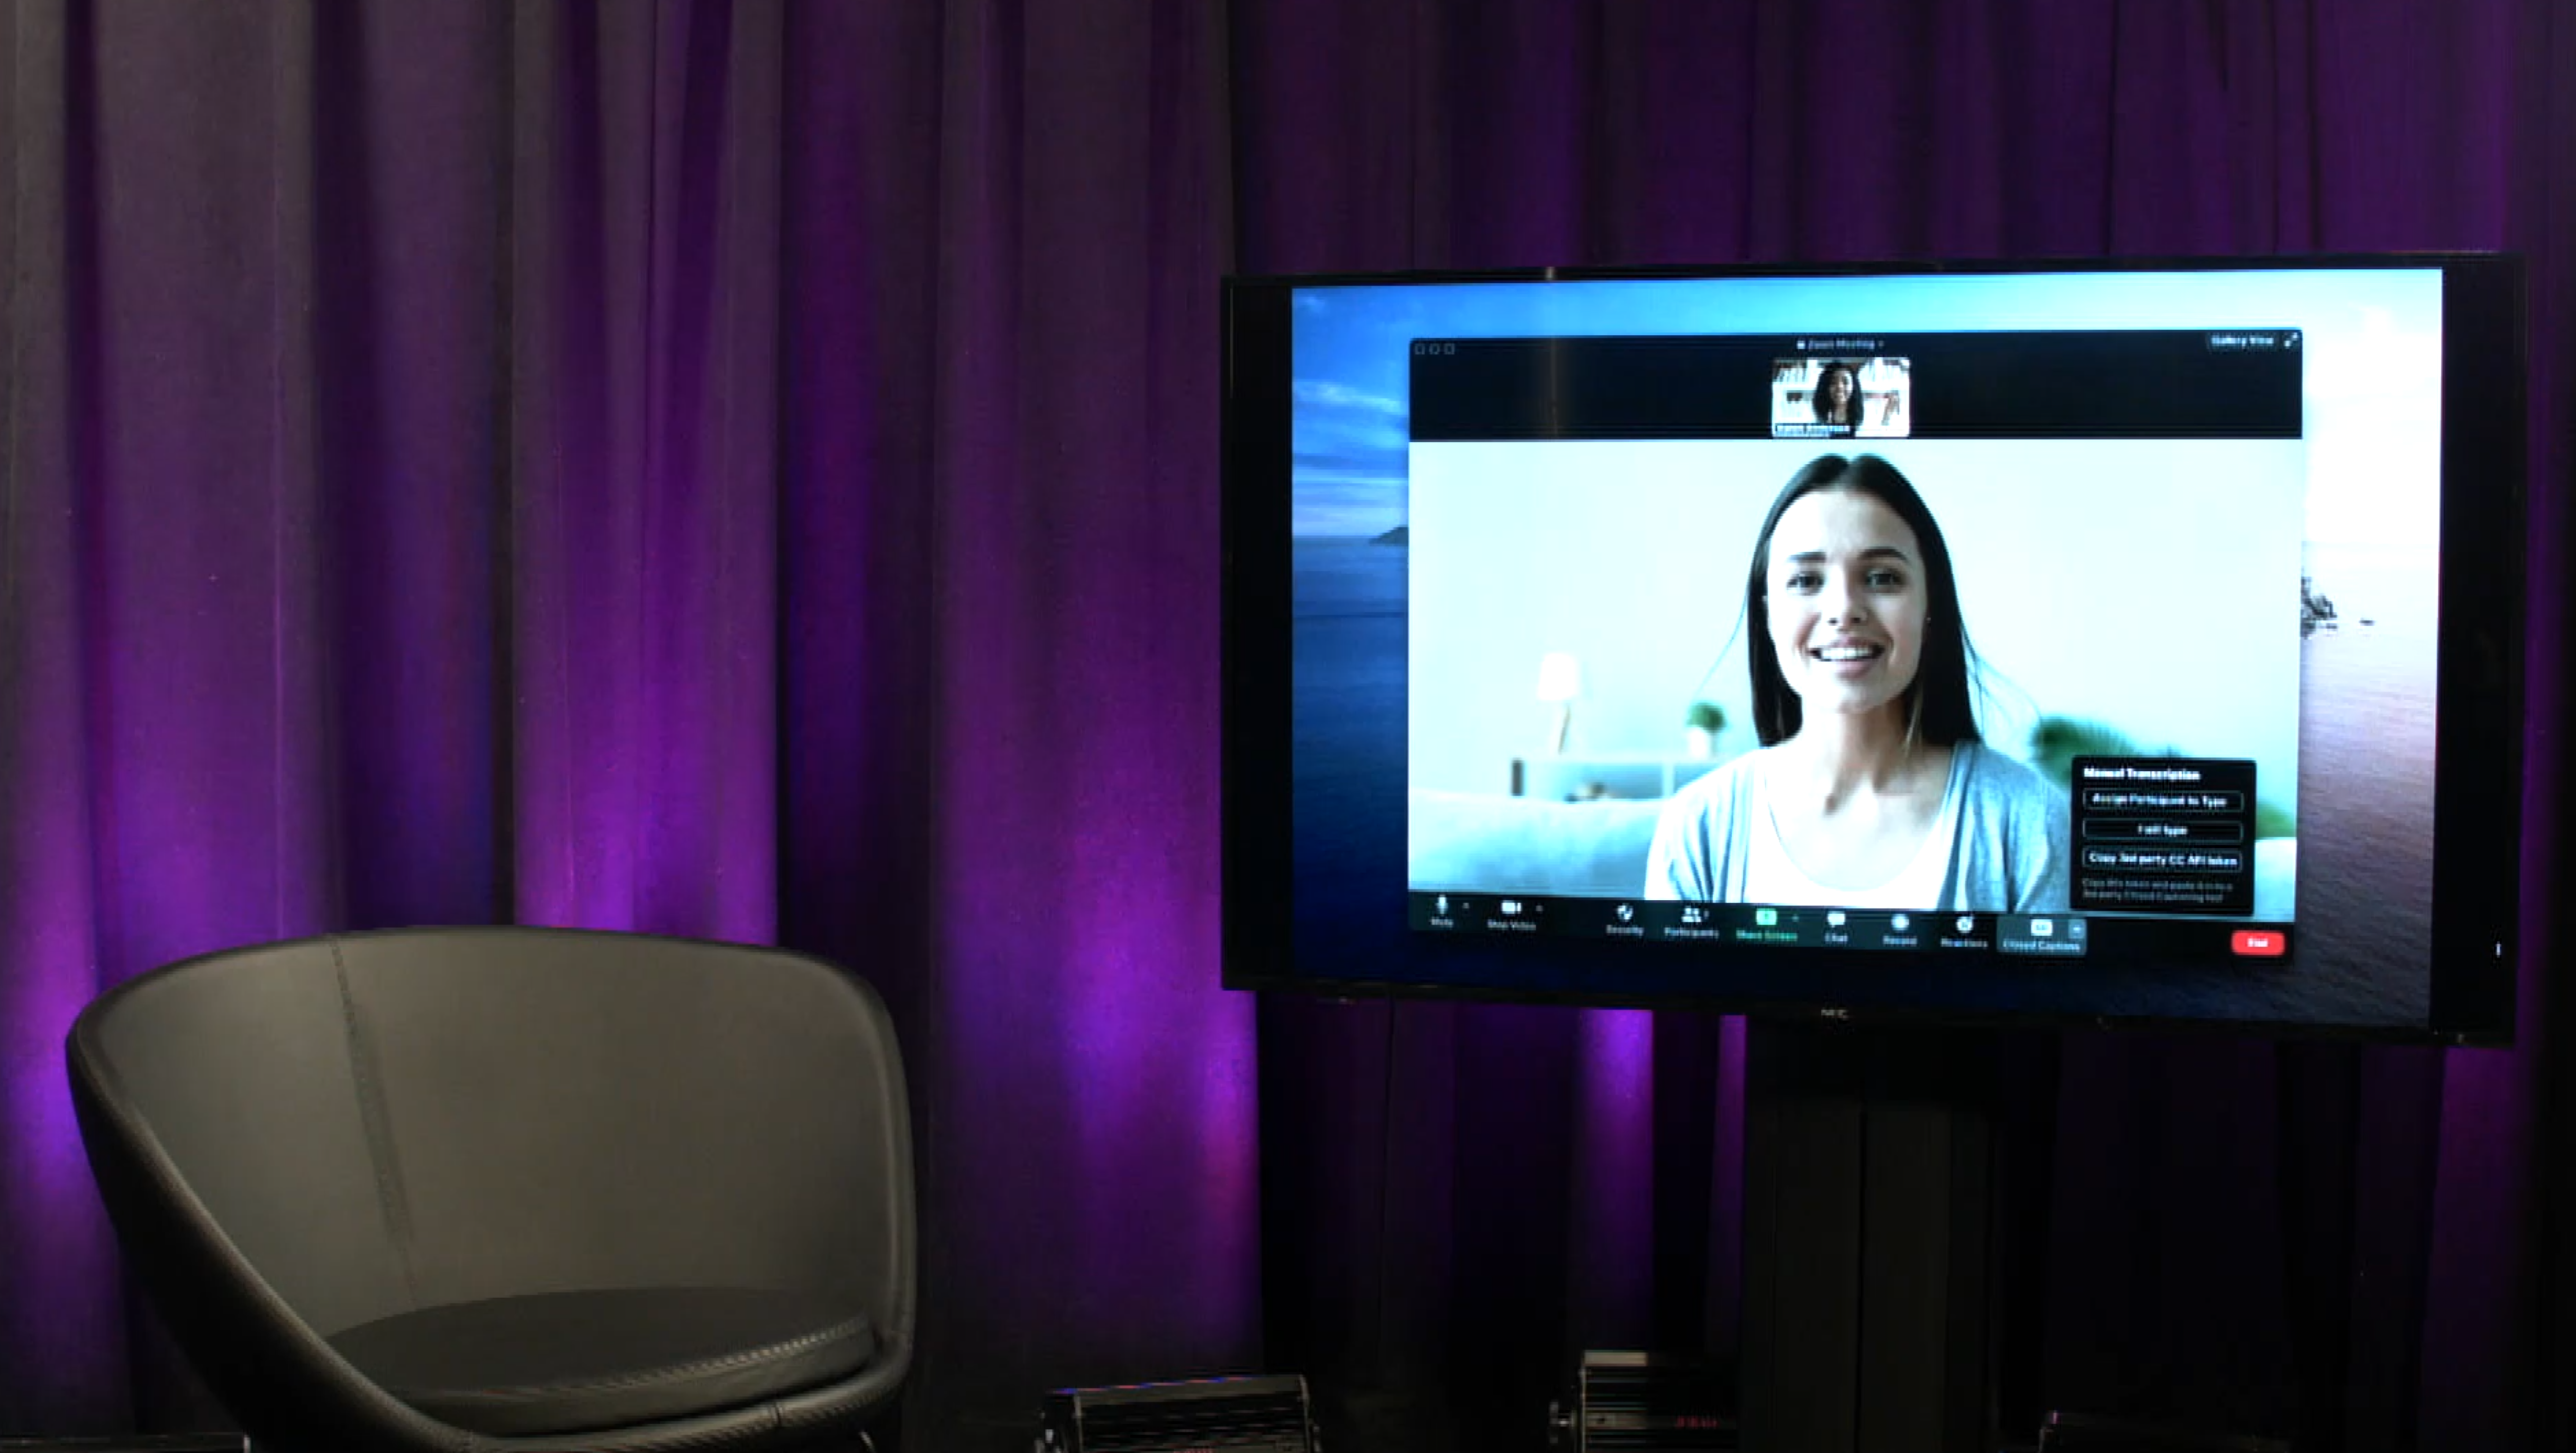
The Interview Set
Live or recorded session with the "interview" style set. Ideal for interviews, webinars or talk shows. The set can include 1 - 2 chairs and a TV for virtual guests.
 Click here for more information about this set!
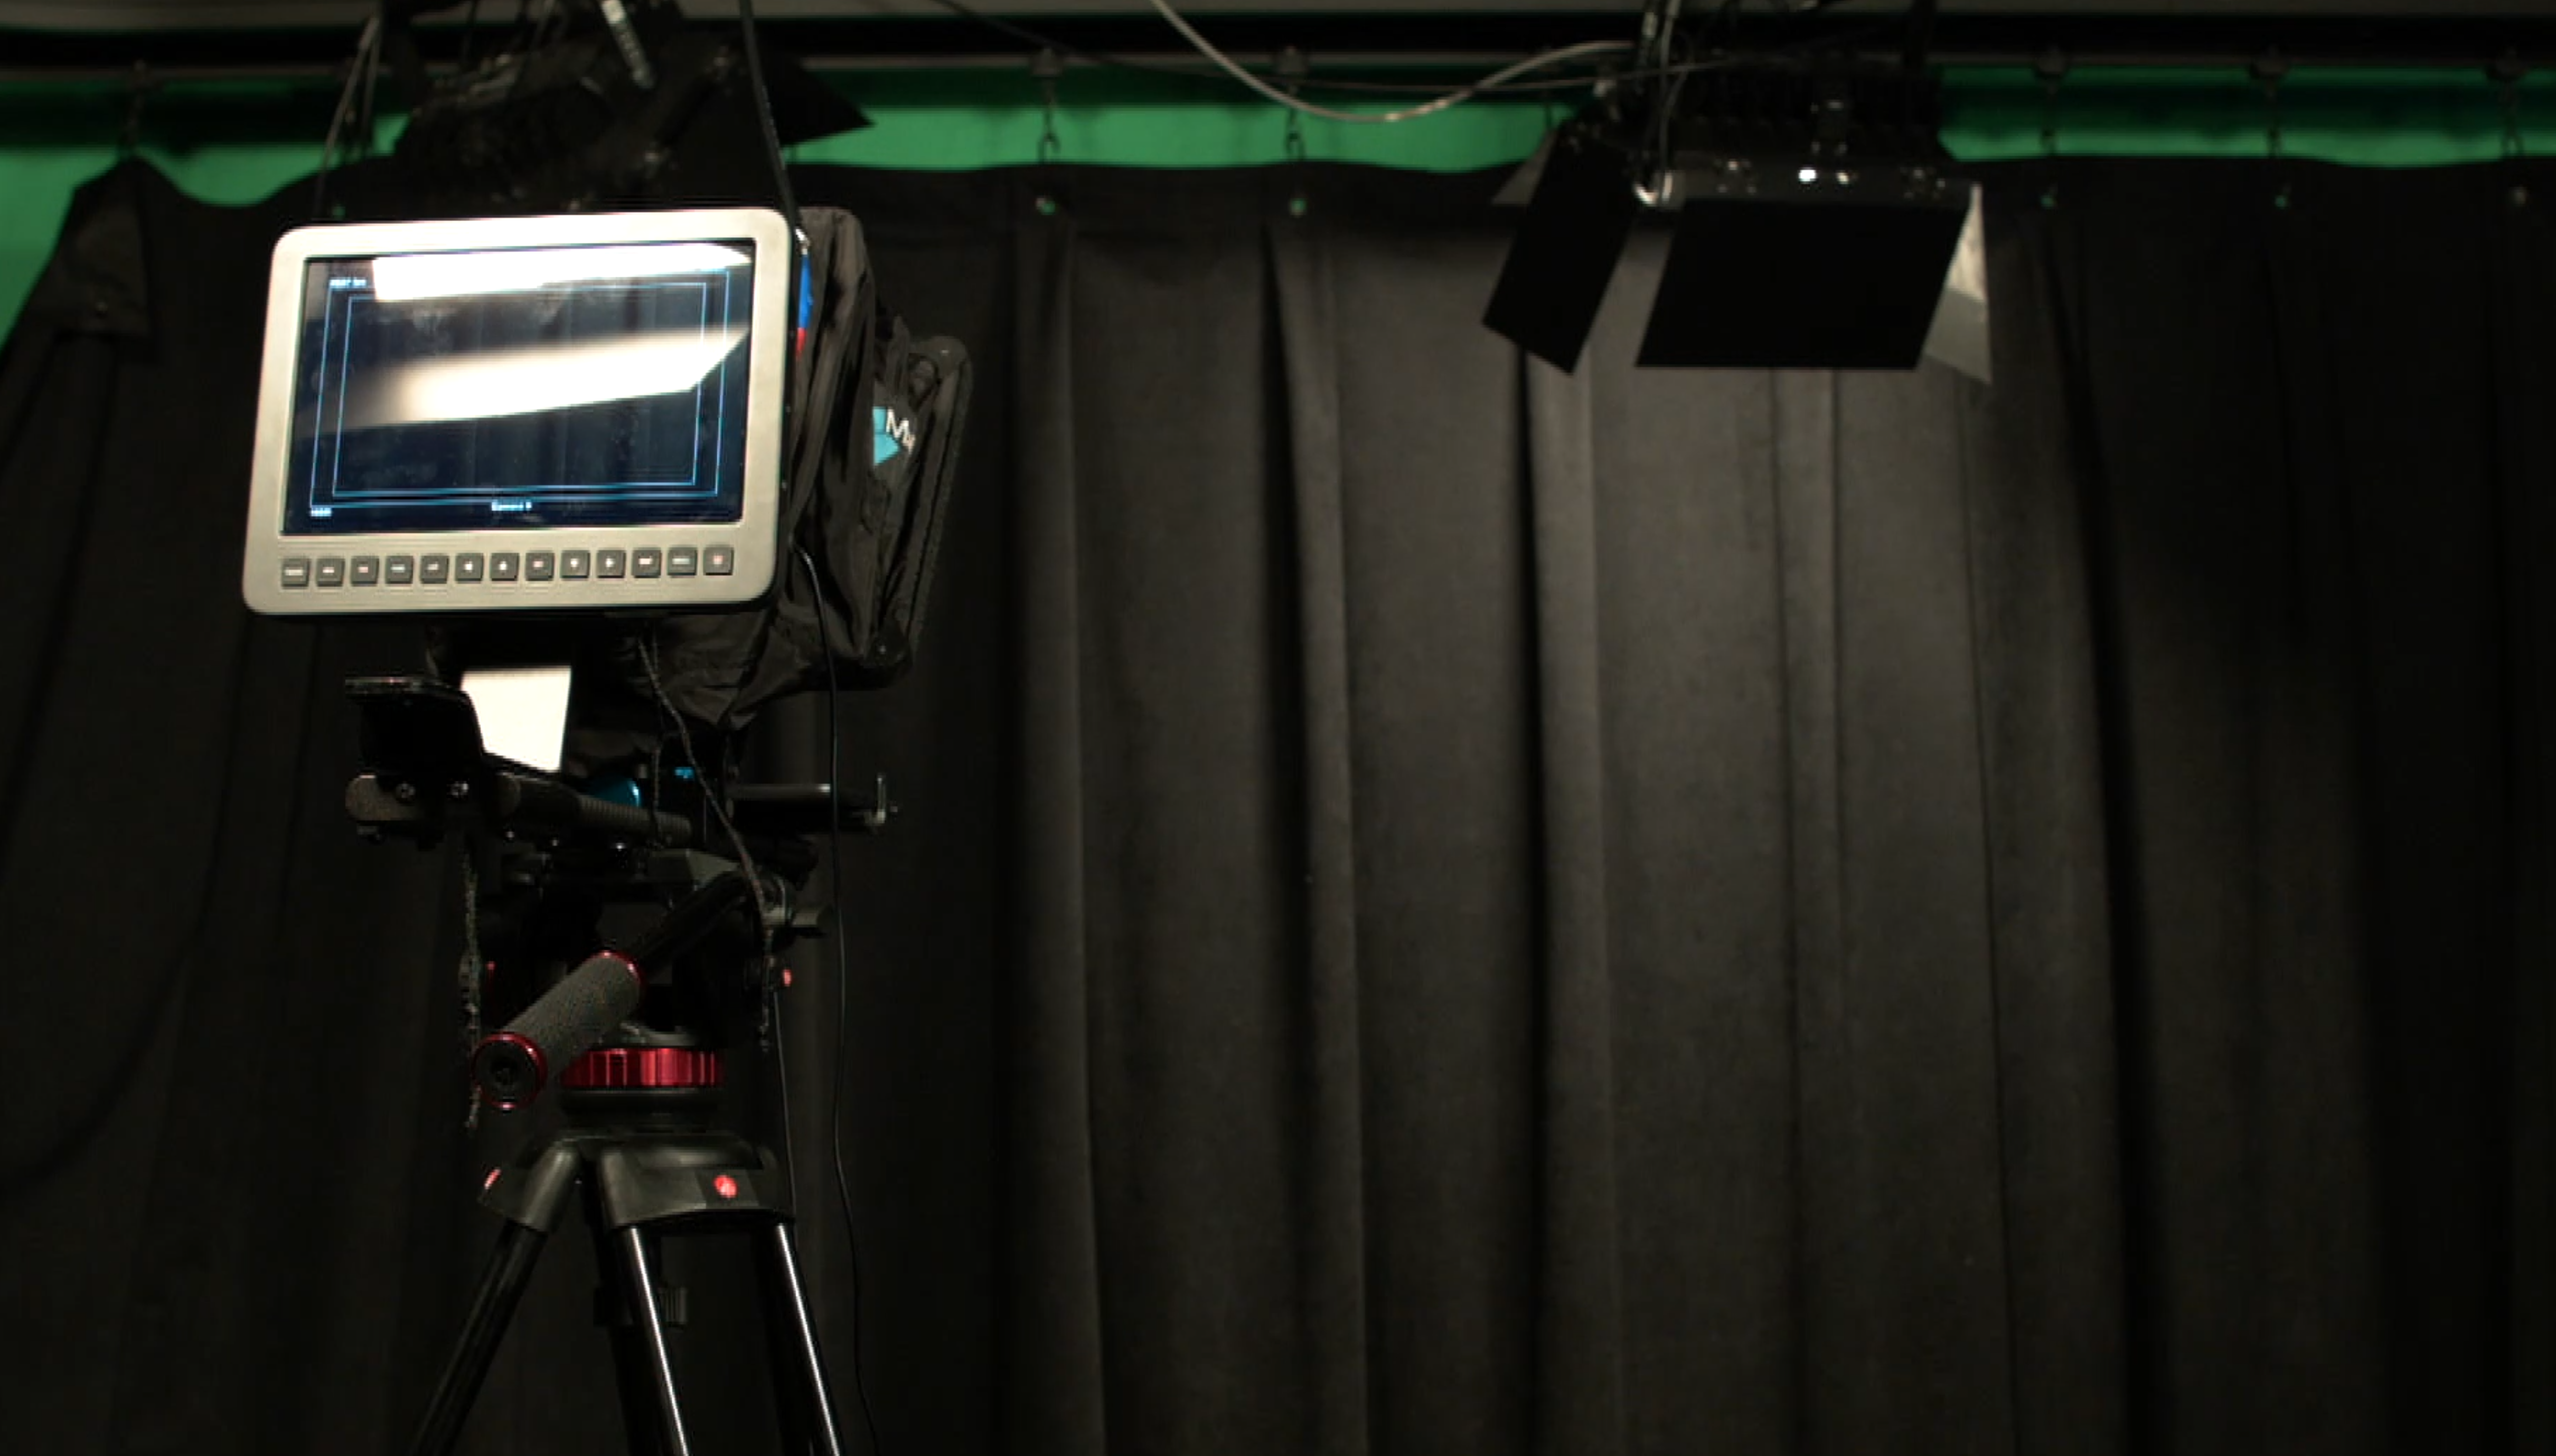
The Stand & Talk Set
Live or recorded session with the stand and talk style set. Ideal for talking head style videos and lectures. Can be filmed with a curtain background or green screen for post production editing.
Click here for more information about this set!
The Lightboard Set
Recorded session with the light board style set. Ideal for recording lectures or presentations while making notes on the light board.

Click here for more information about this set!
Faculty and staff can book into the studio space to use one of these 3 sets by clicking this link.
8. Editing Suites
The Library Learning Commons has 2 small editing suites that are available for video and audio projects for a small group or individual.
Both editing suites come with a 27" iMac Pro with secondary 27" monitor, 24TB external RAID drive for video storage, input options to get SD cards, SSD drives, and other storage devices connect, a voiceover microphone
The software installed on the systems are: FinalCut Pro, Adobe Premiere, Davinci Resolve, GarageBand, Audacity, Screenflow recording and editing software.
The editing suites can be booked in advance, and have a daily maximum of 8hrs and 30 minutes.
If you are booking the editing suite for the first time please book at least 24hrs in advance to allow the creation of the user on the iMac, otherwise the iMac cannot be used.

Book an Editing Suite
First time booking?
It is very important that if it is your first time booking that you indicate this, a user needs to be created for you, and ITS will allocate memory for you.
10. Meeting Room
11. Agora
The agora is an open space located in the main entrance of the Library Learning Commons. Users wishing to book the agora need to contact the University Librarian with their request.
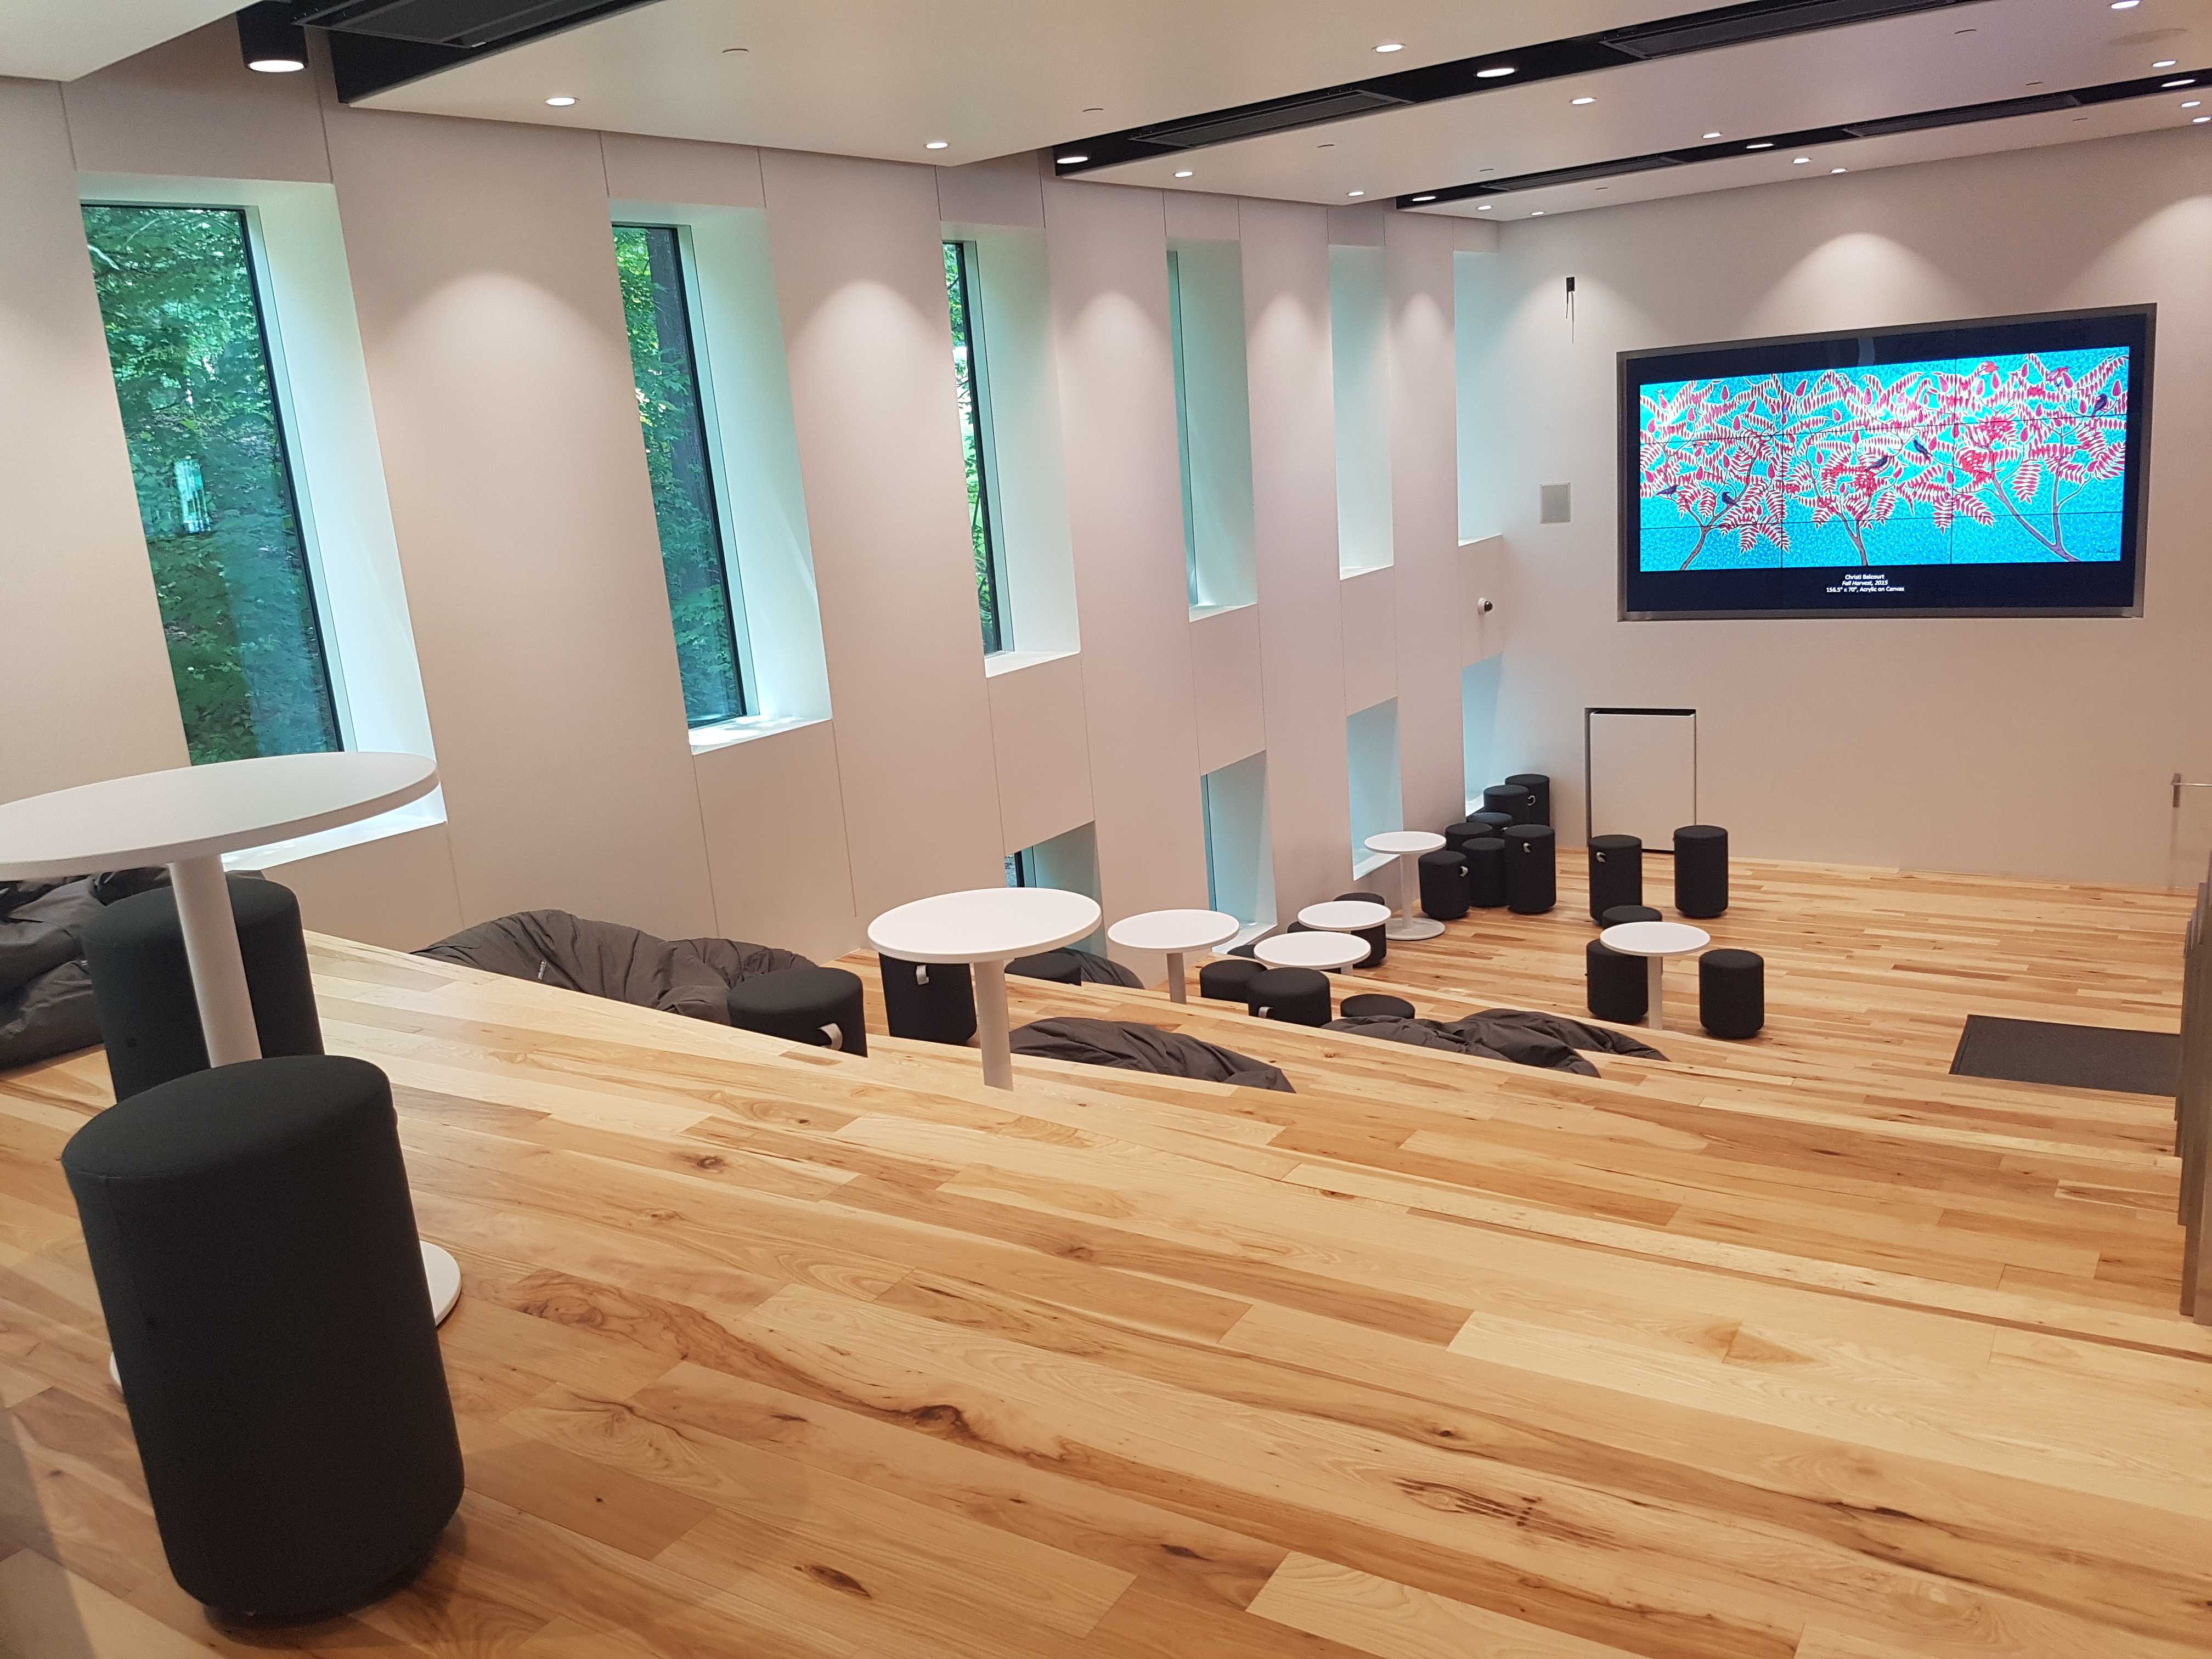
The agora includes a 3x3 grid of 55" screens creating a massive wall display controlled by a main console. The console allows users to access the provided computer or to setup their own laptop to be displayed on the wall monitors.
The agora is best used for information sessions.
How to use the agora
11.1 The console
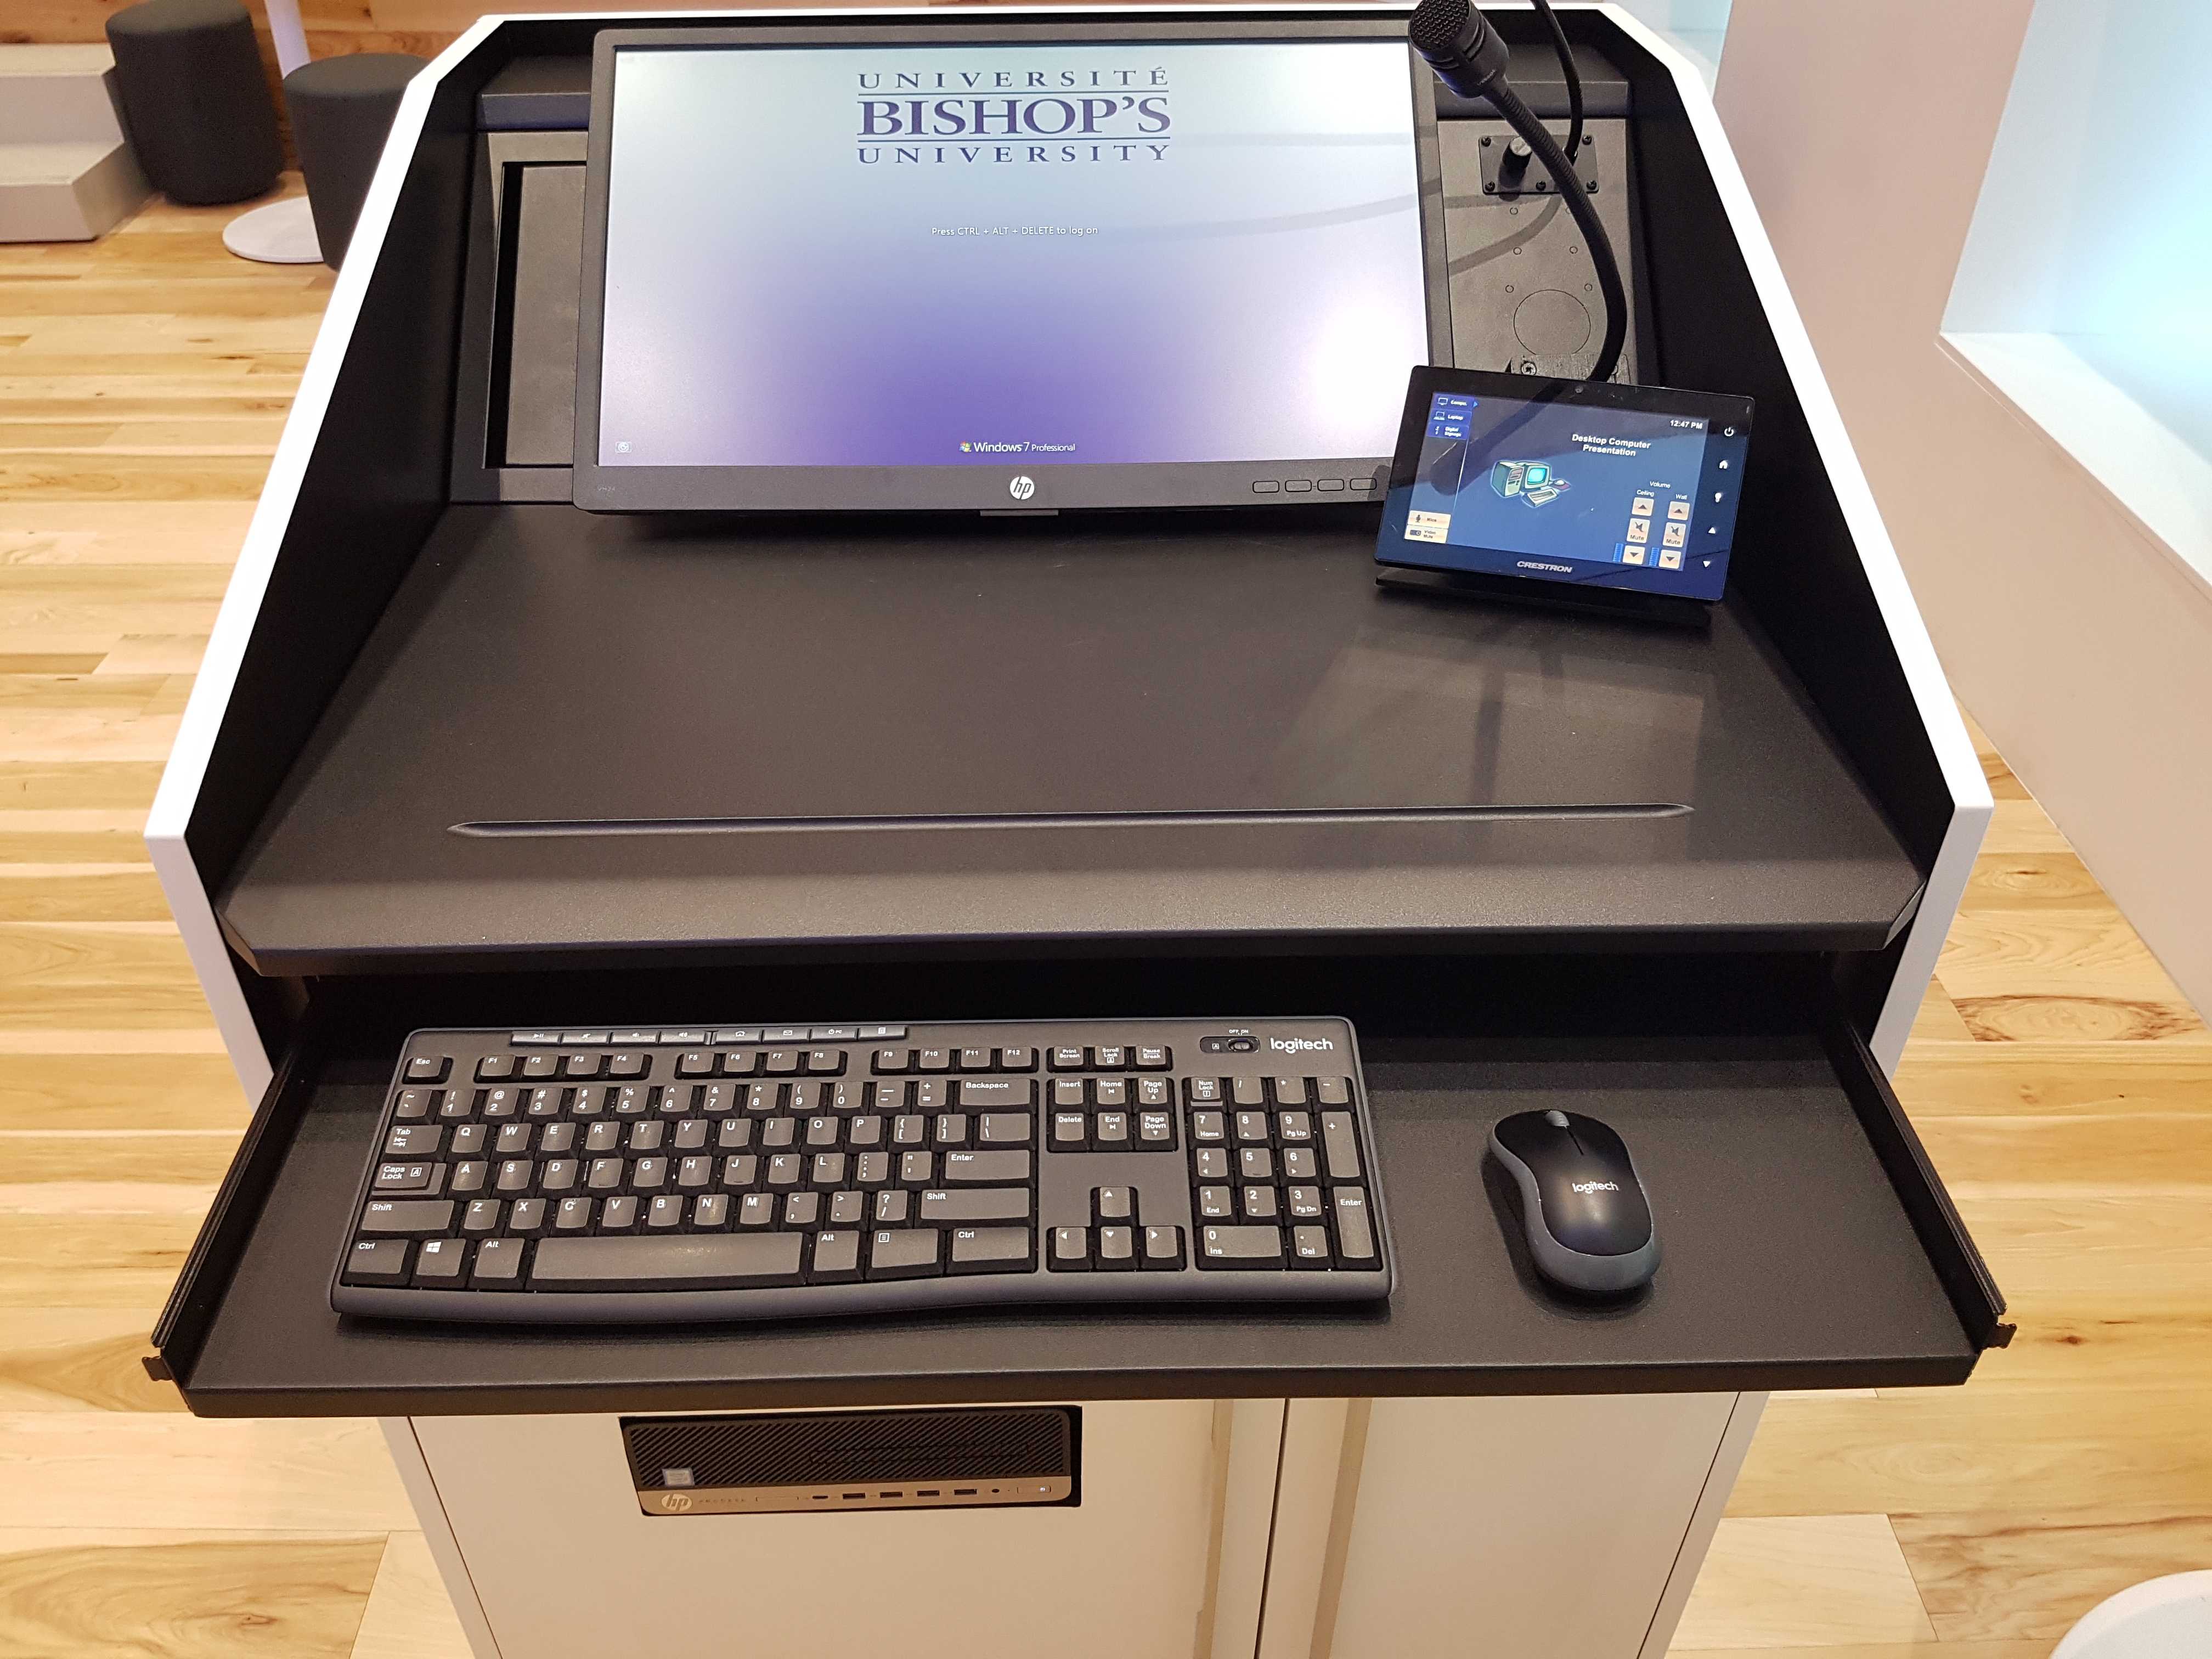
The console allows users to show content on the display wall using the provided computer or a laptop. It includes a Crestron touch panel, a computer, a monitor to keep track of the presentation, a wireless keyboard & mouse, a microphone, a small lamp, and an HDMI & VGA/auxiliary laptop display cables.

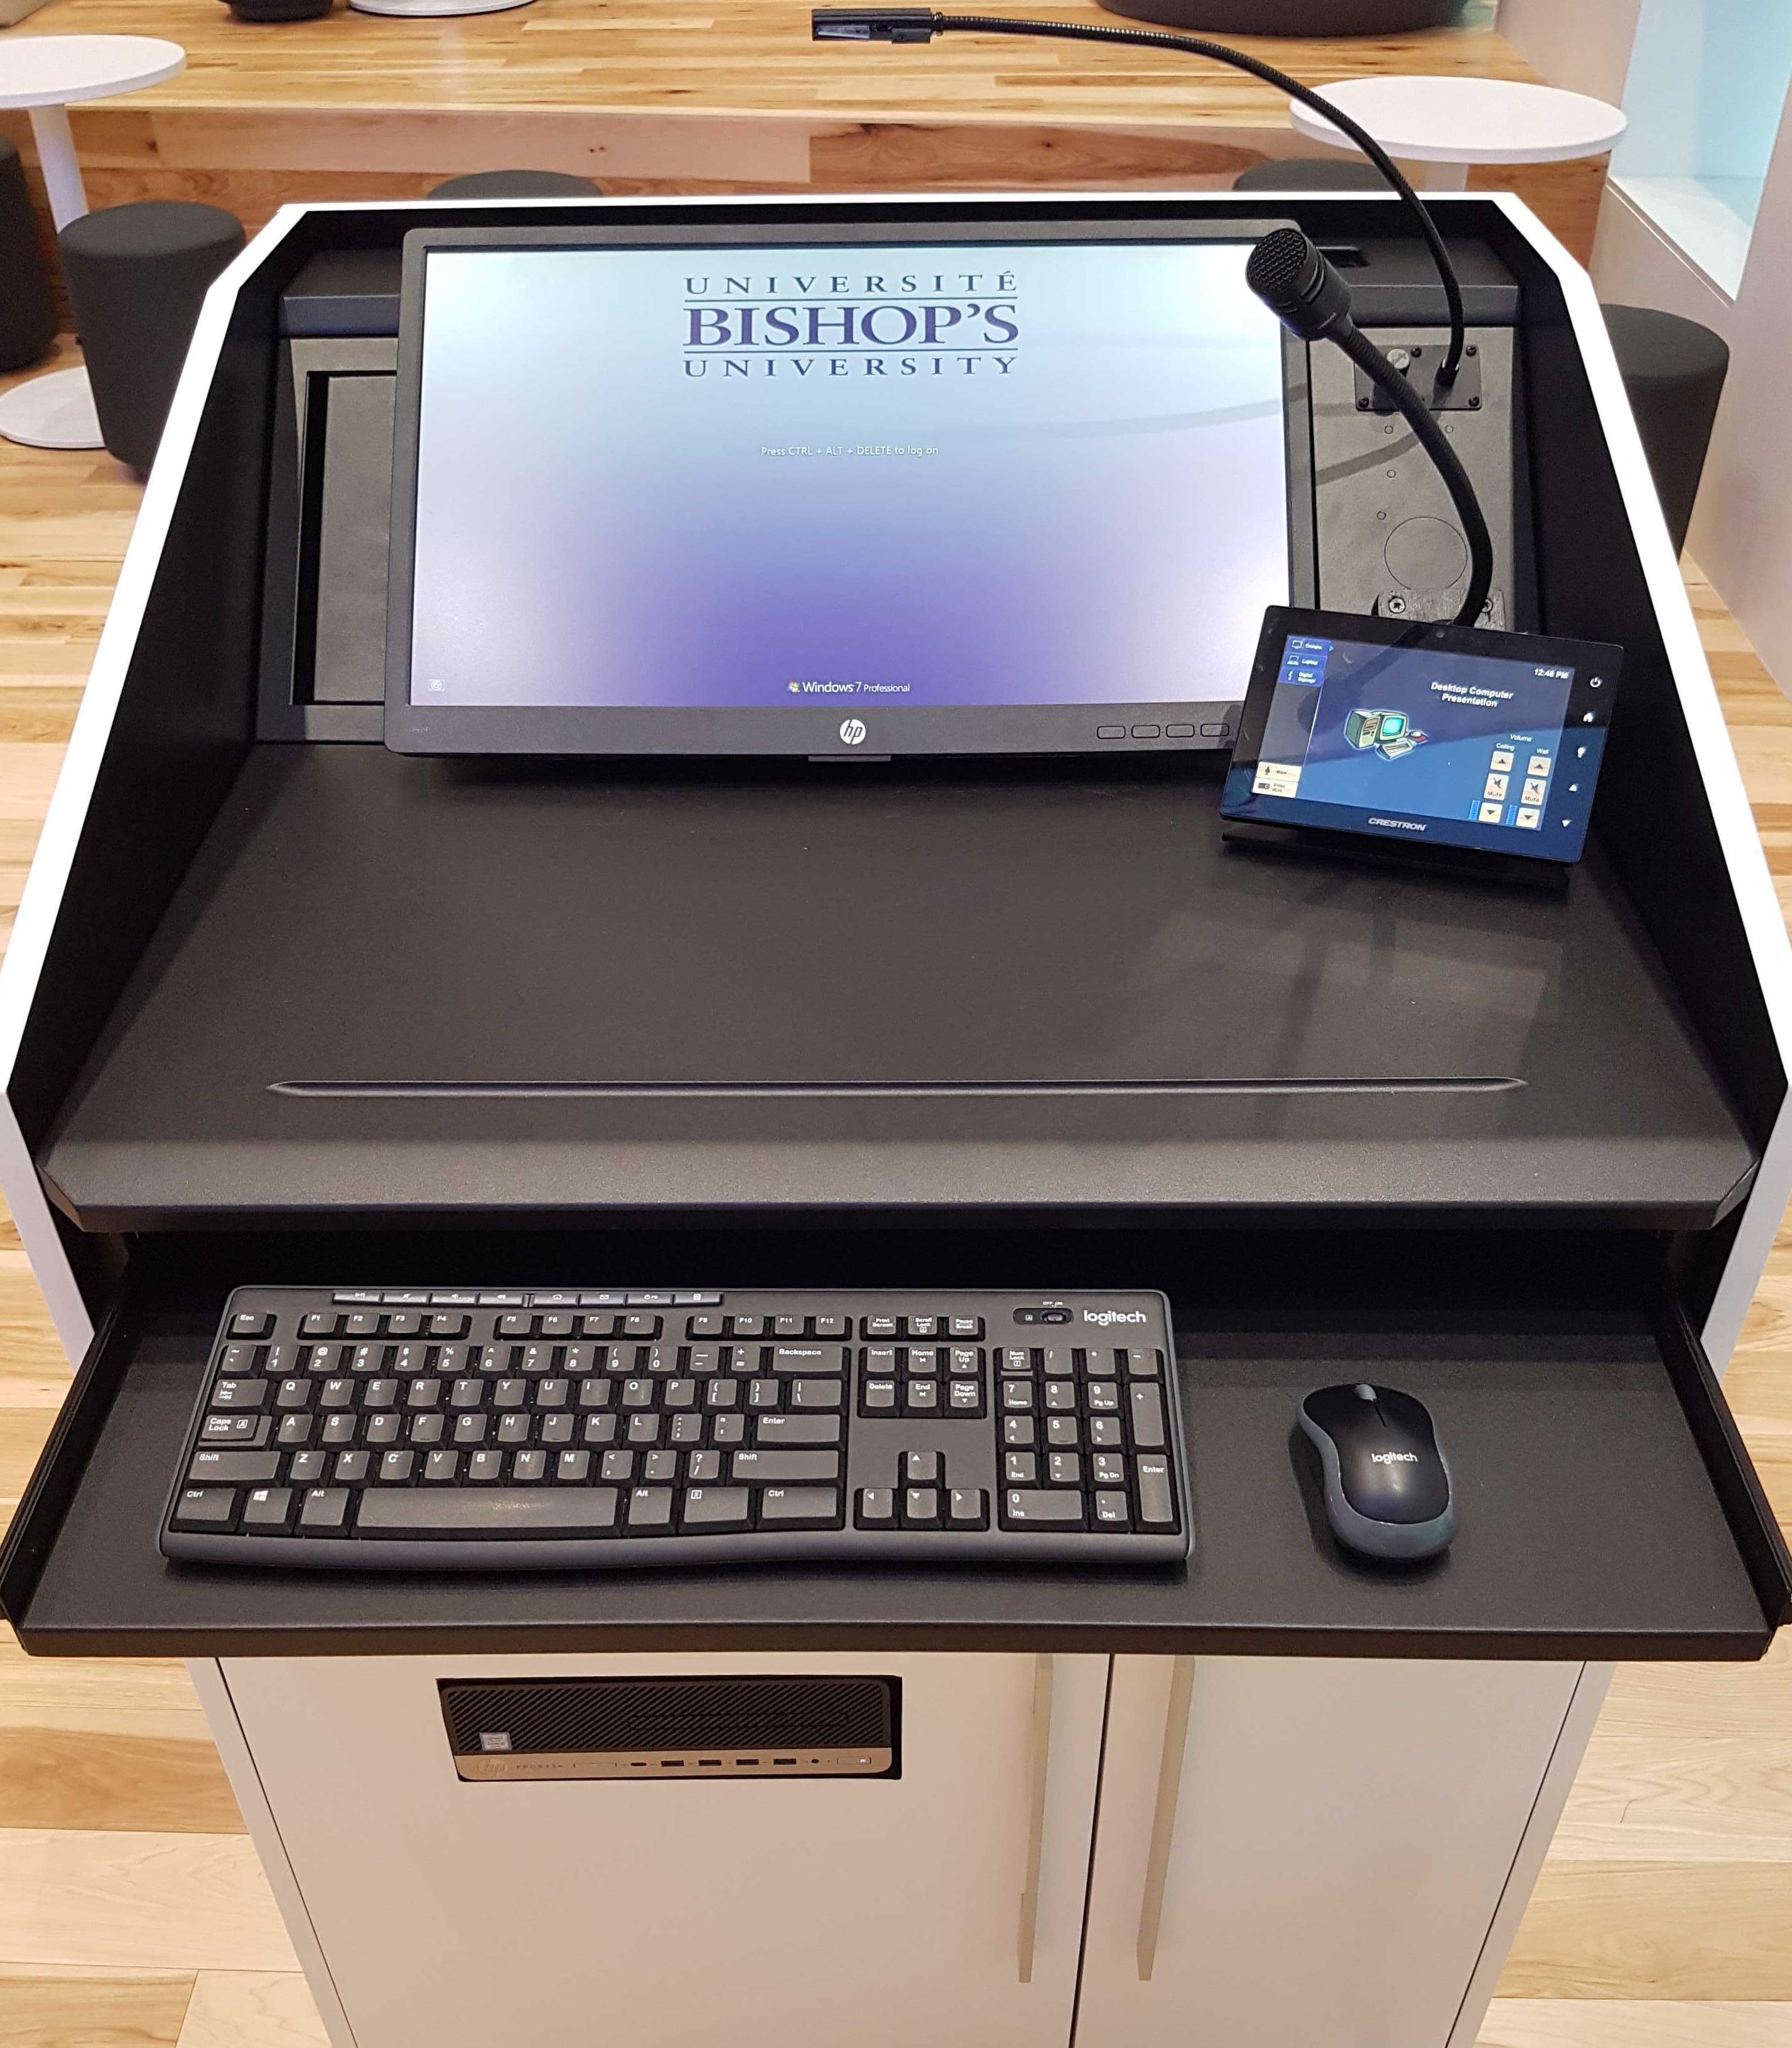
11.2 Using the Crestron touch panel
The Crestron touch panel allows users to show content on the wall display, to control the lights, and to control the volume of the presentation and microphone.
Step 1:
Press the touch panel to begin.
Step 2:
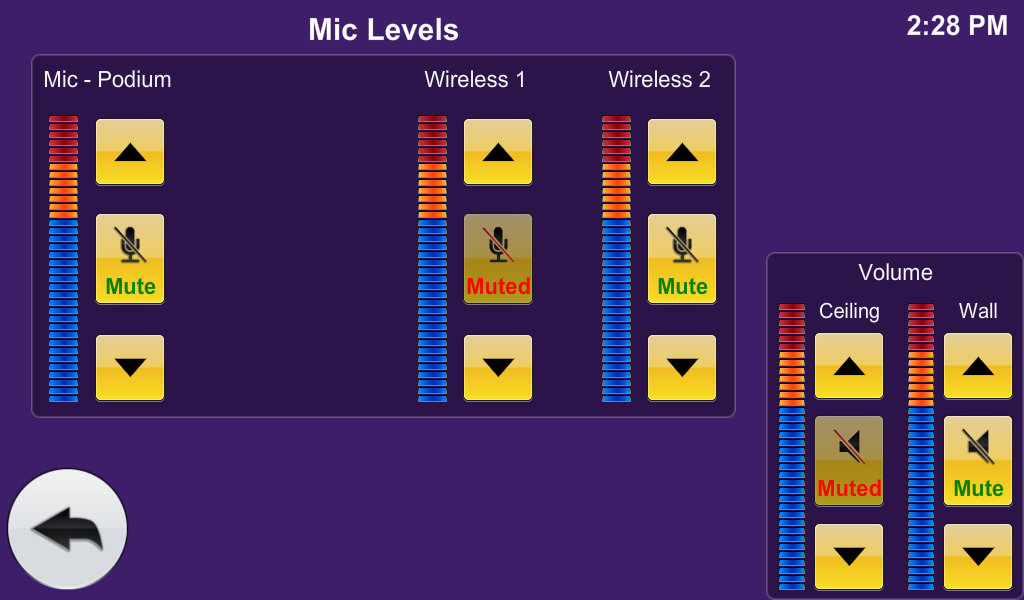
Press the "Mics" button on the left side to adjust the microphone level.
Step 3:
Adjust the "Mic - Podium" levels if you are using the podium microphone.
Alternatively, you can borrow a wireless handheld microphone from the IT Helpdesk and control its volume from the "Wireless" section.
Note: When adjusting the volume of your microphone, please, consider that this space is located in a public area. Always adjust the volume levels with respect to the other users using the space around you.
Step 4:
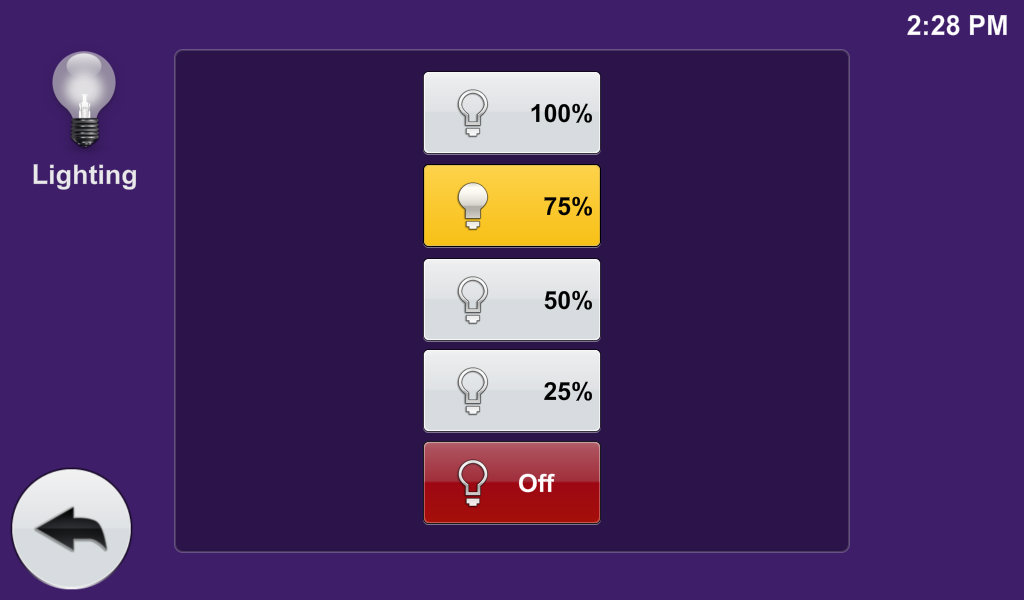
To adjust the lights select the lightbulb icon on the right side of the touch panel.
11.3 Setting up the computer
Bishop's users can login to the available PC with their BU credentials.
Step 1:
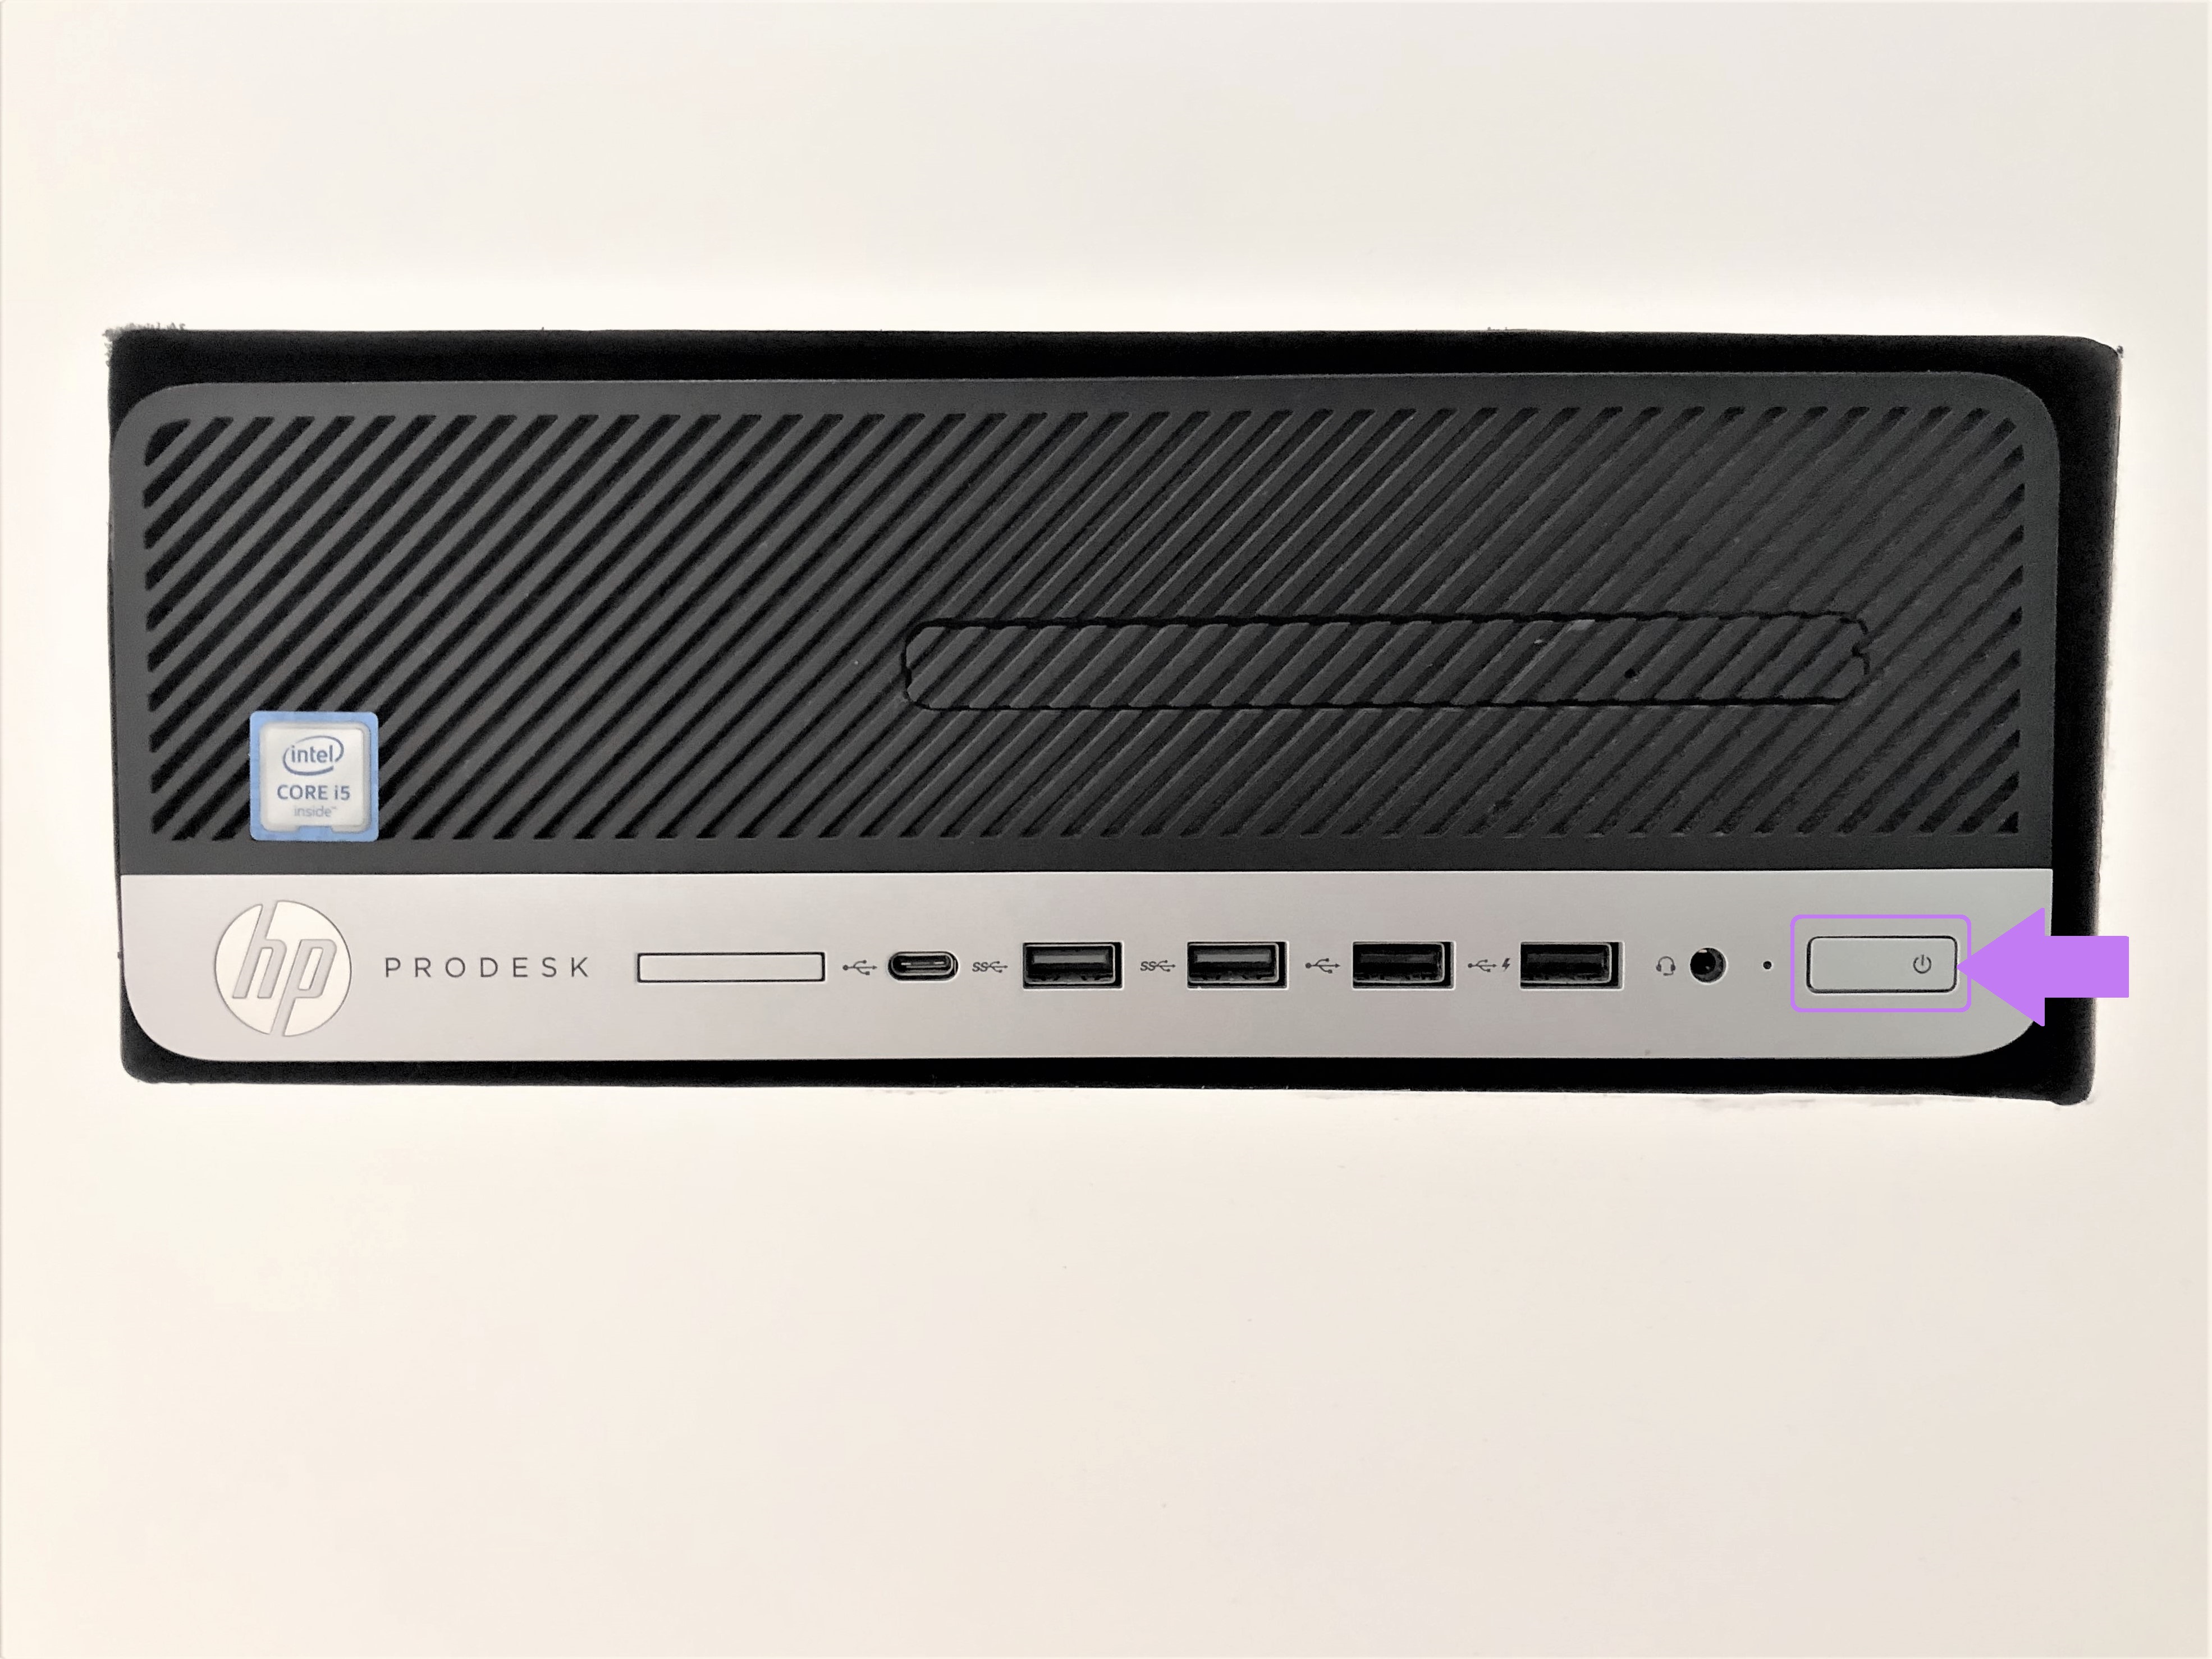
Turn the provided PC ON.
The PC is accessible on the bottom of the console. If needed, you can plug in a USB key directly on the front of the PC.
Step 2:
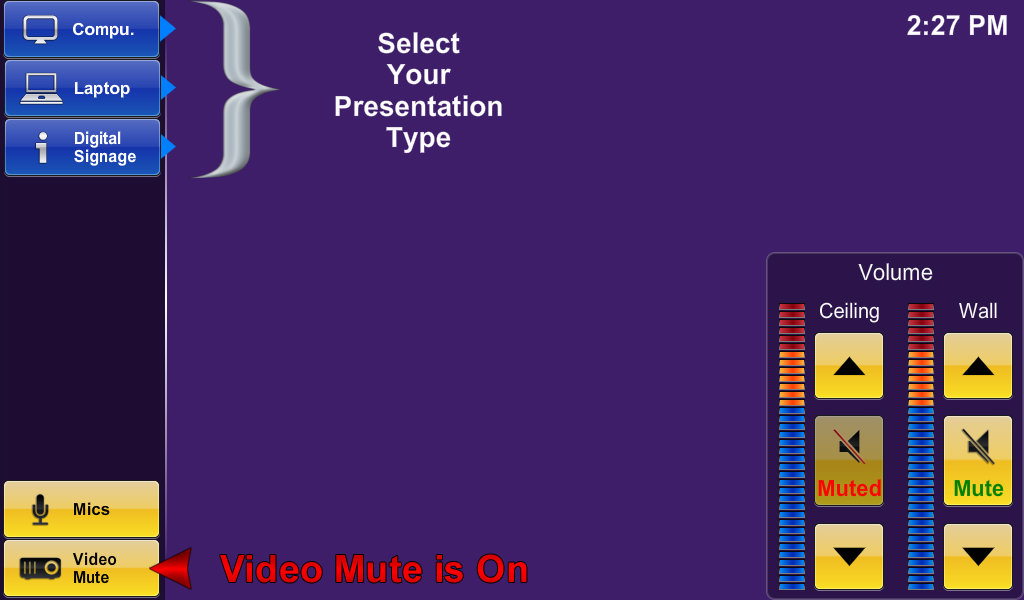
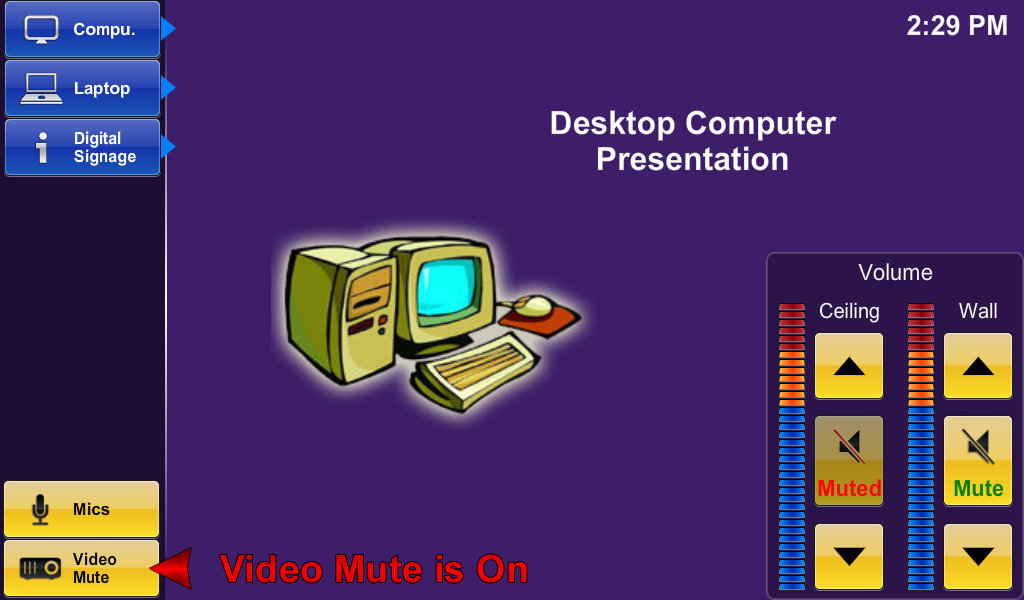
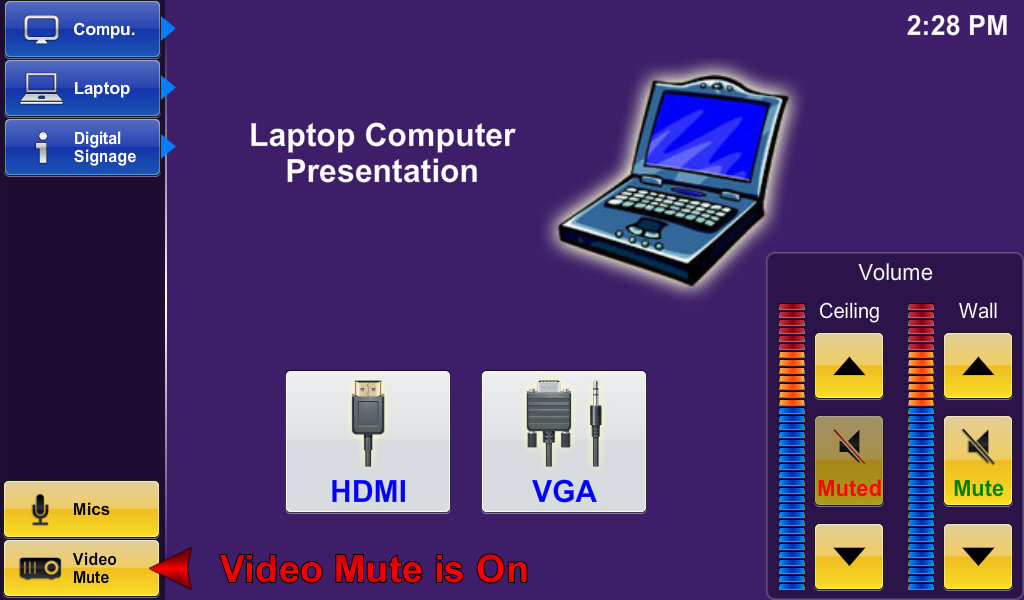
Select the "Computer" button on the upper left corner of the touch panel to display from the provided PC.
Note: Make sure the video mute button is not activated to allow displaying your screen on the wall display.
You can press the "Video Mute" button anytime you desire to access content on the computer you do not wish to display to everyone.
Step 3:
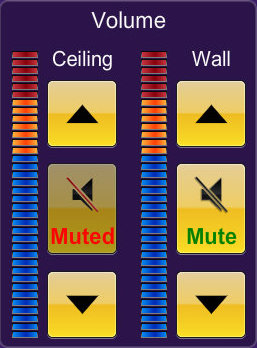
To adjust the volume of the presentation, use the volume panel on the bottom right.
The ceiling and wall speakers can be adjusted individually.
Note: When adjusting the volume of your presentation, please, consider that this space is located in a public area. Always adjust the volume levels with respect to the other users using the space around you.
11.4 Setting up your laptop
A laptop can be plugged into the system using the provided HDMI & VGA/Auxiliary cables to present on the display wall.
Step 1:
Open the panel on the left side of the monitor and connect to either the HDMI or VGA/Auxiliary cables.

Step 2:
Select the "Laptop" button on the upper left corner of the Crestron touch panel and select whichever cable you connected to your laptop in step 1.
Note: Make sure the video mute button is not activated to allow displaying your screen on the wall display.
You can press the "Video Mute" button anytime you desire to access content on the computer you do not wish to display to everyone.
Step 3:
To adjust the volume of the presentation, use the volume panel on the bottom right.
The ceiling and wall speakers can be adjusted individually.
Note: When adjusting the volume of your presentation, please, consider that this space is located in a public area. Always adjust the volume levels with respect to the other users using the space around you.
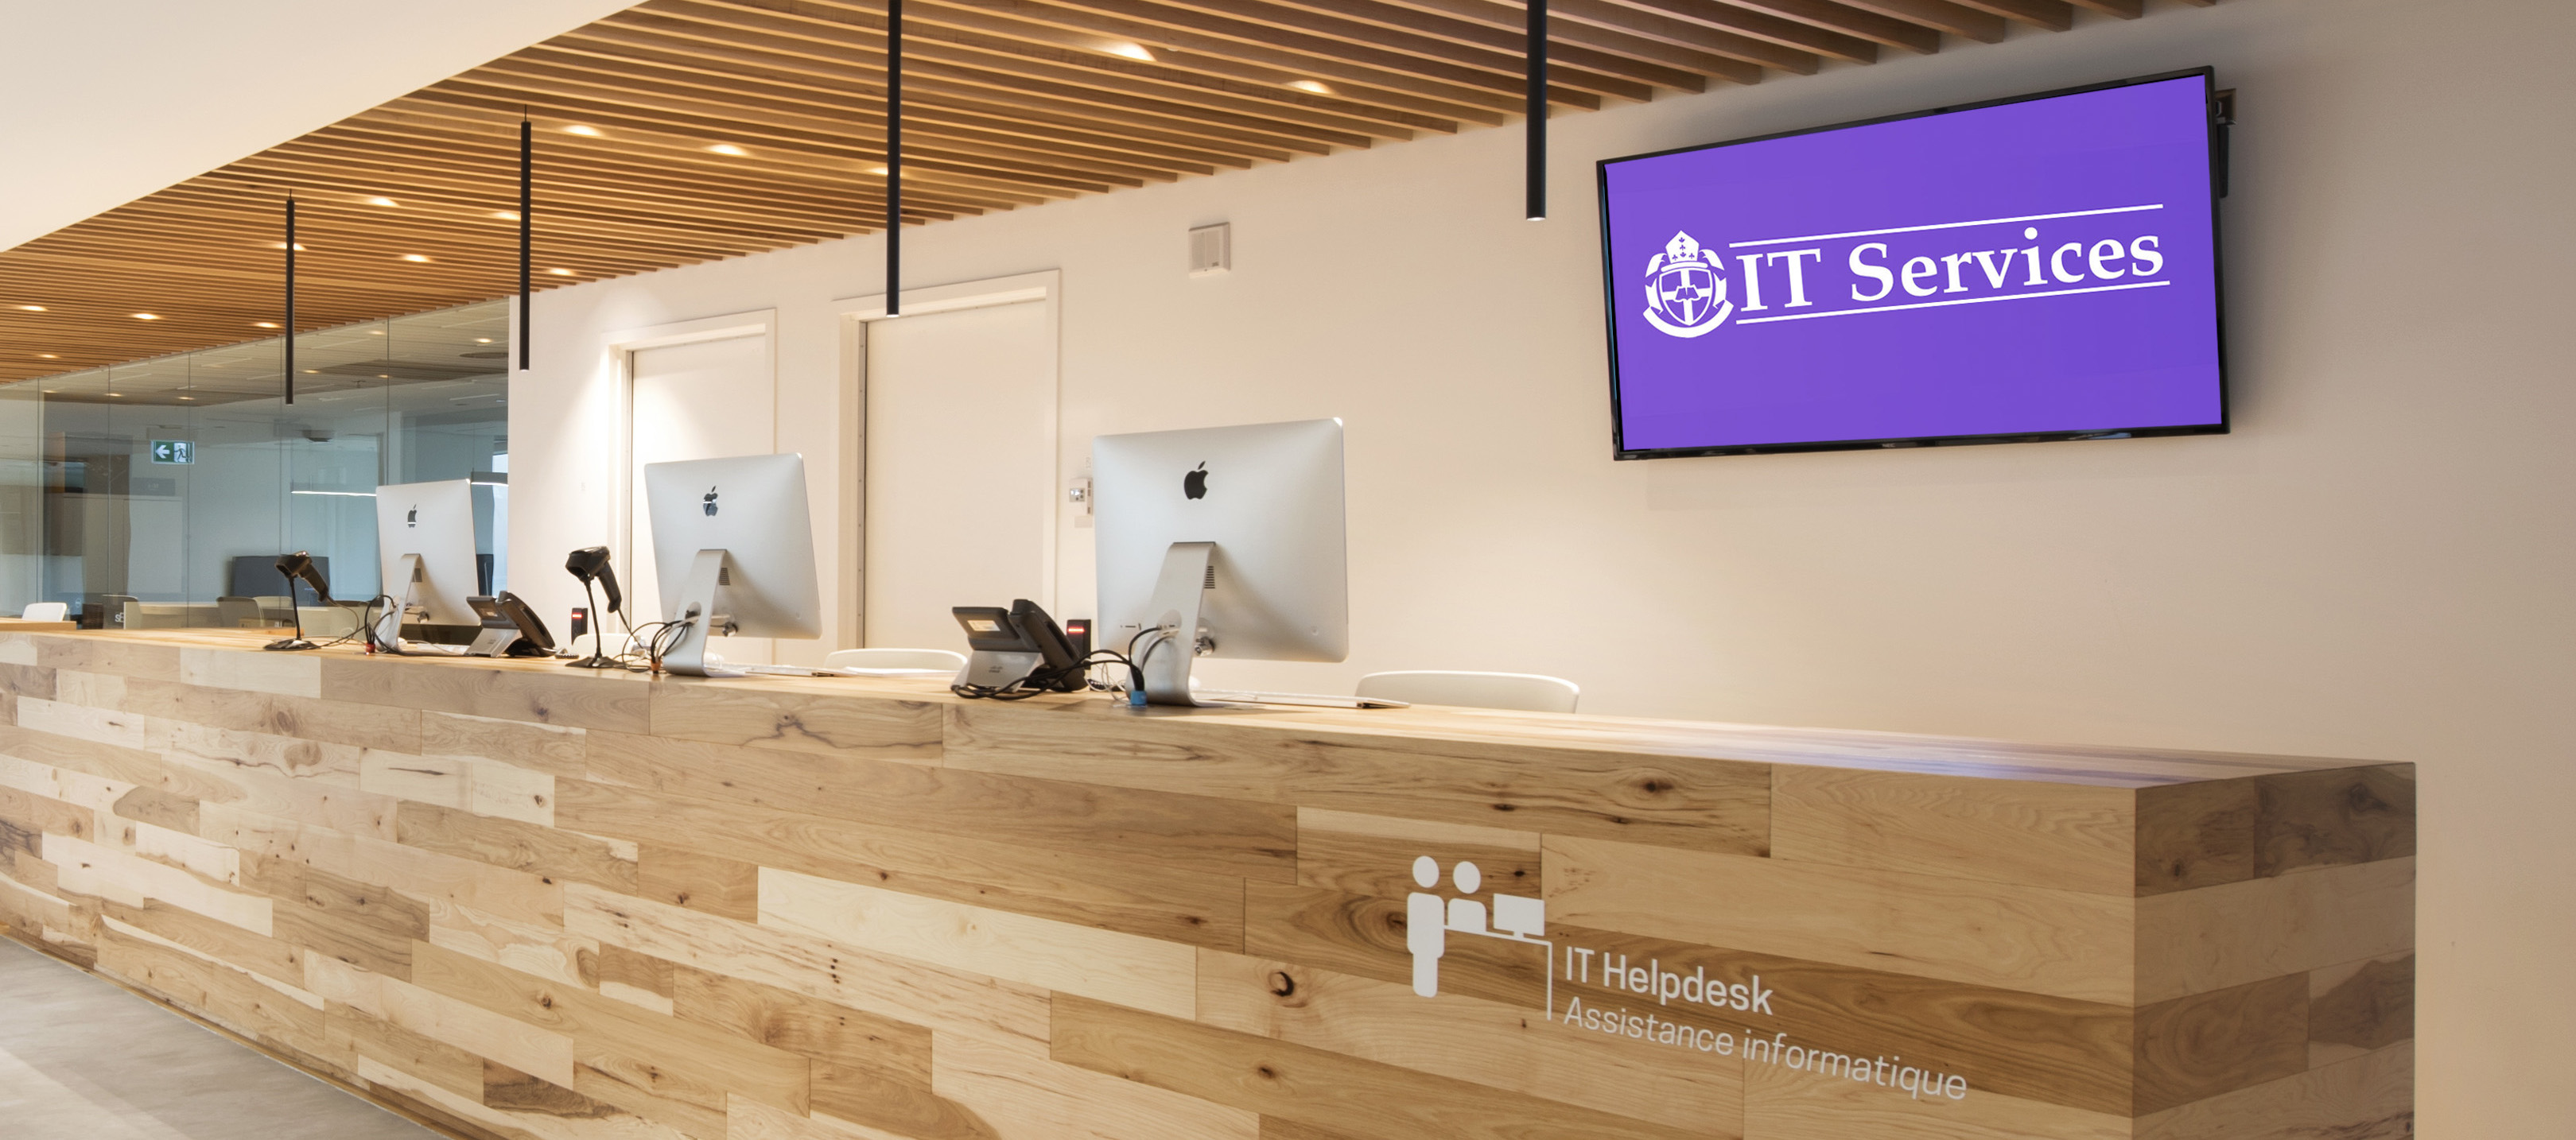
12. The IT Helpdesk
The IT Helpdesk is located on the main floor of the Library Learning Commons. It offers on-site support to the Library Learning Commons' users. If you experience any technical issues or need help seting up any of the multimedia equipment available in the Library Learning Commons, do not hesite to visit or contact the IT Helpdesk.
To learn more about the IT services offered, visit the "IT Services Offered" page.
Contact Us
- Email: helpdesk@ubishops.ca
- Phone: 819-822-9600 ext. 2273
Hours
The IT Helpdesk's business hours follow the Library Learning Commons' hours. Refer to the "Library's hours" page to see when we are open.
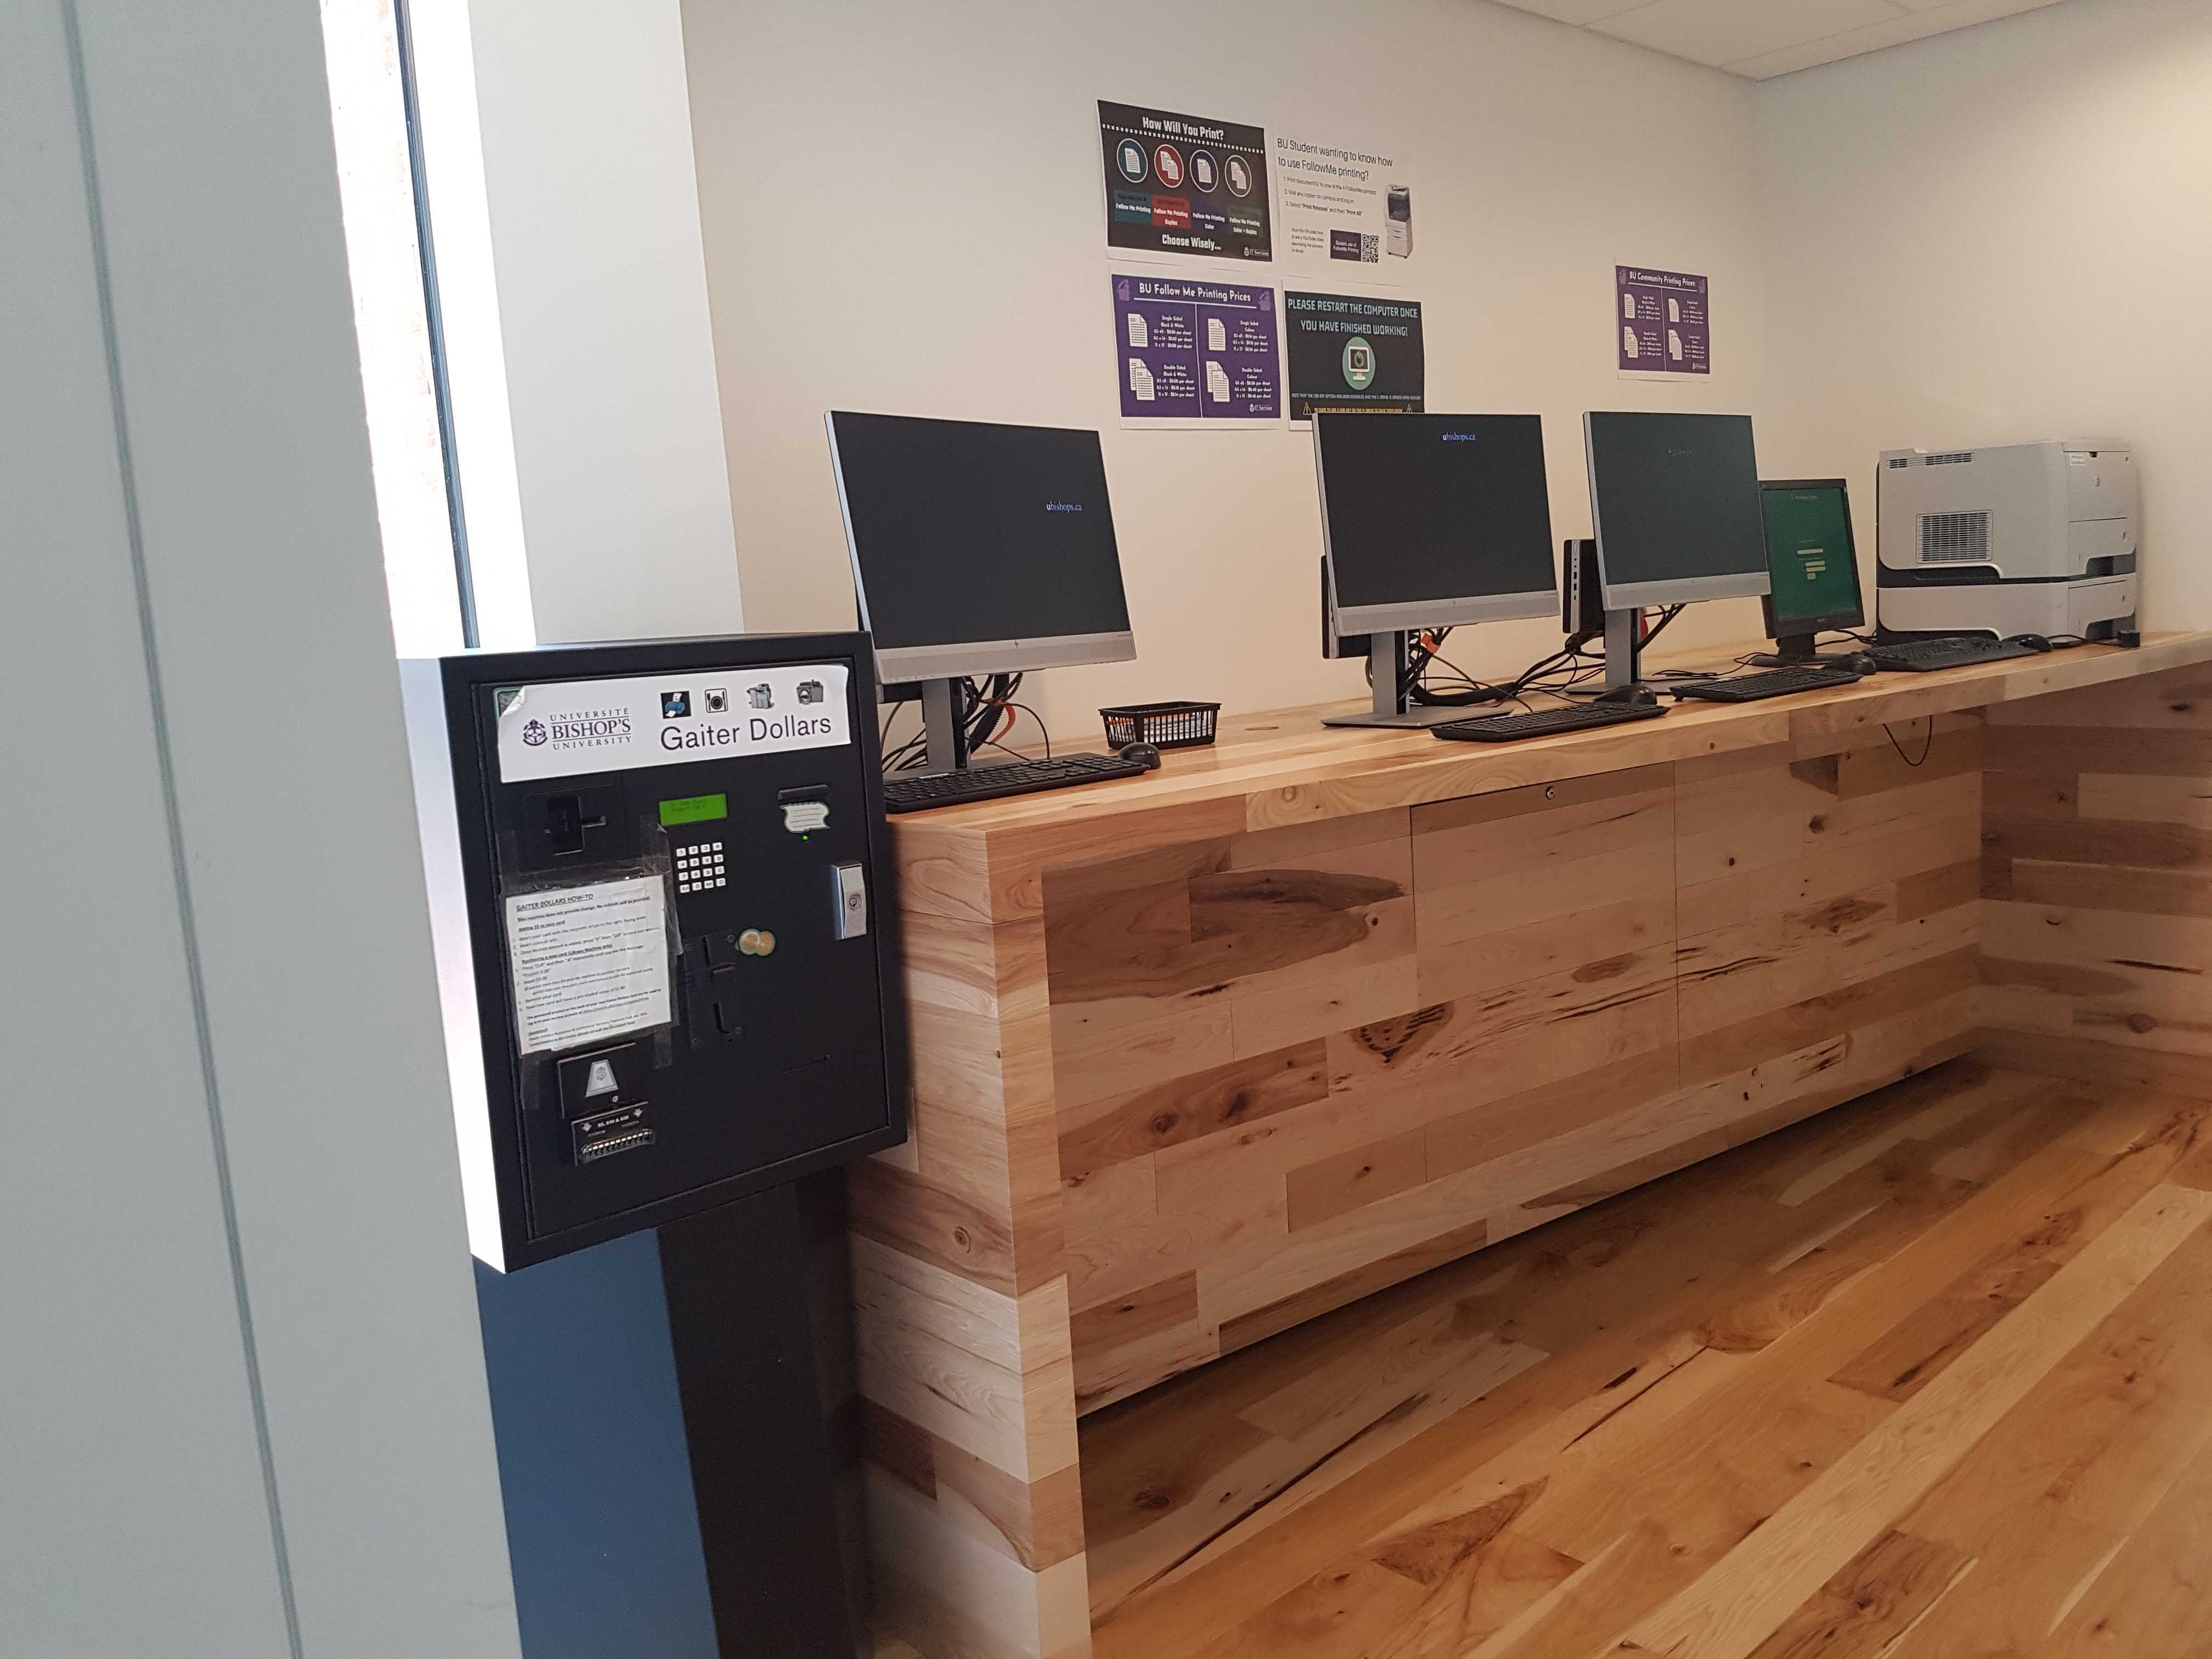
13. Community Stations
The community stations provide access to a selection of computers as well as a printer to the members of the community. There are two community stations with three computers each in the Library Learning Commons. One community station is located on the main floor, in front of the IT Helpdesk, and the other one is located at the bottom of the stairs in the basement. There is only one printer available for both stations, it is located next to the main floor community workstations.
To learn more on how to use the community stations and the printer, refer to the BU Community Printing Tutorial page.
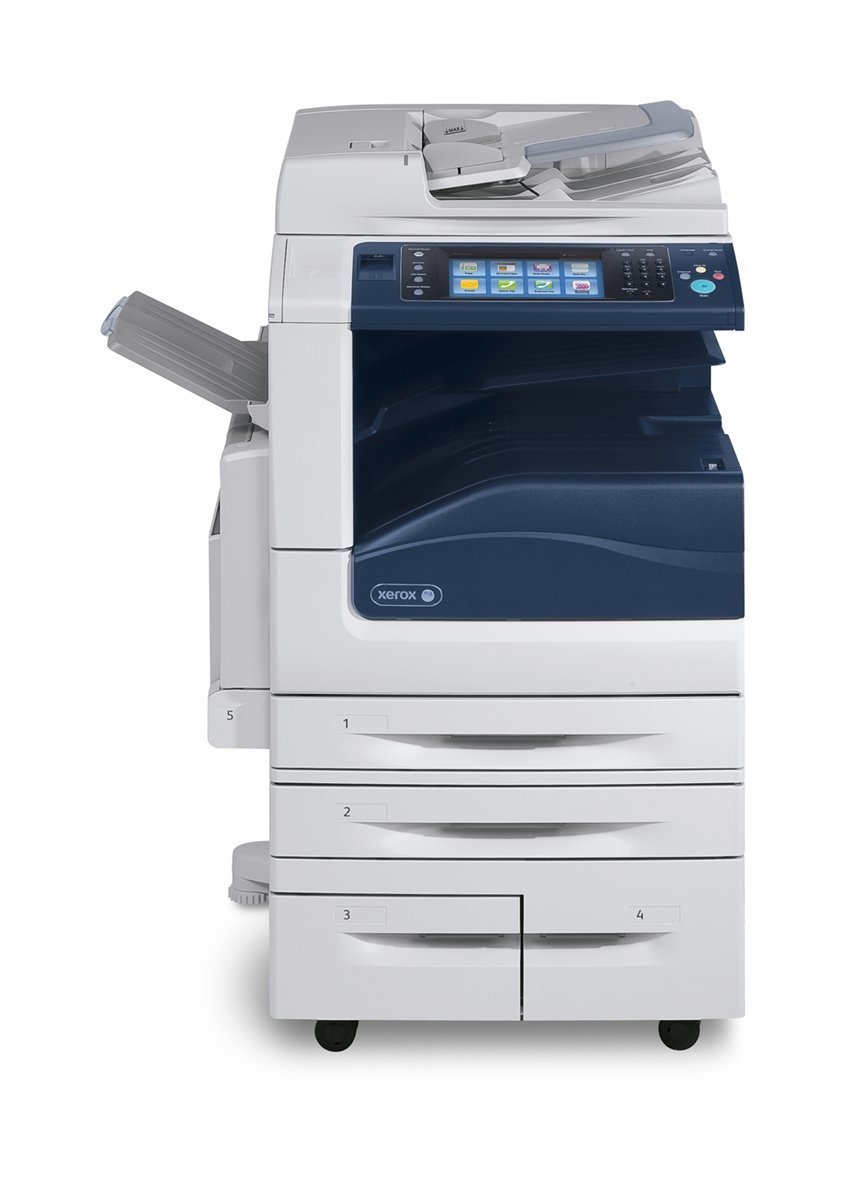
14.1 Xerox photocopiers
The campus has 36 Xerox WorkCentre photocopiers installed which act as printers, copiers and networked scanners.
5 of these are available in the Library Learning Commons to faculty and staff and any copiers that are in public spaces (computer zones, hallways, etc) can also be used by students.
Xerox has produced a series of videos documenting the use and functions of the copiers. Additionally, you can click on the links below to see some ITS documentation on some of the most used functions.
Using the Xerox photocopiers
14.2 How to print in the Library Learning Commons
BU users wishing to print from their personal devices should refer to the "Using Web Print" page.
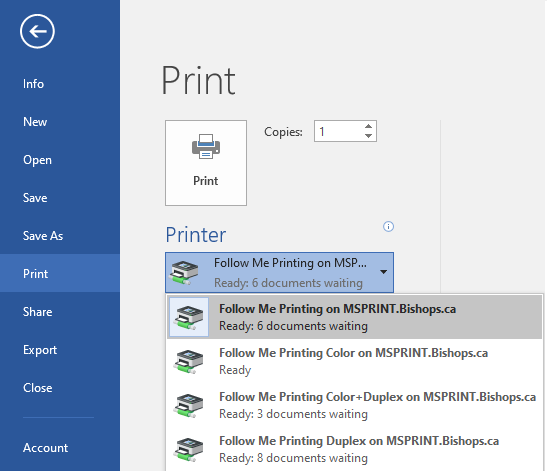
BU users using the computer zones will be able to print by using Follow Me printing.
- To print Single-Sided in Black & White:
Select Follow Me Printing - To print Single-Sided in Color:
Select Follow Me Printing Color - To print Double-Sided in Black & White:
Select Follow Me Printing Duplex - To print Double-Sided in Color:
Select Follow Me Printing Color+Duplex
Printing Prices
Refer to this "BU Follow Me Printing Prices" poster to know how much your job will cost for any of the Follow Me Printing printers.
Please Note: Scanning from any photocopier is free and will not result in any charges.

Step 2:
Once your document has been sent to the printer, you will have 24 hours to retrieve it from any Xerox photocopier on campus:
- Swipe your ID card in the card reader to login on the Xerox photocopier.
- Select the "Access Device".
- Select "Print Release" on the bottom right corner.
- Select "Print All" to print all your documents at once or select the one you want to print individually.
Note: any documents left in the printing queue will be deleted from the servers after 24 hours.
Note: any unprinted documents will be deleted from the servers after 5 days.
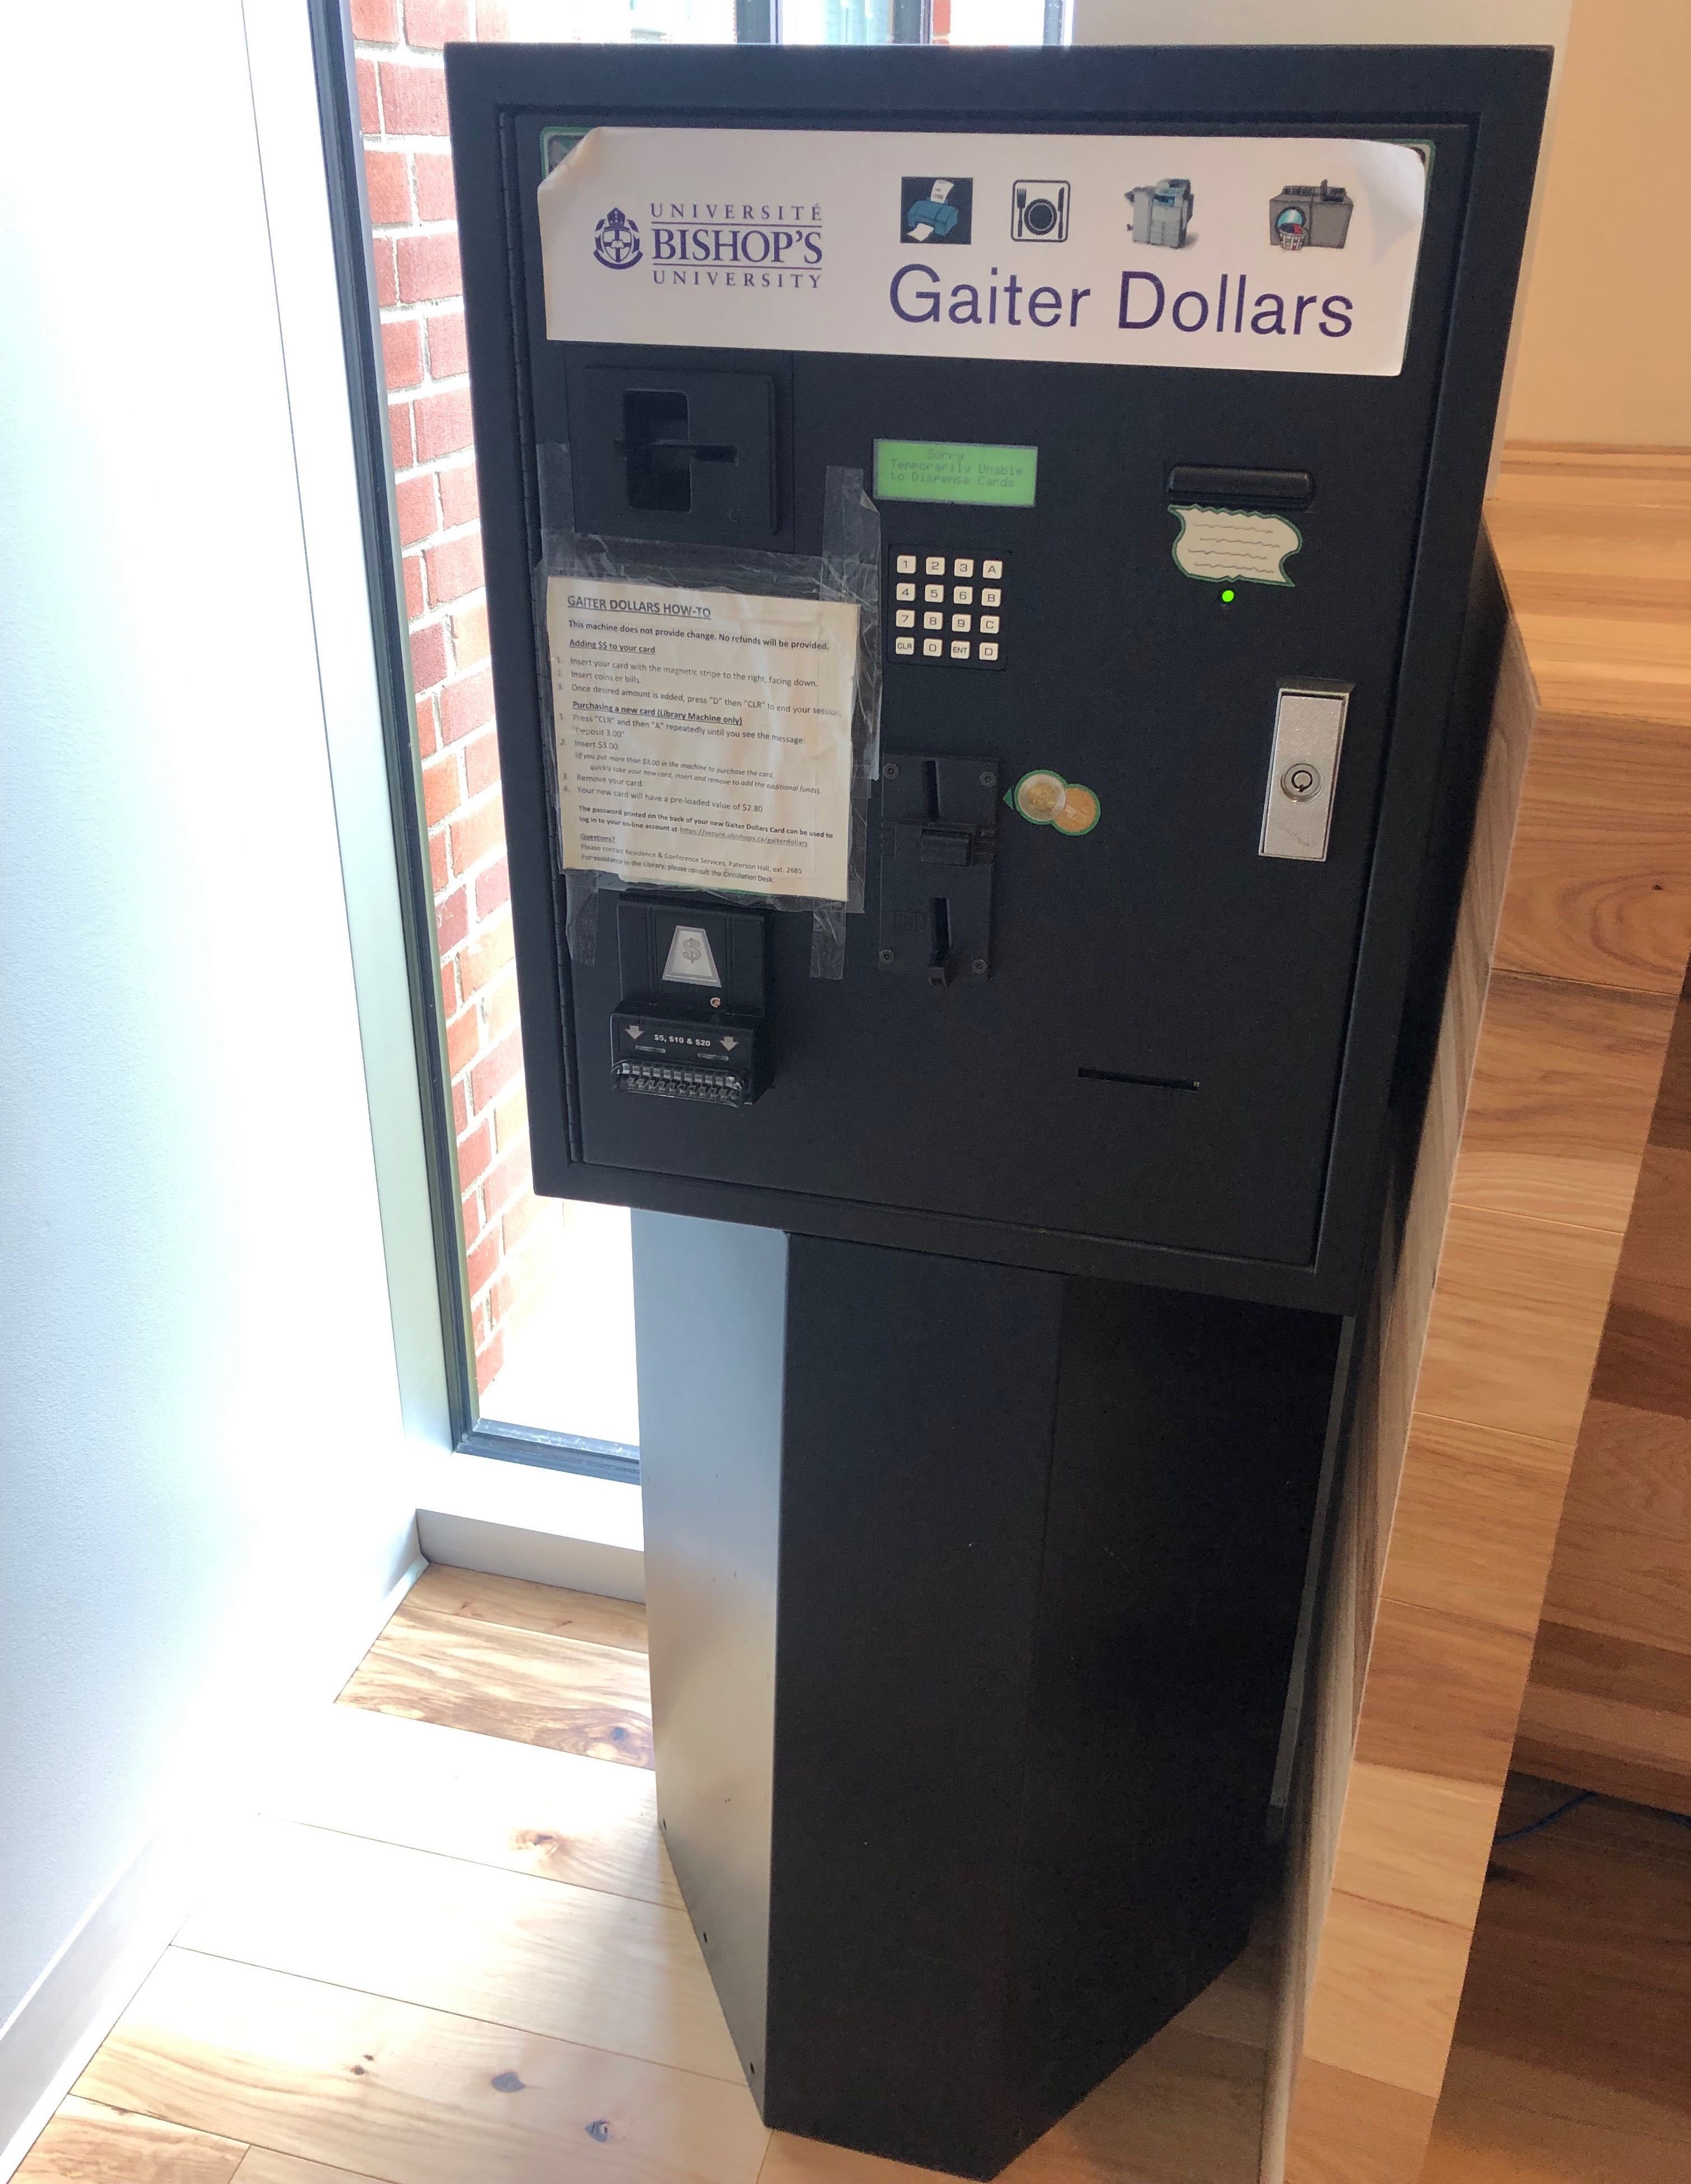
14.3 Gaiter Dollars
Gaiter Dollars are required to use the printing services offered in the Library Learning Commons. Gaiter Dollars can also be used for laundry or food venues at either Dewies, the Bus Stop or Tim Horton’s on campus.
Gaiter Dollars can be added to a Bishop's ID using the Gaiter Dollars machine located in front of the IT Helpdesk on the main floor of the Library Learning Commons or at the Paterson front desk. To learn more on Gaiter Dollars, click the link bellow.
Using Gaiter Dollars